


Back in June, just before I went off for holiday, I attended a CFEngine training in Amsterdam. When I returned from holiday a few weeks later, me and my team started making plans to implement CFEngine in our environment. After two months of hard work, I’m proud to say we manage about 350 out of our 400 Linux servers with CFEngine!
The ride has been fun, although not always easy. In this post I’ll give a quick overview of our CFEngine implementation, where I found useful info, etc.
CFEngine is different
To start, let me tell you that one of the most difficult parts of learning CFEngine is to get used to the terminology and to ‘think’ CFEngine. For example, a ‘class’ in CFEngine is not what you think it is. It has nothing to do with object oriented programming. It’s more like a ‘context’ that you can use to make decisions. There’s no ‘flow control’ in CFEngine either: no IF/THEN/ELSE, no FOR/FOREACH/WHILE etcetera. In CFEngine classes are used for decision making, and, since CFEngine is smart, it does looping automatically. This results in clean and easy-to-read code.
CFEngine works on top of a theoretical model called ‘Promise Theory‘ by Mark Burgess (author of CFEngine). This theory models the behavior of autonomous agents in an environment without central authority, based on only promises of behavior made by each agent, and shows that even without central control , the system can converge to a stable state.
To get used to it, read ‘Learning CFEngine 3‘ by Diego Zamboni, as it will walk you through all of it with a lot of examples. The quote above is also from the book.
The basic idea is that each agent makes promises only about its own behavior, since that is all it can control. In CFEngine 3, everything is a promise.
Examples:
– a file promises to have a certain content and to be executable
– a service promises to be running
– a user account promises to exist (or not to exist) and have certain properties
When CFEngine finds a promise is not kept, it will do everything it knows about to make the promise true. If it cannot reach the promised state at first, it tries to the next best. Over time, the system converges to the desired (promised) state.
Once you get it and get used to it, it actually makes sense and is pretty easy to implement.
With great power comes great responsibility
This one-liner says it all. When you have a configuration management system that manages a lot of servers, you better be careful what promises you have it keep. This is why you need to manage CFEngine promises like software. You need version control and it needs to be flexible as well. I’ve read a lot about this subject and I believe Git is the way to go. This blog by Brian Bennett pretty much nails it. I got a lot of inspiration from it, thanks Brian!
I implemented these ‘branches’ in Git:
– development (aka master)
– beta
– pre-production
– production
This works perfectly: develop new promises in the ‘development’ branch, then merge to ‘beta’ branch to test on some of our own test servers. When everything works together and seems stable, we merge to the next branch ‘pre-production’. This is then tested on ~15 real production servers so it better be good. But when it isn’t, the impact is still not too high and it should be fixed before it ever hits ‘production’. Production branch is everything that is stable and is used on all ~350 servers.
Every time we merge to either ‘pre-production’ or ‘production’, we create a Git ‘tag’ with a date, that allows for easy roll backs. Whenever we need to get back to a certain state, we can always just checkout a tag. This is also very useful for audit trails, by the way.
Actually, we’re using another branch called ‘hotfix’. Whenever there’s an emergency to fix, we branch a ‘hotfix’ from ‘production’ and do the fix. This is for example when a promise misbehaves. This branch is then merged to production when ready, and also to ‘development’. Git handles this nicely: whenever the hotfix makes it all the way from ‘development’ to ‘production’, Git recognizes this commit was already processed earlier and ignores it.
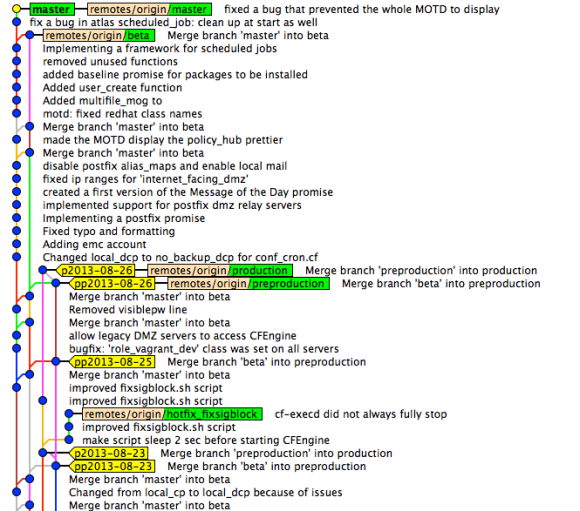
Git commits, branches and tags in CFEngine repo
This is a screenshot from ‘Gitk’ that shows the commits, branches (green) and tags (yellow). As you can see, ‘production’ and ‘pre-production’ are at the same level now, so nothing new is tested in ‘pre-production’ at the moment. Quite some work is tested in the ‘beta’ branch and there are already some fixes committed in ‘master’. Recently there was a ‘hotfix’ branch that has now been merged. It should give an idea of how it works. It provides a clear overview and we now know about every change on the configuration of our servers. Clicking on a commit show what changed, who did it, etc.
CFEngine Policy hubs
For each of the 4 branches we’ve created a CFEngine policy hub. The policy hub is a server running CFEngine software that serves the given branch to the agents (the Linux servers connected to it). Linux servers can even switch between them by ‘bootstrapping’ to one of the 4 policy hubs. Although we only use that on our test servers.
Manage what’s ‘in flight’ with a CFEngine Trello board
Trello provides an intuitive and modern web interface that allows you to manage ‘cards’ on different ‘lists’ on a ‘board’. To get an idea, see the example Trello board below (click on it to enlarge).
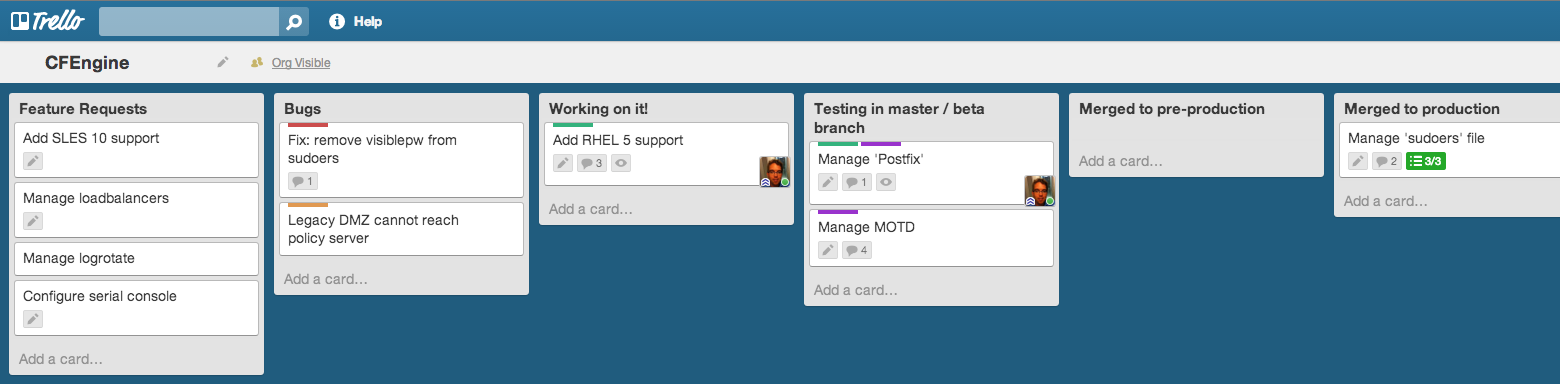
Trello CFEngine board
New cards are usually created in ‘Feature requests’ or ‘Bugs’ and then transferred to ‘Working on it!’. The number of cards in this stage should be limited, as you can only work on a number of things at the same time. This is actually Kanban style. Next, we’ve created a list for each Git ‘branch’ we have and cards flow from ‘beta’ to ‘pre-production’ and finally ‘production’. Moving cards is just dragging & dropping. Each month, cards in ‘production’ are archived. This creates an overview of what new work is to be done (‘Feature requests’ and ‘Bugs’), what we’re currently working on and what’s in each of the branches. Trello has the overview, Git has the code and the details. Also, Trello is perfect for communication between team members. Notes, comments, documents, lists, etcetera can all be created with ease.
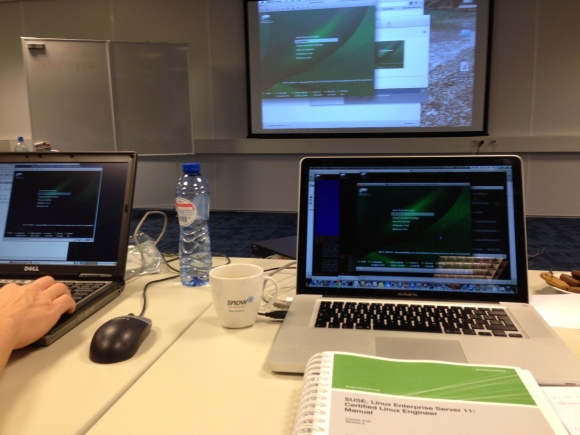
Testing promises
To be able to test the promises on our local laptops, we’re using a tool called Vagrant. Vagrant sets up Virtual Machines (for example using Virtual Box) and allows you to ‘destroy’ and ‘create’ them within minutes. All team members have a local Git checkout, that is also available in the Vagrant boxes. This allows us to test any change before even committing. We have Vagrant boxes setup for all Linux distributions we support. It’s so easy and so fast to test changes that everybody does. And even when an error slips through, other team members will soon notice and it’s usually fixed within minutes, before it ever hits the ‘beta’ branch.
Bugs
We encountered a strange bug when using SLES 11 and CFEngine 3.5: CFEngine (community edition) got running with the ‘SIGPIPE’ signal blocked. When CFEngine restarts SSH, this too gets running with ‘SIGPIPE’ blocked. This results in ‘sudo’ no longer working. It would just return nothing at all. It took us quite some time to figure out it was the ‘SIGPIPE’ signal that was blocked. The root cause probably lies in an old ‘Bash’ version (3.51) that SLES uses, combined with something CFEngine triggers. We’ve now implemented an automated work-around (made a CFEngine promise) that fixes the problem. We did some nice team work on this one!
Conclusion
CFEngine’s learning curve might be steep, but the result is definitely rewarding. Combined with Git and Trello it allows for fine control and great overview of configuration changes. Our whole team is involved in changes, they are reviewed and result in high quality code. This eventually makes the Linux servers we manage more stable. Also, it’s a great feeling to be in-control and know what’s going on our servers.
From this point on, we’ll continue to both scale horizontally (add more servers) and vertically (add more promises). After two months of daily working with CFEngine, I’ve to say I really like it and I enjoy writing promises.
I’ll keep you posted, I promise 😉

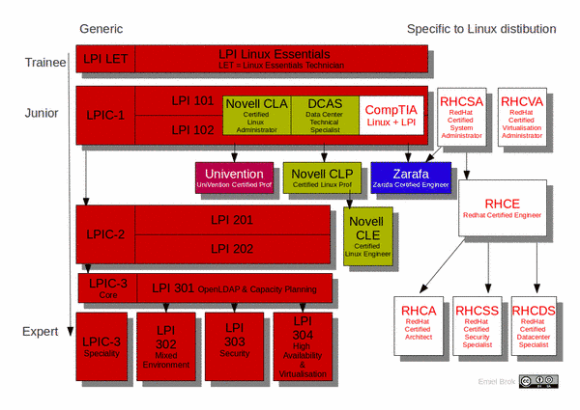
 One has to take the exams in the right order: start at the so called ‘Junior’-level, and work your way down. That’s why I decided to do some self-study and take the LPI-101 and LPI-102 exams to become LPIC-1 certified. I passed the first exam last week (730/800), and the second one today (700/800). As a bonus, I also received the Novell/SUSE Certified Linux Administrator (CLA) certificate. So this is a nice first step.
