Thanks to the FOSDEM video team for this video! It nicely integrates the slides and me talking! It’s just a pity the sound from the camera was used instead of the mic I was wearing. Therefore you hear a lot of noises from the people outside the room, on the hallway (there were >100 people that did not fit in the room anymore!). But anyway, enjoy the recording 🙂
The WordPress.com stats helper monkeys prepared a 2013 annual report:
Here’s an excerpt:
My blog was viewed about 220,000 times in 2013, which is a 733% increase over last year. On the last day of the year we even reached a quarter of a million total views! 🙂
2013 was an interesting year for me: I had a challenging job to do in an enterprise Linux environment. I’m proud to announce I was already able to automate myself out of it. Come see my FOSDEM talk at February 1st and I’ll tell you all about it. The talk will be in the Configuration Management Room.
Thanks to all visitors, especially the ones that left their comments: I appreciate it!
The recent article on Ars Technica, Anatomy of a hack: How crackers ransack passwords like “qeadzcwrsfxv1331” made me realize again how weak password authentication is. True, in this case the MD5 hashes were known, but still it’s only a single factor. Imagine what happens when you reuse a password on multiple sites, and one of them stores it as MD5 (or SHA-1, even plain-text) and gets comprimised.
Brute-force What’s interesting in the above article, is that brute-force attacks only work up to 6 to 7 characters (depending on the hardware available) because of the so-called “exponential wall of brute-force cracking” caused by the exponentially increasing number of guesses each additional character creates. Although project Erebus v 2.5 already demonstrated brute-forcing any 8 character password in just 12 hours with a 8 GPU cluster. This, however, does not mean a 9+ character password is safe. In fact, passwords of 16 characters are easily cracked when using the right techniques.
Patterns One of the techniques used to crack the passwords, is to use common patterns. These patterns were learned from past security breaches. Especially the famous RockYou breach, in which they lost millions of passwords in plain-text. This revealed many passwords people use in real life and gave an interesting view on how people choose passwords. Not only are these passwords added to the word lists used to crack passwords today (500 hundred million words is no exception), patterns were developed as well to help efficient cracking of more complex longer passwords.
A simple example of such a pattern is: Winter09 (word starting with a capital, two digits added to the end, all lowercase in the middle). Don’t think ‘W1nt3r09’ is safer, as this is also a pattern: i is replaced by 1, e with 3, etc. Huge collections of patterns can be found online.
You can now imagine why you should use random password instead. Random strings are the best, because they can only be brute-forced. When you take a 12 character random password, such as 45zCpJEq8bAf, you’ll be safe. The longer, the better, but W6Bf7TwFfRhM3xQ9FYckCYs3VpY38yJR is much harder to remember, of course. Fortunately, tools exist to help you.
Password managers Use a secure password manager to help you remember strong passwords. I say secure, because the password managers in browsers are not secure (at all). Services like 1Password and LastPass provide an encrypted vault in which you can store your passwords, protected by a secure, random master-password. They integrate in your browser, and automatically fill-in your site-specific, strong, password. This password can now be much longer, since you don’t have to remember it. All you have to remember is the master-password.
Everything is encrypted locally, before sending to their servers, making it useless data without your master-password. It’s automatically sync’ed across your devices (laptop, desktop, mobile, tablet, etc). Check it out, it’s great.
Google Authenticator
Multi-facor authentication Now that you have safe passwords, and a way to manage them, I’d like to suggest another technique called ‘multi-factor authentication‘. Multi-factor authentication (also Two-factor authentication, TFA, T-FA or 2FA) is an approach to authentication which requires the presentation of two or more of the three authentication factors: a knowledge factor (“something the user knows”), a possession factor (“something the user has”), and an inherence factor (“something the user is”).
Both 1Password and LastPass support two-factor authentication. This can eiher be hardware device (RSA, Yubikey, etc) or software (like Google Authenticator). Sometimes verification codes are send as SMS-messages. When two-factor authentication is enabled, you need to have a master-password and a verification key to access your vault. That’s great security for your passwords!
Final thing you should do, is protect your e-mail address with two-factor authentication, as well. Some e-mail providers offer this service. Google’s Gmail even offers it for free. Why this is important? Because most sites send a ‘password lost’ e-mail to verify a password change. So your passwords are only as secure as your e-mail password. With an added security layer, this becomes much harder to crack. You now probably also understand why you shouldn’t reuse your e-mail password on other sites..
I hope this blog brings in some inspiration to upgrade your online security!
When I’m not at home I use my iPhone or iPad and connect to the internet using either 3G or public wifi. I want to configure my mobile device to setup an encrypted VPN tunnel and route all traffic through it, so I have a safe browsing experience. Fortunately, there now is an OpenVPN app available on iOS that allows you to do that! Please install this app using the App Store, and continue reading to set it all up.
Preparing and importing the certificate I’d suggest creating a separate certificate for each device you want to connect to your OpenVPN server. Although, it is possible to reuse the certificates on multiple devices, I’d recommend not to do so. First of all you will not be able to connect at the same time. Security-wise it is also smart to use one certificate for each device: whenever you lose your device, you can easily revoke the certificate and still connect from your other devices.
cd /etc/openvpn/easy-rsa/2.0/
. ./vars
./build-key remiiphone
You will now have a private key and certificate generated for your mobile device (check the ./keys directory). To be able to work with it on a mobiel device, we convert it to pkcs12 format using this command:
The password it asks is to protect the file. Remember the password, we will need it when installing on the mobile device. The file ‘remiiphone.p12’ should be created.
Next step is to bring this file to our mobile device. I did first scp it from the Pi to my iMac, then send myself an e-mail with the .p12 file attached. Since the file is password protected, it is safe to e-mail.
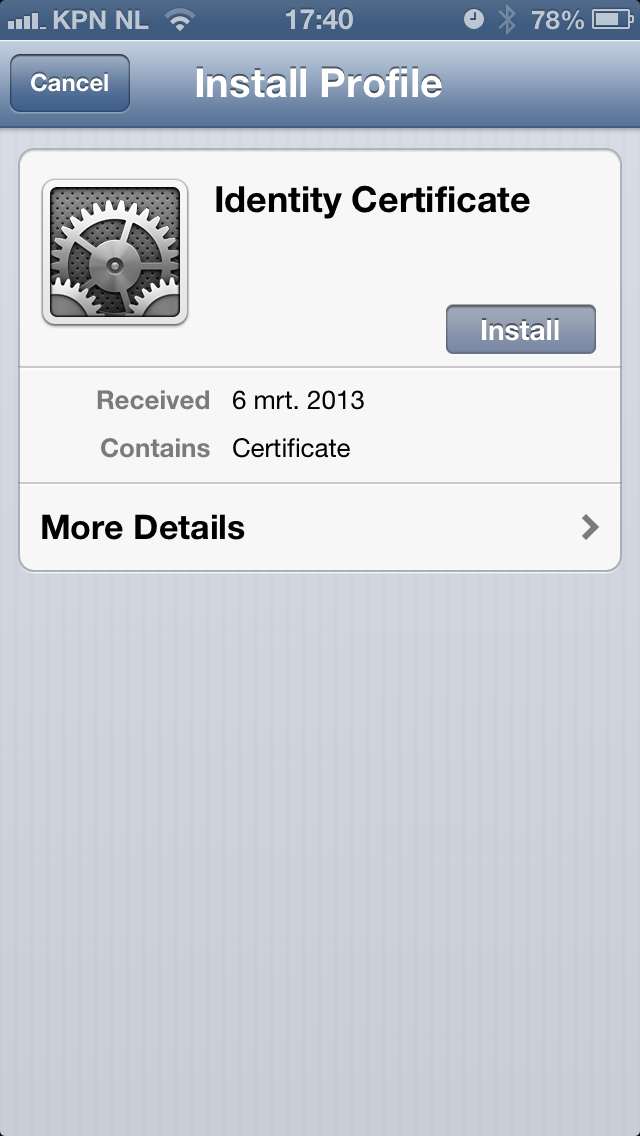
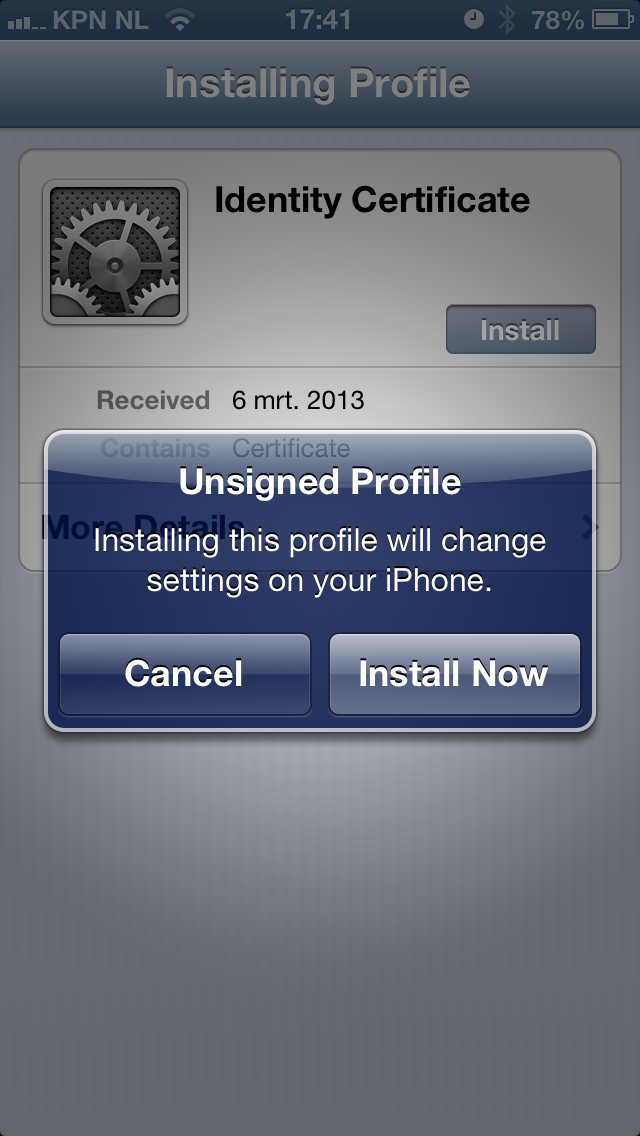
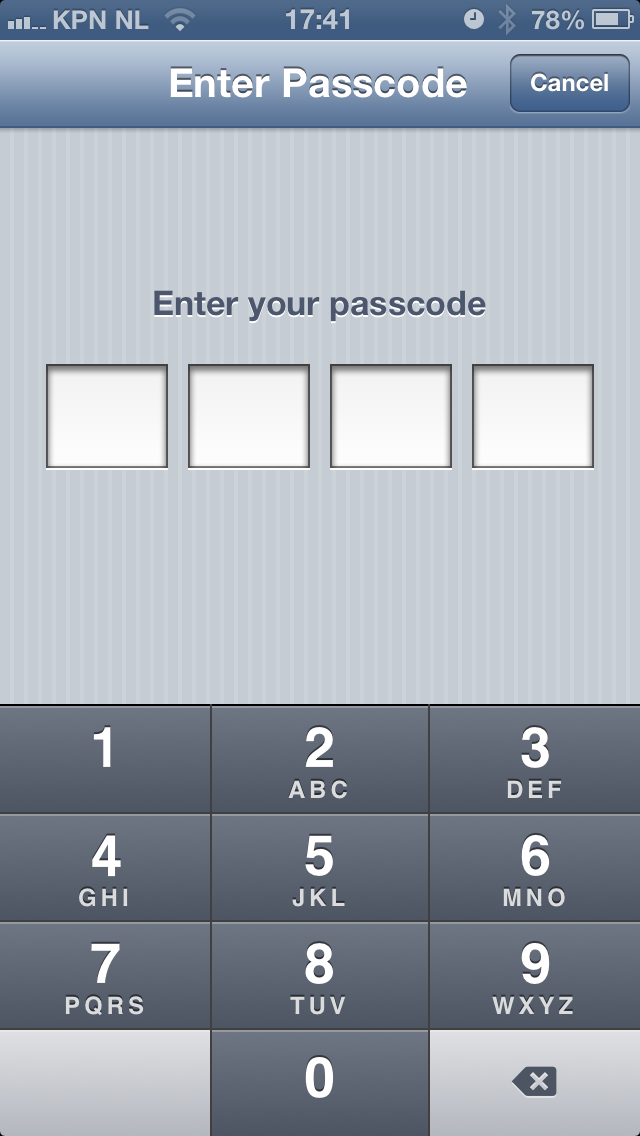
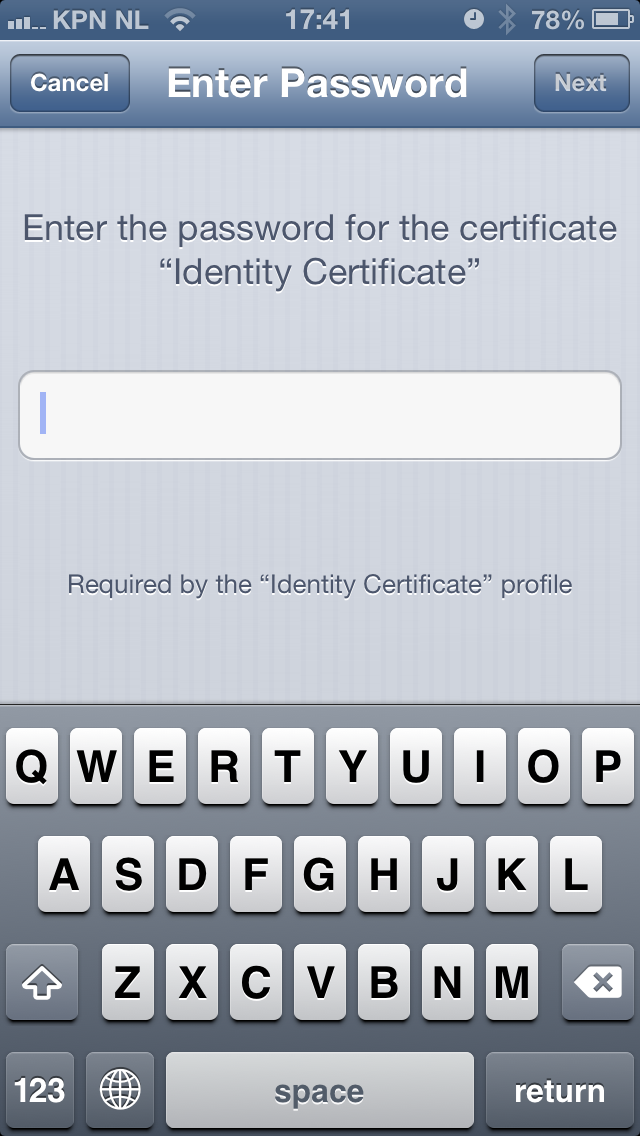
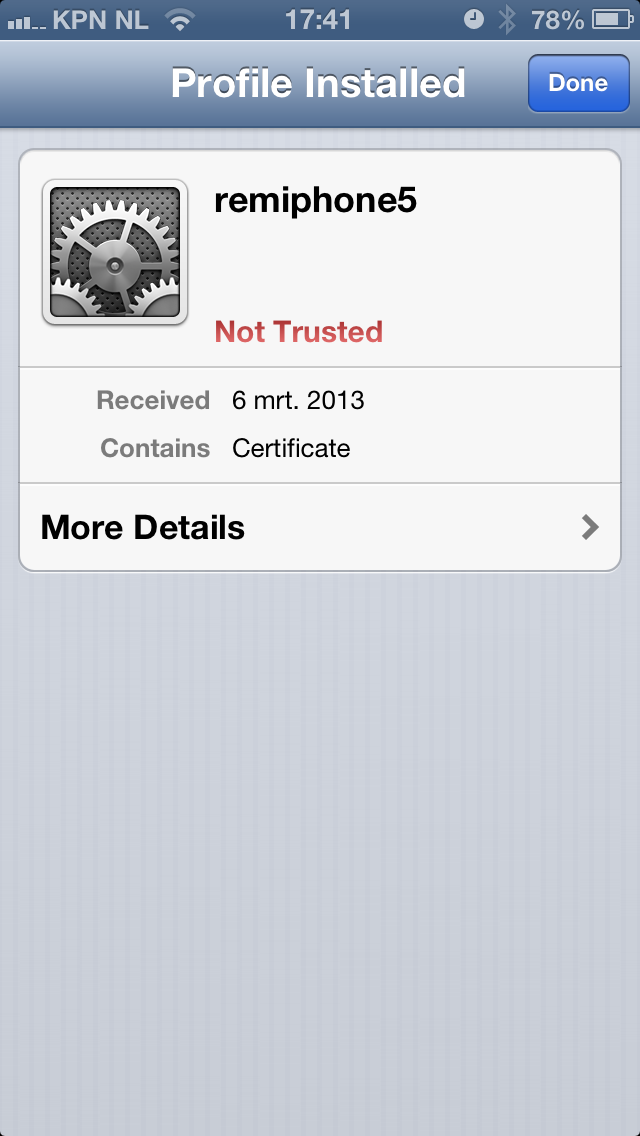
When you open the e-mail on your mobile device, and click the .p12 attachment you will be asked to install the certificate. Click install and confirm installation. If your device has a passcode, you will be asked to enter it. Afterwards, you need to type the password you choose when generating the p12 file. Finally, because I use a self-signed certificate, from an untrusted CA, iOS mentions the certificate is ‘Not Trusted’. Don’t worry, it’s fine.
The screenshots below show you how it looks like:
Installing the p12 certificateUnsigned profile warningEnter device codeEnter passwordInstalled certificate
Your certificate is now installed on iOS and it is ready to be used by the OpenVPN app.
Preparing and importing the OpenVPN configuration file Next step is to provide the OpenVPN app with a configuration file. When you use the .ovpn extension, you can easily import it later on. But let’s start with setting up the configuration file.
client
dev tun
proto udp
remote pi.example.org 1194
comp-lzo
redirect-gateway
<ca>
-----BEGIN CERTIFICATE-----
...
q0c4PYC3BB7pIOA2fH7Clkb8TduDcz0kzPqStD3mVjLXx1+KVxVeGMgbj0QLbPoG
...
-----END CERTIFICATE-----
</ca>
# other options (mostly defaults)
nobind
persist-key
persist-tun
user nobody
group nogroup
resolv-retry infinite
Let me explain: This tells the OpenVPN app we’ll be using client mode and use the ‘tun’ device (the only supported in iOS). The server is using udp (choose udp or tcp) and can be found on pi.example.org using port 1194. Please adjust accordingly. Line 5 tells it to use compression, and line 6 sends all traffic through the tunnel. This is exactly what we want: this allows secure browsing.
The thing that took me some time to figure out is that you need to specify the CA certificate in the OpenVPN app. Even though it was included in the .p12 file we imported, iOS would strip it and therefore not import it. That’s why you should include it in your .ovpn file. Replace lines 8-12 with your CA certificate. It needs more lines, for sure. Just paste everything between the CA tags in the file and you’ll be fine. If you’ll get this error message, your CA is probably not right:
CORE_ERROR PolarSSL: error parsing ca certificate : X509 - The certificate format is invalid, e.g. different type expected [ERR]
Finally, I have some more settings in the file that are mostly defaults. Note: it is also possible to add your private key and certificate directly to the .ovpn file, in the same way as the CA is done above. I’d recommend not to do that because your .ovpn file is then all somebody needs to be able to connect. Since there is no password protection, e-mailing the file is insecure and dangerous!
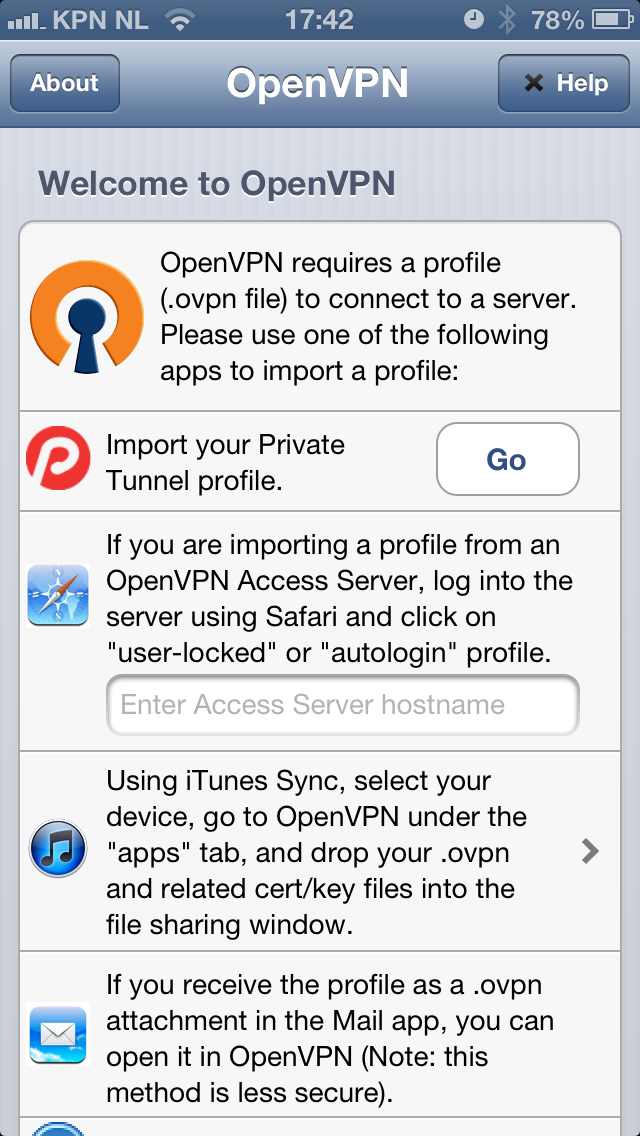
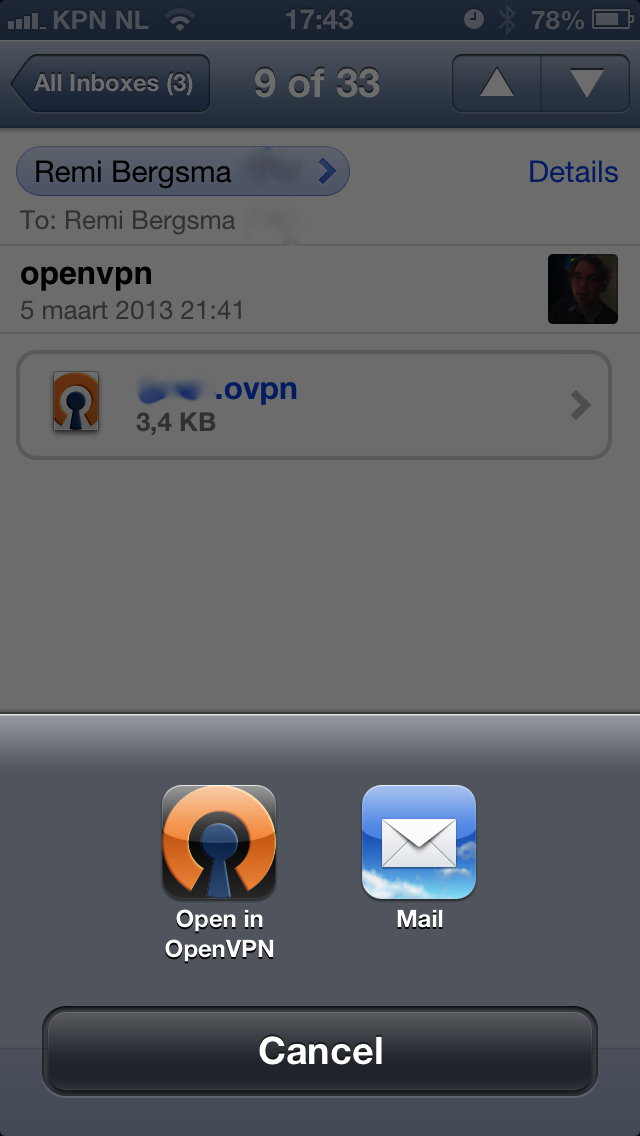
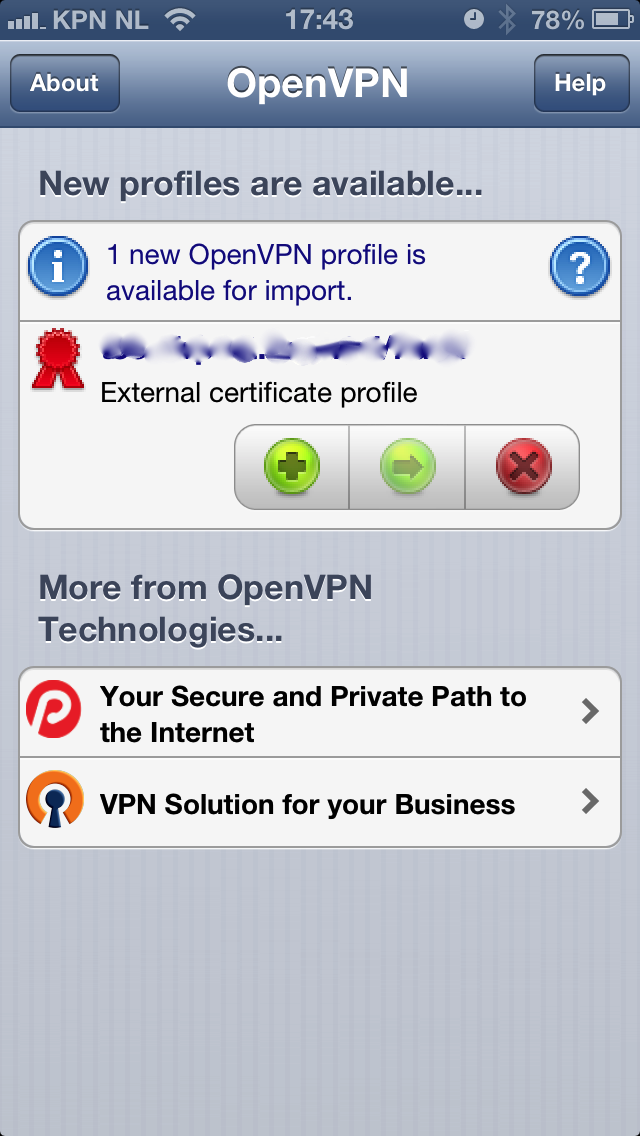
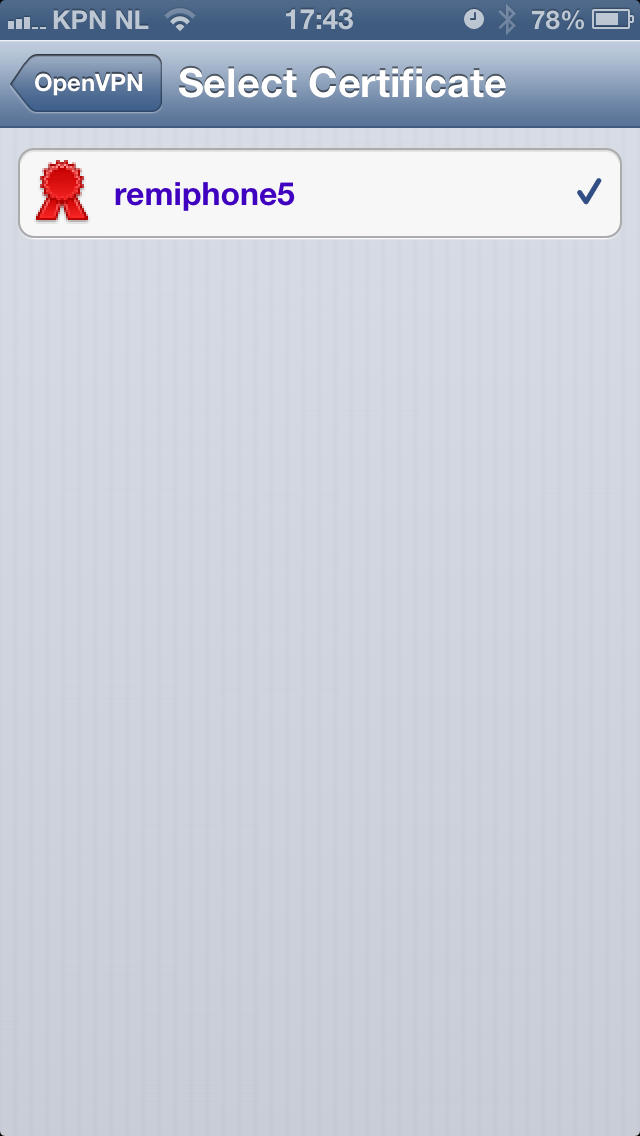
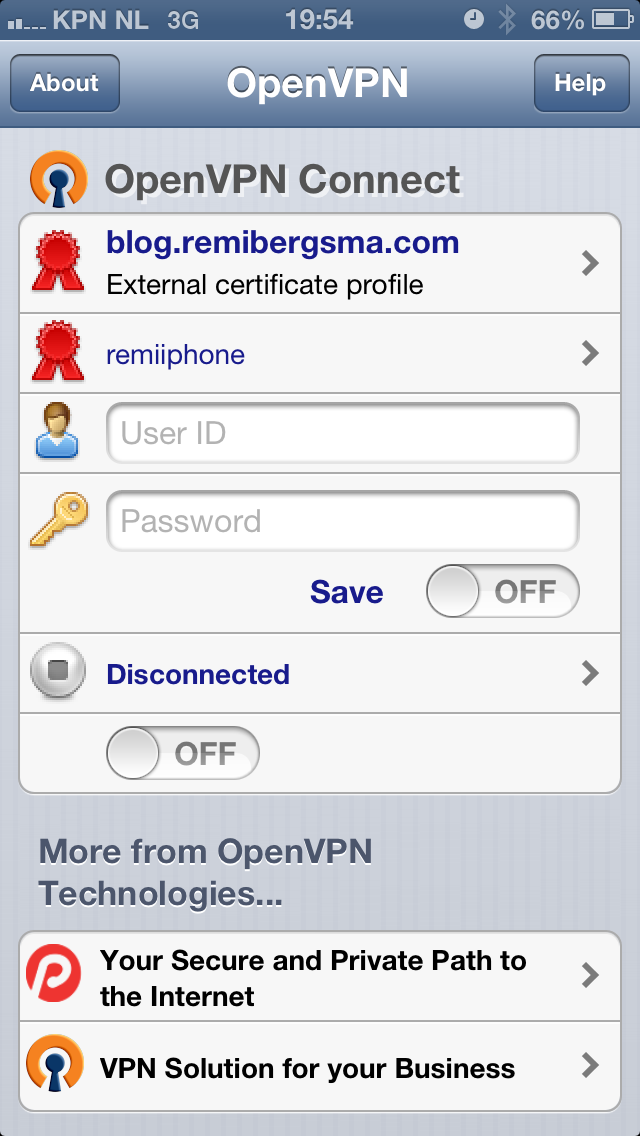
Save the file, call it pi.ovpn or so, and e-mail this file to yourself as well. The e-mail app on iOS will allow you to import this configuration to the OpenVPN app by clicking on the file. The OpenVPN app will show your imported configuration. Confirm by tapping the green + icon. Next step, select the certificate to use with this profile. Here you will select the certificate we imported into iOS in the previous step. As a result, we can omit the username and password fields, as we use our certificate instead.
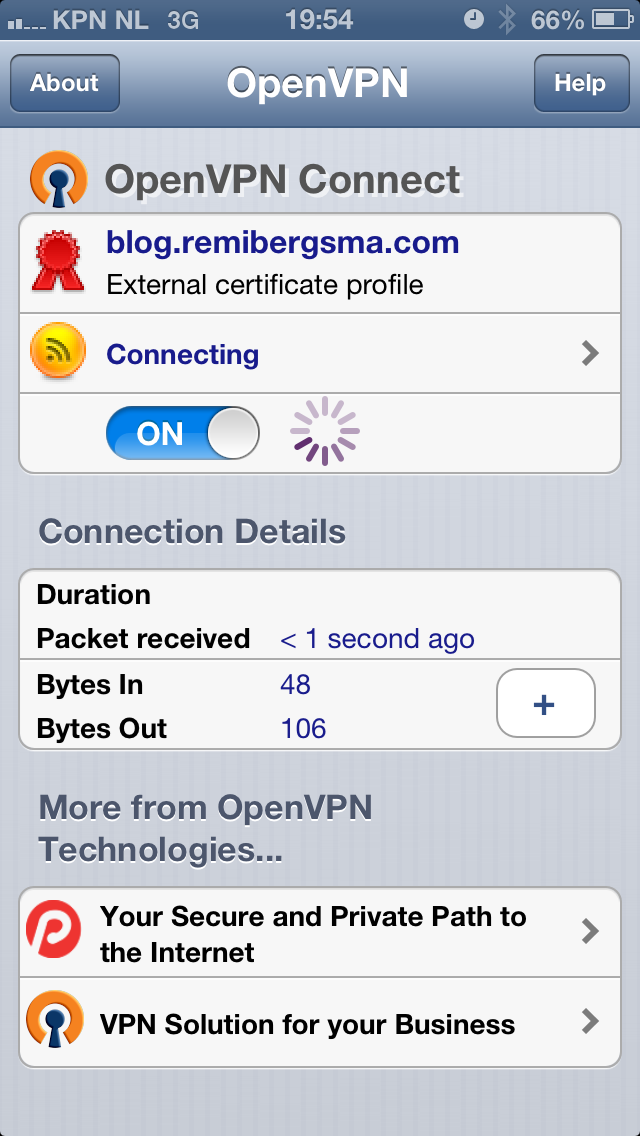
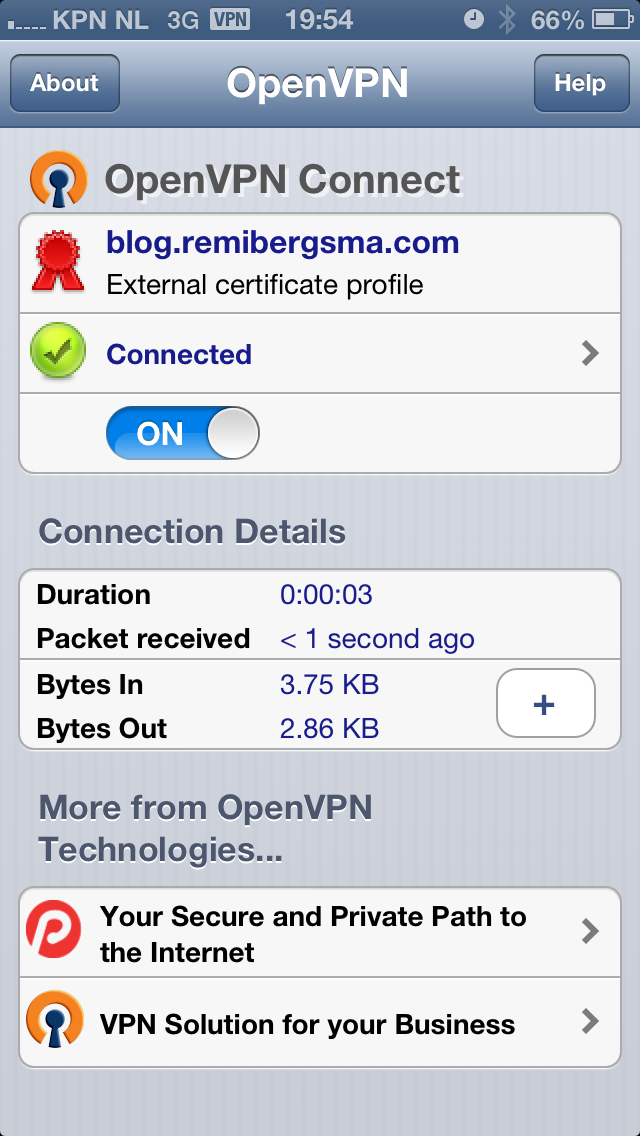
Connecting.. Your OpenVPN client configuration is now imported and ready for use. Let’s test it! All you have to do to connect, is to tap on the OFF button just below the status ‘Disconnected’. You should now be connected to your OpenVPN server. Note the VPN icon on top of the screen while you’re connected.
The best way to verify everything is working properly, is to open your mobile Safari and visit a website that displays your ip address (such as ifconfig.me). It should show your OpenVPN server’s public ip address, instead of your mobile or wifi ip address. Try disconnecting and compare the ip addresses. Cool hah?!
A few weeks ago I attended a full week of SUSE training, which I really enjoyed. There were lots of highly skilled geeks and the course had a nice solid pace. By the end of the week I did the CLE practicum exam (to become a Certified Linux Engineer). Today I heard I passed! 🙂
I’ve been working with SUSE Linux Enterprise Server since I started my new job back in December and the training really helped me.
Impression of the CLE training
Before I’m officially certified, there’s another step to take though. One needs to pass three exams: CLA, CLP and CLE. I’ve passed both CLA and CLE now, so I only need to pass the one in between. This happened because the course I attended was aimed towards RHCE certified professionals, which I am not (yet). So, either passing the CLP or RHCE practicum will bring in the CLE certification as well. Looking forward to continue the certification process!
The Raspberry Pi can easily be setup as an OpenVPN server. One common feature is to access servers or services on the remote network. Another use case is to provide a secure connection when you’re not at home.
You can do this by sending all traffic over the VPN connection, instead of only traffic for the remote servers. The idea is to connect your laptop to your OpenVPN server (this is encrypted by default) and access the internet from there. Whatever you send over the wifi connection, is encrypted by the VPN and thus safe. In the comments on the previous post there was someone trying to set this up. To help him solve the issue, I tested this myself, and decided to write a post showing how to do it because I really like the idea.
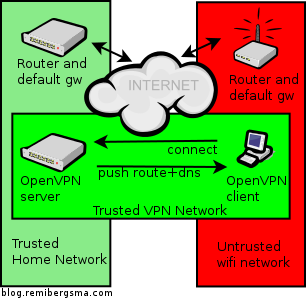
This is how it looks like: you’re on a untrusted network (red) and create a safe VPN connection (green) and all traffic will flow over the green network, to the also trusted home network (lighter green). People on the red network now cannot see the sites you visit.
Here’s how to set it up:
Allow the OpenVPN server to route ip traffic
Tell the default gw where to send traffic for OpenVPN clients
Send DNS servers to the VPN Clients
Configure the OpenVPN Client
Test your setup
Allow the OpenVPN server to route ip traffic First of all, you need to allow the OpenVPN server to route packets.
sudo vim /etc/sysctl.conf
Add this line, or alter it if it already exists:
net.ipv4.ip_forward = 1
Then activate the change:
sudo sysctl -p
The change is now activated, and persistent.
Tell the default gw where to send traffic for OpenVPN clients Another important step is to tell the default gateway in the home network (lighter green) where to send traffic for theOpenVPN clients. If you omit this step, this traffic gets lost. More info in this post. Short story: add this static route to your default gateway. If it’s Linux, you’d run:
sudo route add -net 10.8.0.0/24 gw 10.5.5.5
Assuming 10.5.5.5 is the ip address of the OpenVPN server. When your router is not Linux, check the manual on howto add a static route.
Send DNS servers to the VPN clients Most ISP’s restrict the usage of their DNS servers to their own network. When you connect to Wifi, you probably receive some DNS servers via DHCP. When you connect to VPN and then send all traffic through the VPN, you are effectively using the network (and internet connection) of your VPN server and not the local network. The DNS-servers you received via DHCP might not work because you access them from another network. To solve this, configure the OpenVPN server to push public DNS servers to use. Alternatively you can also push some local DNS servers or the DNS servers of your ISP.
sudo vim /etc/openvpn/server.conf
Add or edit these lines:
push "dhcp-option DNS 8.8.8.8"
push "dhcp-option DNS 8.8.4.4"
These are Google’s public DNS servers. Just enter some DNS servers that work on the network of your OpenVPN server and that you are allowed to use.
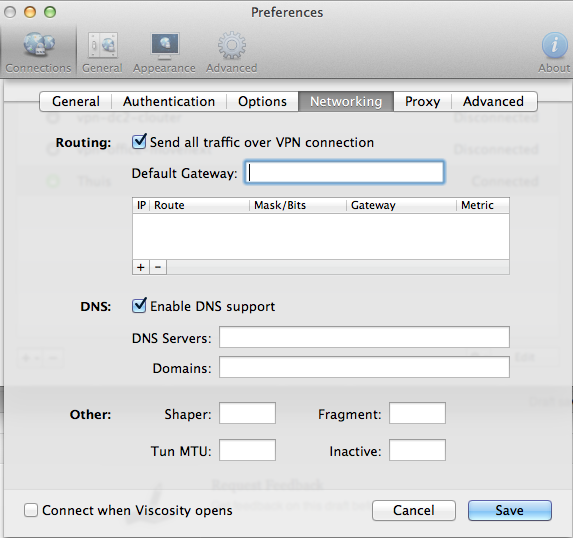
Configure the OpenVPN client I’m using Viscosity and all I have to do is enable a setting to send all traffic over the VPN connection.
Alternative way: It’s also possible to configure the ‘Send all traffic over VPN connection’ on the server-side instead of the client. Both has pros and cons, of course. To set it server-side set this option in the server config:
push "redirect-gateway def1"
Test your setup The final step: test your setup! Make sure you’re connected through some other network than the one the OpenVPN server is in. Use some public Wifi service of connect over 3G. My iPhone can share its 3G connection and start a Wifi hotspot. My MacBook connects via Wifi, then does the OpenVPN connection to the Pi. The expected behavior is then to see the public ip address of the OpenVPN server’s internet connection, instead of the 3G ip address. Use a website like whatismyip.com to test this. Do this before connecting the VPN, and after. It should be different.
Someone asked me if it were possible to download a web site and make it available offline. To some extend, this can be done. Interactive forms will not work (searching, ordering, etc), but you can use ‘wget‘ to transform a website into a static version.
Let me explain: The ‘–recursive’ option downloads the entire web site and ‘–domains’ tells wget not to follow links outside example.org. Otherwise you will download far too many pages. ‘–page-requisites’ makes sure we’ll get all the elements that compose the page (images, CSS, etc), ‘–html-extension’ saves files with the .html extension so they will work on a stand-alone pc, ‘–convert-links’ converts links so they’ll work off-line and ‘–no-clobber’ prevents any existing files to be overwritten
Using a ‘–limit-rate’ you can prevent wget from using all available bandwidth. Wile downloading will take longer, it is now possible to browse the web while wget is downloading.
Give it a try, it works pretty nice and is great if you’re about to make big changes to your site and you want to save a copy of the old version.
The Raspberry Pi is a $35 credit-card sized computer, with an ARM-based CPU. It uses very little power (only 3 Watt), so it’s ideal for a server that’s always-on. I was thinking what’d be a nice task for my Raspberry Pi and came up with an OpenVPN server. This enables me to connect to my home from anywhere, for example to access some files or to access the internet from there.
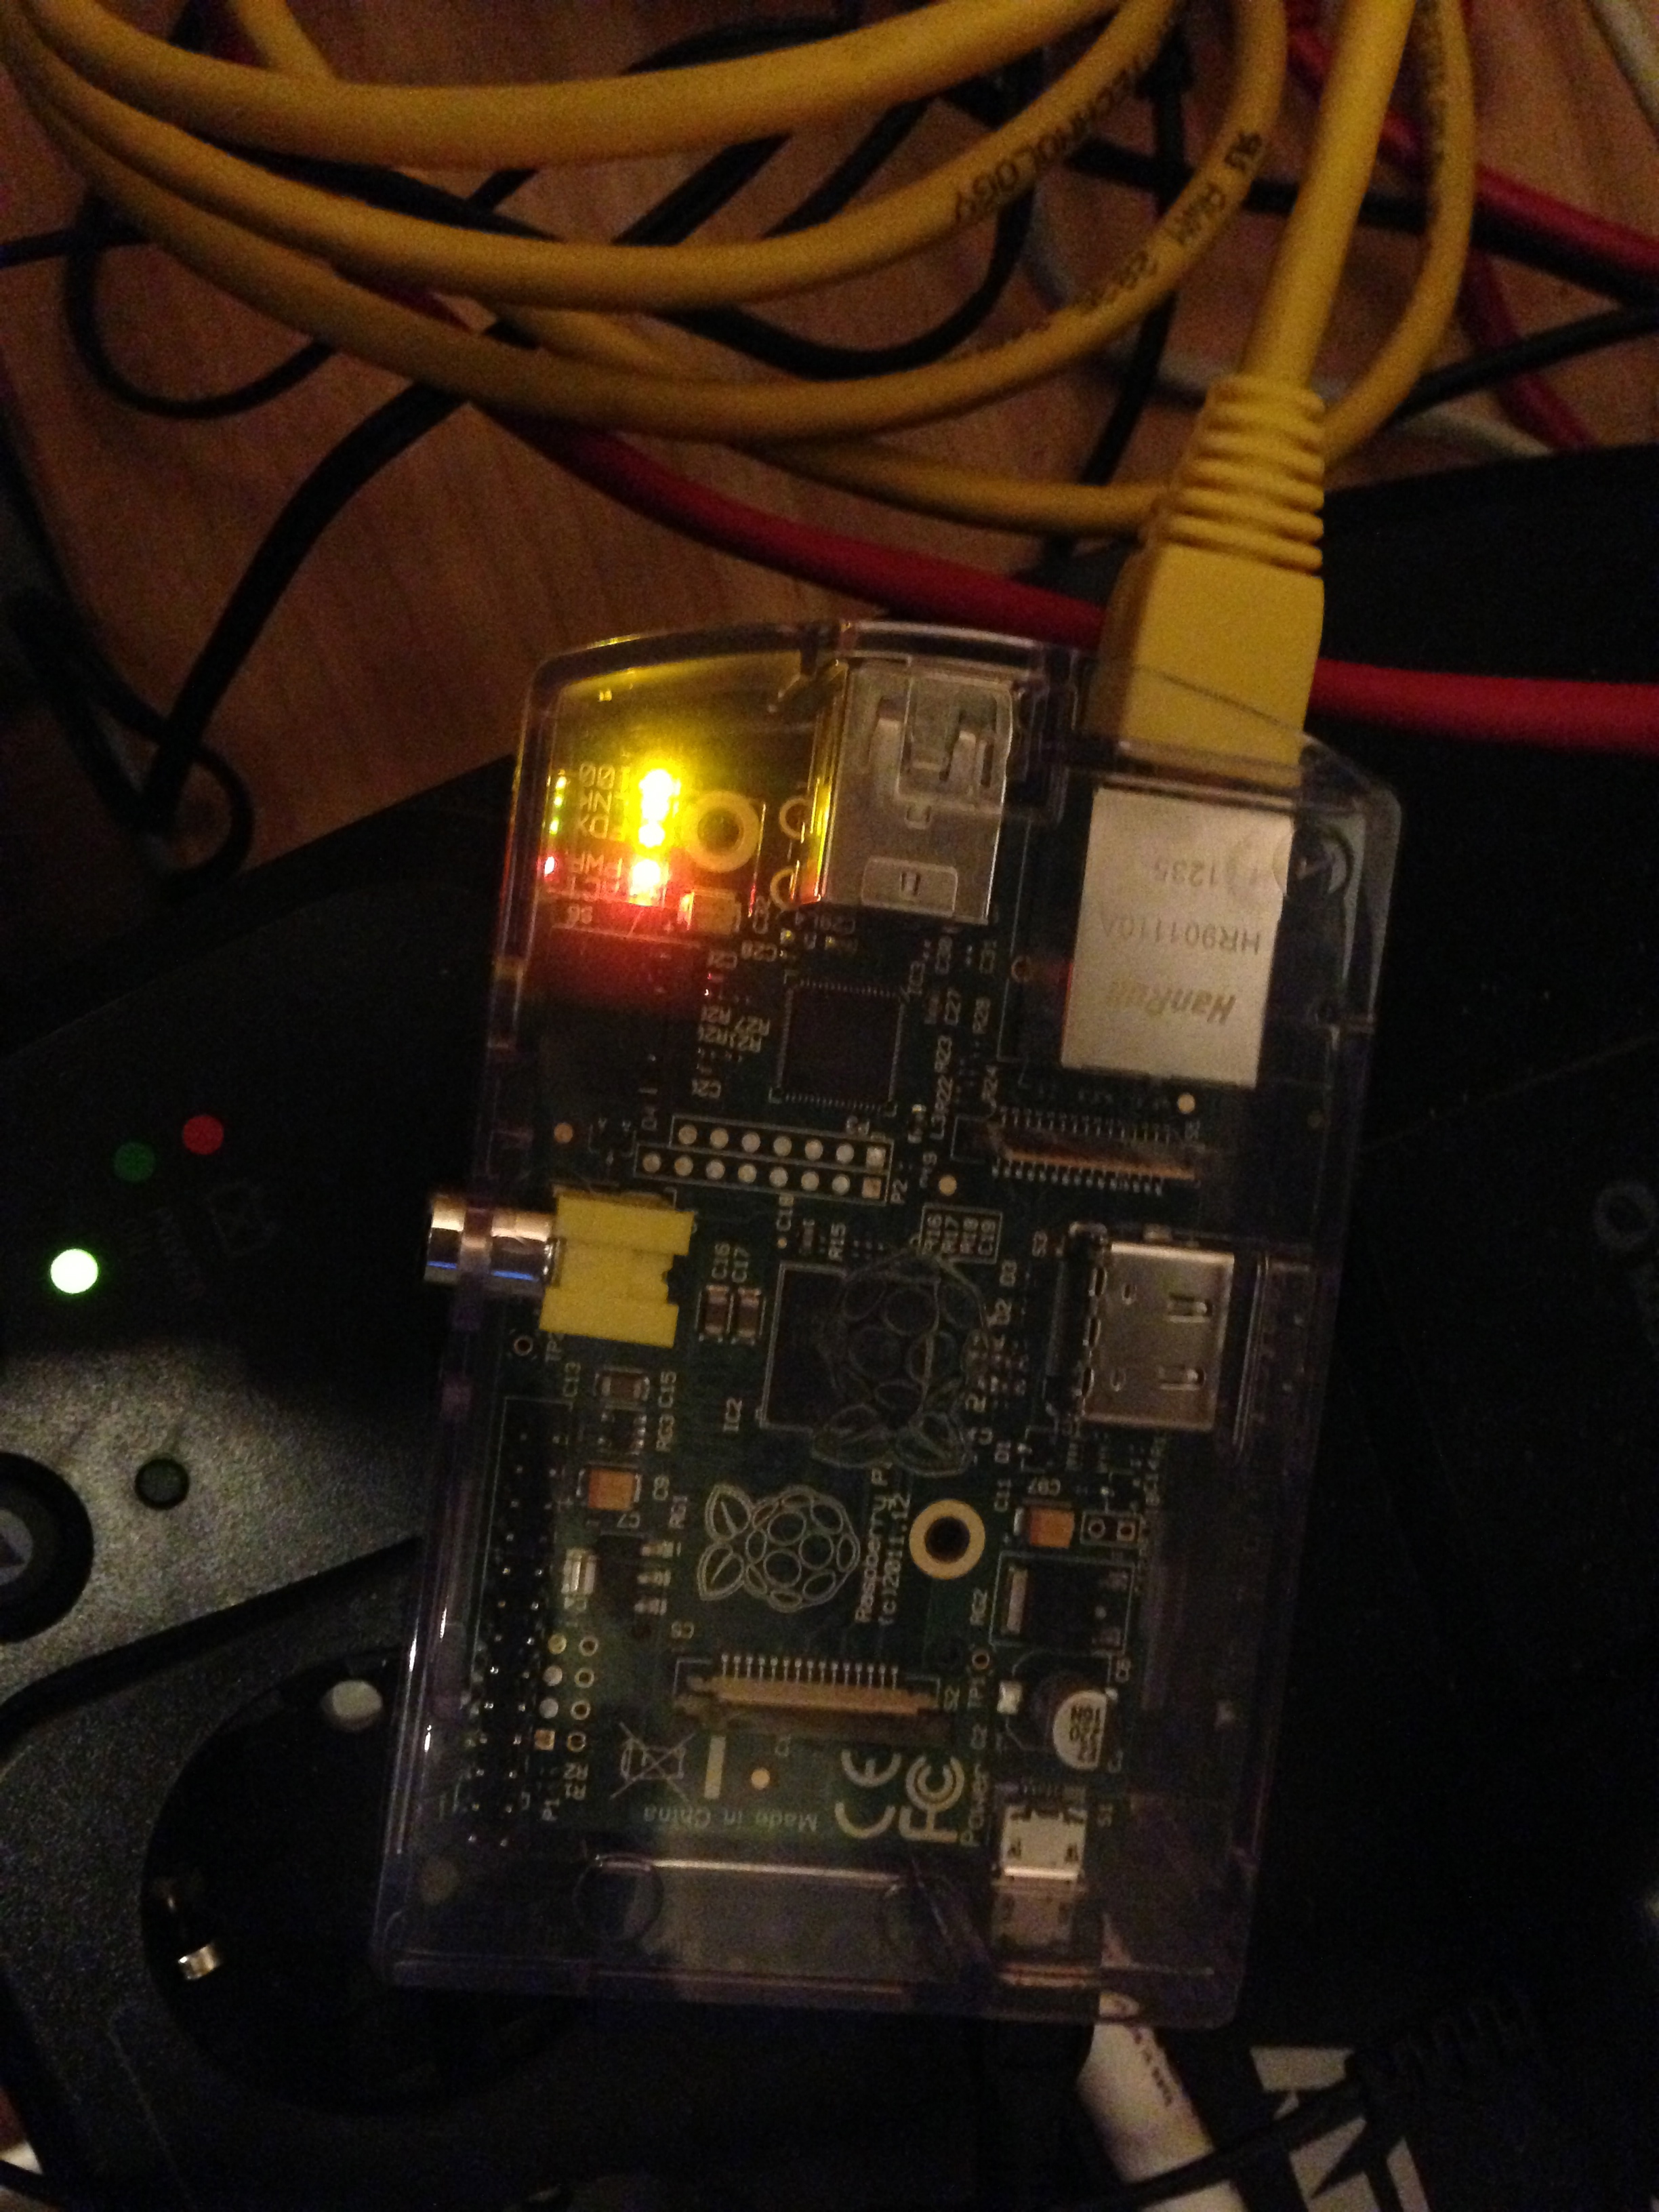
Before we start, Let’s have a look what’s on board the Raspberry Pi so you’ve an idea what we talk about:
Here’s mine in action:
Now, let’s see how we can turn it into a OpenVPN server. Actually this is very easy due to the fact that the Raspberry Pi is running (a modified) Debian Weezy called Raspbian. Since it’s Debian, you can use apt-get to install software:
apt-get install openvpn
After the install finishes, you need to generate keys for the server and the client(s). OpenVPN ships with the ‘easy-rsa’-tool. It’s easiest to copy the example folder and work from there.
cp -R /usr/share/doc/openvpn/examples/easy-rsa /etc/openvpn
cd /etc/openvpn/easy-rsa/2.0
The ‘easy-rsa’-tool has a file called ‘vars’ that you can edit to set some defaults. That will save you time later on but it’s not required to do so.
Load the vars like this (note the two dots):
. ./vars
Then we need to generate keys:
./clean-all
./build-ca
./build-key-server server
./build-key client-name
./build-dh
The first line makes sure we start from scratch. The second generates a key for the Certificate Authority. The key for the server itself is generated on the third line. Repeat the forth line for each client that needs to connect. Finally, we need the Diffie Hellman key as well, which is generated on the fifth line. Make sure you use a 2048 bit key, as suggested in the comments.
We need to copy the keys to the OpenVPN folder.
cd /etc/openvpn/easy-rsa/2.0/keys
cp ca.crt ca.key dh2048.pem server.crt server.key /etc/openvpn
Last step is to configure the server. You can copy the example config and make sure it points to the certs you just created.
cp /usr/share/doc/openvpn/examples/sample-config-files/server.conf.gz /etc/openvpn
gunzip /etc/openvpn/server.conf.gz
vim /etc/openvpn/server.conf
When you’re done, start OpenVPN like this:
/etc/init.d/openvpn start
Response looks like:
[ ok ] Starting virtual private network daemon: server.
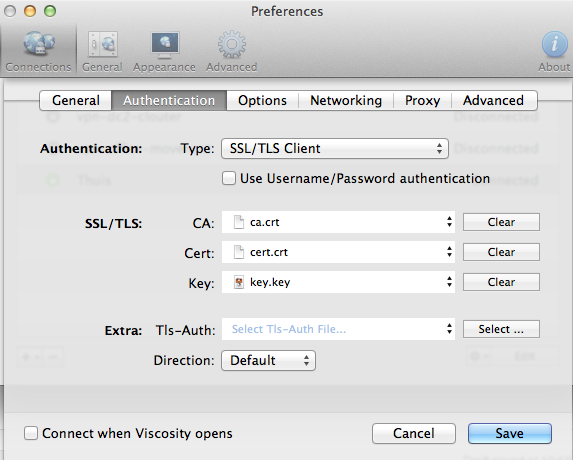
Now you should be able to connect to the OpenVPN server with a client. I’m using Viscosity on Mac OSX, but there’re many clients available on almost any platform (Windows, Mac OSX, Linux). You need the client.crt, client.key and ca.crt files plus the ip-address of your Raspberry Pi.
Connecting should now work without trouble. Have a look at ‘/var/log/syslog’ to access the logfiles. You’d be able to see which client connects:
Jan 5 22:07:56 raspberrypi ovpn-server[14459]: 1.2.3.4:64805 [client-name] Peer Connection Initiated with [AF_INET]1.2.3.4:64805
Now that all is working, time for a last tip: when you want to access the network behind the Raspberry Pi through your OpenVPN connection, configure OpenVPN to push the right route to the clients. Edit the OpenVPN server config, and add a parameter like this:
push "route 10.1.7.0 255.255.255.0"
Be sure to enter the network- and netmask address that match your network setup. The route is automatically added on connect, and removed on disconnect.
Finally, enable routing on the Rasperry Pi:
echo 1 > /proc/sys/net/ipv4/conf/all/forwarding
Have fun with it, you can do a lot of great things with this little machine!
Update: Also see these follow-up posts that contain more detailed info on some interesting use cases and help you set it up:







 A few weeks ago I attended a full week of SUSE training, which I really enjoyed. There were lots of highly skilled geeks and the course had a nice solid pace. By the end of the week I did the