


At DevOpsDays Amsterdam 2016 I hosted a 3 hour hands-on workshop with my colleague Fred Neubauer. In these 3 hours we had 12 people build their own cloud based on Cosmic Cloud. It was great fun!
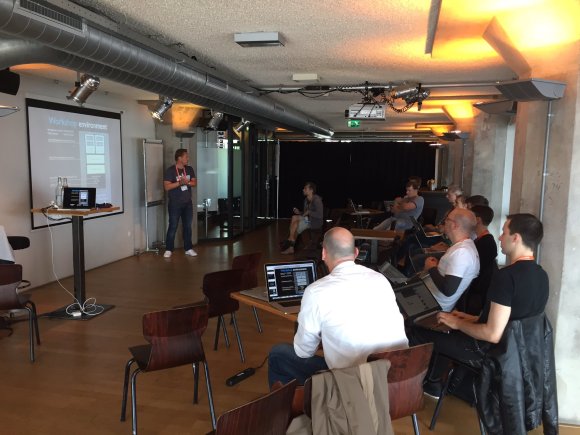
The slides are here:
At DevOpsDays Amsterdam 2016 I hosted a 3 hour hands-on workshop with my colleague Fred Neubauer. In these 3 hours we had 12 people build their own cloud based on Cosmic Cloud. It was great fun!
The slides are here:

 I was the Release Manager for Apache CloudStack versions 4.6, 4.7 and 4.8 and during this time many people told me they thought it’s hard to build and package Apache CloudStack. The truth is, it’s not that hard once you know the steps to take. 😉
Next to that there’s the release pace. You may want to move in a different pace than the project is. There’ve been lots of discussions for example on a fast release cycle, and also on LTS-releases on the other hand. In this blog post I’ll show you how easy it is to create your own CloudStack release to satisfy the demands of your organisation.
Maven
Compiling Apache CloudStack is done using Maven. You need to install this tool in order to work with releases so let’s do it. Let’s assume a CentOS 7 box you want to compile this on. It should pretty much work on any OS.
yum install maven java-1.8.0-openjdk mkisofs ws-commons-util genisoimage gcc
We also install Java and some tools needed to compile Apache CloudStack.
Versioning
When you’re building your own release of Apache CloudStack, you have two options:
You’ve to keep in mind that when you create a new version, you need also to create so-called upgrade-paths: how the database can be upgraded to your version. When you choose option 1, and rebuild an existing version, this is not necessary. This sounds easy, but on the other hand, it’s confusing as there’s no way to tell the difference later on.
Apache CloudStack works with versions like 4.8.0 and 4.7.1, etc. The upgrade mechanism will only consider the first 3 parts. This means, we are free to create 4.8.0.16 (our 16th custom version of 4.8.0) as long as we do not touch the database. That sounds like a nice way to make custom daily releases, and at the same time can be used for those wanting to build LTS (Long Term Support) versions.
Setting the version
The question then is, how can we modify the version of Apache CloudStack? Well, there’s actually a tool supplied in the source that does this for you. It’s called setnextversion.sh. Here’s how it works:
usage: ./tools/build/setnextversion.sh -v version [-b branch] [-s source dir] [-h]
  -v sets the version
  -b sets the branch (defaults to 'master')
  -s sets the source directory
  -h
To build our custom 4.8.0.16 version off the 4.8 branch we run:
./tools/build/setnextversion.sh -v 4.8.0.16 -b 4.8 -s /data/git/cs1/cloudstack/
Output shows a lot of things, most interesting:
found 4.8.0 setting version numbers
[master 27fa04a] Updating pom.xml version numbers for release 4.8.0.16
126 files changed, 130 insertions(+), 130 deletions(-)
committed as 858805957e2c7e0a0fbeb170a7f1681a73b4fb7a
The result is a new commit that changed the versions in the POMs. You an see it here:
git log
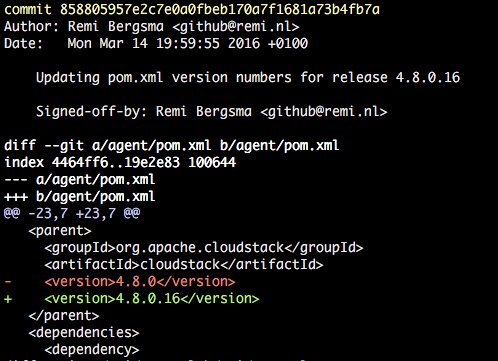
You’ve successfully set the version!
Compiling the custom version
Let’s compile it. This works like with any release build:
mvn clean install -P systemvm
This will take a few minutes. You should see your new version flying by lots of times.

After a few minutes the build completes.
By the way, if you want to skip the unit tests to speed up the process, add -DskipTests to the mvn command.

RPM packages
The source also contains scripts to build packages. To build packages for CentOS 7 for example, do this:
cd ./packaging
./package.sh -d centos7
You should see this:
Preparing to package Apache CloudStack 4.8.0.16
When the script finishes, you can find the RPM packages here:
ls -la ../dist/rpmbuild/RPMS/x86_64/

Installing the new version
You can either use the war that is the result of the compile, or install the generated RPM packages. Installing and upgrading is out-of-scope in this blog, so I assume you know how to install a stock version of CloudStack. I first installed a stock 4.8.0 version, then (as shown above) built 4.8.0.16 and will show the upgrade.
As soon as you start the management server with the new version you will see this:
2016-03-14 12:34:09,986 DEBUG [c.c.u.d.VersionDaoImpl] (main:null) (logid:) Checking to see if the database is at a version before it was the version table is created
2016-03-14 12:34:09,995 INFO  [c.c.u.DatabaseUpgradeChecker] (main:null) (logid:) DB version = 4.8.0 Code Version = 4.8.0.16
2016-03-14 12:34:09,995 INFO  [c.c.u.DatabaseUpgradeChecker] (main:null) (logid:) DB version and code version matches so no upgrade needed.
This is actually very nice. We made a custom version and CloudStack still assumes it’s 4.8.0 and so no upgrade of the data base is needed. This obviously means that you cannot do this when your patch requires a data base change.
When we look at the database, we can confirm we still run a 4.8.0-compatible release:
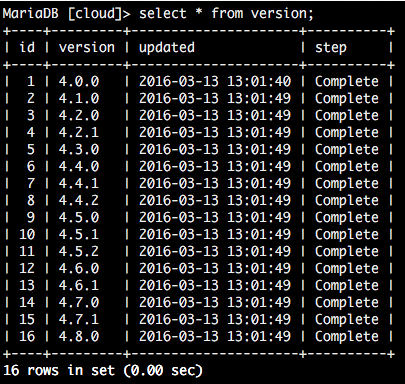
From this table, one cannot tell we upgraded to our custom version. But when you look closer, the new version is active.
This is the version an agent reports:
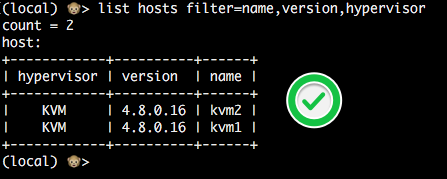
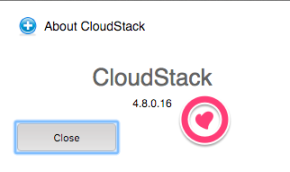
Also, the UI will show the custom version in the About box. This way users can easily tell what version they are running.
Conclusion
Creating your own custom version of Apache CloudStack may sound complicated but we’ve seen it’s pretty easy to do so. Creating a custom release will provide you with a lot of flexibility, especially if you combine it with war dropping. By numbering your version like 4.8.0.x you don’t have to worry about upgrade paths.
Happy releasing!

Recently I became a committer in the Apache CloudStack project. Last week when I was working with Rohit Yadav from ShapeBlue he showed me how he had automated the process with a Git alias. I really like it so I’ll share it here as well.
First of all, pull requests are created on Github.com. Rohit created a git alias called simply ‘pr’. This is how it looks like (for the impatient: copy/paste the one-liner below). The command below is for easy reading, it will print a syntax error.
[alias]
pr= "!apply_pr() { set -e;
rm -f githubpr.patch;
wget $1.patch -O githubpr.patch
--no-check-certificate;
git am -s githubpr.patch;
rm -f githubpr.patch;
pr_num=$(echo $1 | sed 's/.*pull\\///');
git log -1 --pretty=%B > prmsg.txt;
echo \"This closes #$pr_num\" >>
prmsg.txt; git commit --amend -m \"$(cat prmsg.txt)\";
rm prmsg.txt; }; apply_pr"
Copy/paste this next two lines into your .gitconfig file (usually located in ‘~/.gitconfig’.):
[alias]
pr= "!apply_pr() { set -e; rm -f githubpr.patch; wget $1.patch -O githubpr.patch --no-check-certificate; git am -s githubpr.patch; rm -f githubpr.patch; pr_num=$(echo $1 | sed 's/.*pull\\///'); git log -1 --pretty=%B > prmsg.txt; echo \"This closes #$pr_num\" >> prmsg.txt; git commit --amend -m \"$(cat prmsg.txt)\"; rm prmsg.txt; }; apply_pr"
This alias allows you to do this:
git pr https://pull-request-url
It will then fetch the patch, extract the pull request number, adds a note that closes the pull request, finally commits all commits to your current branch. All you have to do is review and push.
Let’s demo this on a pull request I openend on the CloudStack documentation. Goes like this:
git pr https://github.com/apache/cloudstack-docs-rn/pull/21
--2015-05-24 19:22:54--
https://github.com/apache/cloudstack-docs-rn/pull/21.patch
Resolving github.com... 192.30.252.130
Connecting to github.com|192.30.252.130|:443... connected.
HTTP request sent, awaiting response... 302 Found
Location: https://patch-diff.githubusercontent.com/raw/apache/cloudstack-docs-rn/pull/21.patch [following]
--2015-05-24 19:22:54--
https://patch-diff.githubusercontent.com/raw/apache/cloudstack-docs-rn/pull/21.patch
Resolving patch-diff.githubusercontent.com... 192.30.252.130
Connecting to patch-diff.githubusercontent.com|192.30.252.130|:443... connected.
HTTP request sent, awaiting response... 200 OK
Cookie coming from patch-diff.githubusercontent.com attempted to set domain to github.com
Length: unspecified [text/plain]
Saving to: 'githubpr.patch'
githubpr.patch [ <=> ] 9.23K --.-KB/s in 0.002s
2015-05-24 19:22:55 (4.96 MB/s) - 'githubpr.patch' saved [9449]

Applying: add note on XenServer: we depend on pool HA these days
Applying: remove cached python classes and add ignore file for it
Applying: explicitly mention the undocumented timeout setting

[master 08e325d] explicitly mention the undocumented timeout setting
 Author: Remi Bergsma <[email protected]>
 Date: Sun May 24 08:28:43 2015 +0200
 3 files changed, 21 insertions(+), 3 deletions(-)
The pull request has 3 commits that are now committed to the current branch. Check the log:
git log
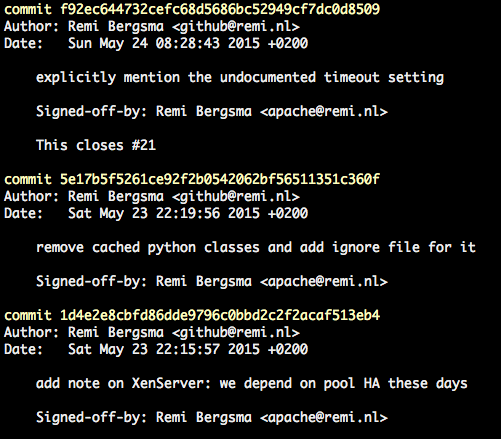
Isn’t that great? Now all you have to do is push it to a upstream repository.
Signed-off-by
This is achieved by adding the following to ‘.gitconfig’:
[format]
 signoff = true
Thanks Rohit for sharing!
 XenServer and Apache CloudStack work nicely together and form an easy-to-go couple for many companies. However, not many people know that recent releases changed the cooperation between the two drastically.
I’m not only talking about the shiny new Apache CloudStack 4.5 release, but the change was back ported to recent releases of 4.3.x and 4.4.x as well. This means that if you run XenServer and CloudStack, you need the review the information below carefully.
 I can understand why almost nobody knows, because this was not well discussed and did not end up in the release notes nor documentation either. I talked to many people about this at meetups and thought it’d be useful to write some of it in a blog. I tested it on both versions 6.2 and 6.5.
What did change?
XenServer works with the concept of a pool-master that coordinates a lot of stuff in the cluster. CloudStack sends its instructions to the pool-master. What did change? CloudStack used to elect a new XenServer pool-master in the event of a failing pool-master. In the new behaviour CloudStack does nothing and relies on the XenServer poolHA feature to be enabled. XenServer itself now elects a new pool-master.
Why is this a problem?
First of all, if you don’t know and upgrade CloudStack, you will not recover automatically anymore from a pool-master failure. This will most likely cause you to have some stress while you work to getting a failed pool-master back up and running. It doesn’t recover automatically anymore, because CloudStack now relies on XenServer to handle this event, but by default this feature is not enabled. No pool-master means no changes are being made (no VMs start, etc).
Why was this changed?
If you ask me, this is a tricky one. The reason for doing it, was sent to the cloudstack-dev list. The mail points to issues CLOUDSTACK-6177 and CLOUDSTACK-5923 but there’s only a vague description there:
“When XS master is down, CS uses pool-emergency-transition-to-master and pool-recover-slaves API to choose a new master, this API is not safe, and should be only used in emergent situation, this API may cause XS use a little bit old (5 minutes old) version of XS DB, some of object may be missing in the old XS DB, which may cause weird behaviour, you may not be able to start VM.”
In other words, there is a small corner-case in which something not specified can go wrong that might prevent starting VMs. Well, if you upgrade CloudStack and do not turn ON the poolHA feature, guess what? You have a 100% change that no VM will start on the whole cluster. Doesn’t make sense to me. At all.
Another thing that bugs me is that there were no replies on the dev-list and that it was silently merged without proper discussion and documentation. I sent an e-mail about it to the cloudstack-dev list, but not too many people seem to care. On the other hand, I do get some questions about it from time to time.
How did we find out?
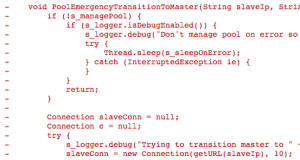
We had an outage and needed to recover manually, after which we started looking for the Root Cause of this. If you look at the code and the commit messages, you find this changed behaviour that relies on ‘XS HA’ aka XenServer poolHA. This is the commit; it clearly removes the PoolEmergencyTransitionToMaster function that used to elect a new pool-master.
A tricky change
Turning on XenServer poolHA seems easy, but there are pitfalls that can have drastic consequences. Let’s start with the basics. To turn it on, use the ‘xe pool-ha-enable‘ command. You need a Storage Repository that is shared to write heartbeats to. In our case, we already used NFS, so we reused that. If you have no shared SR, be sure to create one.
The XenServer documentation (PDF) says:
“Verify that you have a compatible Storage Repository (SR) attached to your pool. iSCSI, NFS or Fibre Channel are compatible SR types” … “Enable HA on the pool: xe pool-ha-enable heartbeat-sr-uuids=“
So I came up with this:
NFSUUID=$(xe sr-list type=nfs params=uuid --minimal)
xe pool-ha-enable heartbeat-sr-uuids=$NFSUUID
The biggest pitfall is that you need to specify the timeout, or else it will use a 30 second default. You’re right, the Citrix manual (linked above) does not tell you this. This caused another outage, this time we lost a whole cluster. Trust me, it was no fun. Fortunately we had application redundancy over multiple clusters. Anyway, my advise: always specify the timeout.
A 30 second timeout means that when your storage or network is unavailable for 30 seconds, all hosts in the cluster will be fenced and reboot. No VM will keep running on that cluster. We use 180 seconds because that is more or less what the ring buffers can hold in our case. Enable HA like this:
NFSUUID=$(xe sr-list type=nfs params=uuid --minimal)
xe pool-ha-enable heartbeat-sr-uuids=$NFSUUID ha-config:timeout=180
If you did enable it already, first disable it:
xe pool-ha-disable
To check if HA is enabled, run:
xe pool-list params=all | grep -E "ha-enabled|ha-config"
Output looks like this:
 ha-enabled ( RO): true
 ha-configuration ( RO): timeout: 180
To see all HA properties:
xe pool-list params=all | grep ha-
 ha-enabled ( RO): true
 ha-configuration ( RO): timeout: 180
 ha-statefiles ( RO): e57b08d0-aada-4159-c83d-3adea565d22e
 ha-host-failures-to-tolerate ( RW): 1
 ha-plan-exists-for ( RO): 1
 ha-allow-overcommit ( RW): true
 ha-overcommitted ( RO): false
The first three show HA being on, a timeout of 180 seconds and the heartbeats will be written to the storage repository (SR) with uuid e57b08d0-aada-4159-c83d-3adea565d22e.
The setting ‘ha-host-failures-to-tolerate‘ is automatically calculated by XenServer. In our case, it is not important as we do not protect any VMs, we just use the poolHA feature. You can leave this default.
I asked XenServer community manager Tim Mackey about overcommitting when I met him at the CloudStack Day in Austin, TX. He said:
“Setting ha-allow-overcommit to true indicates that XenServer should calculate its HA plan using optimistic placement. Since the point of enabling HA for CloudStack is to handle host failures, but that CloudStack handles all VM level HA, no VMs will actually be protected by XenServer HA. The net result is the value for ha-allow-overcommit shouldn’t matter for CloudStack.”
You need at least three nodes!
Your XenServer pool needs to be at least three XenServers or else the HA feature will not work as expected. Why? Because the poolHA tries to detect isolation. If it cannot see any other host, it assumes it is isolated and self-fences. So, if you have two XenServers and one crashes, the other one becomes isolated and will self-fence. Both are now down, and the bad news is: they will keep fencing because they never are up at the same time. So, they keep thinking they have become isolated from the pool. Nice for a lab, but don’t do this in production.
About Self-Fencing
To prevent corruption, XenServer poolHA fill fence itself if it cannot reach the Storage Repository any more where it is supposed to write its heartbeat. You may find messages like this in the logs:

Warning: Do not protect the VMs
XenServer should only take care of the pool-master failover and the fencing not about restarting VMs as this is CloudStack’s job. The documentation of XenServer instructs you to do it, but just don’t if you use CloudStack. Otherwise both CloudStack and XenServer will try to recover VMs and it will become messy eventually leading to corrupted VMs.
To check HA on VMs is off, run this command:
xe vm-param-get uuid=<UUID> param-name=ha-restart-priority
It should return an empty result. If it does not, make sure to use ‘xe vm-param-set‘ to set it empty.
Warning: Licensing considerations
Before XenServer 6.2, HA was a paid feature. Users of 6.0.2 or 6.1 need a license for this to work. The bad news: if you use a modern CloudStack version, you will need to manually elect a new pool-master.
Warning: PoolHA blocks certain operations
Many operations related to XenServer and CloudStack have changed because they are not allowed when poolHA is enabled.
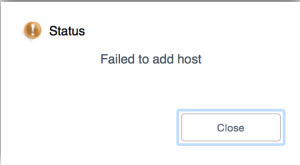
For example, adding a new XenServer to CloudStack has to be done in a different way as well. If you just add it, you’ll get a message like this in the UI:
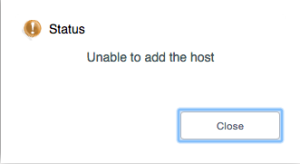
The API does the same:
Error 530: Unable to add the host
Looking at the logs of the management server shows why:
2015-05-23 08:59:03,064 WARN [c.c.h.x.d.XcpServerDiscoverer] (180595423@qtp-818975168-33:ctx-7c741014 ctx-79b8e039) Please join the host 192.168.22.13 to XS pool f4d78d74-1985-d8d7-f1c4-f7b2b5c213b6 through XC/XS before adding it through CS UI
Ah, you need to add it to the XenServer pool first. In other words, when building a new cluster: first you need to make a complete XenServer pool, then add one of them to CloudStack that will discover the others and add them in one go.
When you add an extra XenServer to an existing cluster, be sure to add it to XenServer first and then to CloudStack. Start with disabling poolHA, do your thing and enable poolHA again. if you add more than one new XenServer, adding one to CloudStack will discover them all.
Another example. You can no longer remove the pool-master from CloudStack. You first need to go to the XenServer and designate a new pool-master. That also sounds simple, but it is not allowed when poolHA is enabled. So, you have to:
Poehee. Same goes for patching, as you change the pool-master as well.
In short: Enabling poolHA brings challenges when automating these operations, as we now need to talk both to CloudStack and XenServer.
Known issue: CloudStack reports Alert state
When one of the XenServer nodes crashes for some reason, be it hardware or else, it sometimes is put into “maintenance mode”. Not in CloudStack, but in the pool itself. CloudStack will report an Alert state and refuse to work with it. You need to manually enable the host again using the ‘xe host-enable‘ command. CloudStack will then automatically enable it again and start using it.
How to go from here?
To be honest I don’t like the “two captain” approach. In my opinion CloudStack is the orchestrator and needs to be in control. Any hypervisor should be dumb and do what the orchestrator (in this case CloudStack) tells it to do. Period. Like how KVM works, I love the simplicity.
I’m investigating if we can get the best of both worlds by detecting whether HA is turned ON (one-liner shown above) and implement a behaviour based on that. If HA is turned OM, do what 4.4+ does today. If it’s turned OFF, do the old behaviour. This essentially makes it possible to choose between the options and I’m quite sure I’ll disable HA again. It is also backwards compatible for those relying on this feature now.
Another thing to improve is the documentation. As a start, I‘ve sent a first pull-request to update it.
Conclusion
If you run XenServer and CloudStack, you may want to enable poolHA on XenServer or else you will have to manually elect a new pool-master in the event of a crash. Be sure to configure it properly and remember that poolHA when enabled brings in extra steps to certain operations. I hope this blogs helps people achieving nice uptimes and easy maintenance.
Update (June 1st):
Things started rolling and Citrix updated their XenServer documentation to include the HA timeout settings. Nice!

At work we’re creating a CloudStack development environment that can be created and destroyed as we go. One of the requirements is to quickly create a couple of hypervisors to run some tests. KVM is easy: they are just Linux boxes with some extra packages. XenServer is a different story.
Imagine you create a XenServer by installing it from ISO, then saving it as a template. Then create two instances from it called xen1 and xen2. If you try to add them to CloudStack, you’ll notice only the first one succeeds.
The logs tell you why it did not work:
Skipping xen2 because 7af82904-8924-49fa-b0bc-49f8dbff8d44 is already in the database.
Hmm.. so would both have the same UUID? Let’s see. To get the UUID of a XenServer, simply run this:
xe host-list
The output of both my XenServers is below:
[root@xen1 ~]# xe host-list
uuid ( RO) : 7af82904-8924-49fa-b0bc-49f8dbff8d44
 name-label ( RW): xen1
 name-description ( RW): Default install of XenServer
[root@xen2 ~]# xe host-list
uuid ( RO) : 7af82904-8924-49fa-b0bc-49f8dbff8d44
 name-label ( RW): xen2
 name-description ( RW): Default install of XenServer
CloudStack is now confused and wants them to have a unique UUID, which makes sense.
It was quite a puzzle to come up with an automatic process. A couple of colleagues of mine all contributed a part and we finally came up with something that works on both XenServer 6.2 and 6.5.
First, you need to generate new UUIDs in ‘/etc/xensource-inventory’ for both the XenServer and the dom0. Do this after you’ve stopped the Xapi process. You should also wipe the state.db of Xapi.
An important part consists of running ‘/opt/xensource/libexec/create_templates‘ and then reset the network, after which the XenServer reboots.
To make it easy for others, we’ve published the script on Github.
It should be run as a ‘first boot’ script. It needs two reboots to fully complete the procedure, and it does this automatically.
When you look at the UUIDs again after running the script:
[root@xen1 ~]# xe host-list
uuid ( RO) : ae2eeb9b-ed7e-4c3c-a619-376f8a632815
 name-label ( RW): xen1
 name-description ( RW): Default install of XenServer
[root@xen2 ~]# xe host-list
uuid ( RO) : 50adc2d0-8420-425c-a1c8-68621bd68931
 name-label ( RW): xen2
 name-description ( RW): Default install of XenServer
They’re unique now! Adding them works fine… but hey, they have the same name in CloudStack? This is due to the name-label that also needs to be set to the new hostname.
xe host-param-set uuid=\$(xe host-list params=uuid|awk {'print \$5'} | head -n 1) \
name-label=\$HOSTNAME
Just use our script and you’ll be fine!
Update:
Rohit from ShapeBlue, a fellow engineer working on CloudStack, almost immediately responded to my blog:
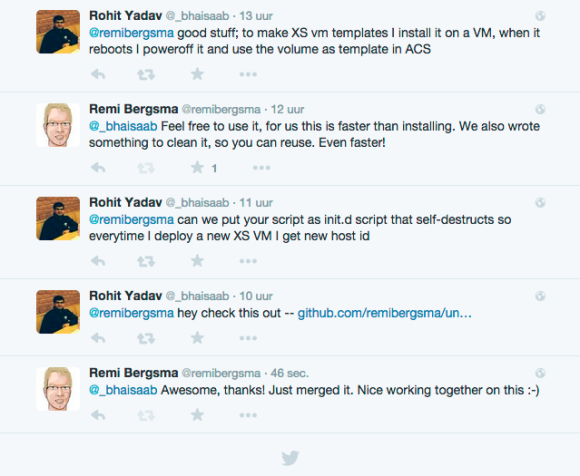
He sent me a pull request that turns the script into an init-script for use in XenServer. That makes it even easier for others to use it. He also updated the documentation:
To use this in a VM template for testing XenServer hosts in VMs:

scp xenserver_make_unique.sh root@xenserver-host-ip:/opt/
scp init.d/xenserver_make_unique root@xenserver-host-ip:/etc/init.d/
ssh root@xenserver-host-ip "chmod +x /etc/init.d/xenserver_make_unique && chkconfig xenserver_make_unique on"

When the XenServer host starts for the first time, it would reset the host uuid by running the script from /opt/xenserver_make_unique.sh, then remove the init.d script and reboot the host.
You only need to do this once in your template, and all XenServers you will create from it will be unique. Enjoy!

| Shashi on Setting locales correctly on M… | |
| Sayling Low on Alt-key in OSX-Terminal | |
| Roger on Setting locales correctly on M… | |
| belwardblog on HOWTO discover the ip address… | |
| Guilherme Caeiro Dia… on Setting locales correctly on M… | |
| Terminal Show Multip… on Setting locales correctly on M… | |
| bodhix on RRDtool: moving data between 3… | |
| vasu on One-liner: restore compressed… | |
| Angel on HOWTO quickly add a route in M… | |
| Kar.ma on HOWTO connect to hosts on a re… | |
| Home | MacarioJames.… on Sed inline editing different o… | |
| Mac i problemy z loc… on Setting locales correctly on M… | |
| NearlyNormal on HOWTO enable color for PHP and… | |
| Yong on Connecting two Open vSwitches… | |
| Aysad Kozanoglu on Creating a multi hop SSH tunne… |
