


It’s been one year after Cosmic started, forked off of the Apache CloudStack project. Cosmic 5.3 brings easy-to-use connectivity between VPCs. CloudStack users will recognise the Private Gateway functionality, which has been completely refactored in Cosmic 5.3. This blog shows what’s new.
The goal: connect VMs together that live in different VPCs
Basically, what you want is to setup a bunch of VPCs, create networks inside them where the VMs will live. Once you do that, there is no easy way to connect VMs from one VPC to another. Sure, you could make a VPN connection, and that is preferred in some cases. When you work in the same availability zone, and for example want Management VMs to access Acceptance or Production, there’s an easy alternative to get connectivity.
Create a Private Network
In Cosmic 5.3 you can create a network of type Private. A default network offering for this is created automatically, the only real difference is setting the type to Private (other networks are usually of type Isolated).
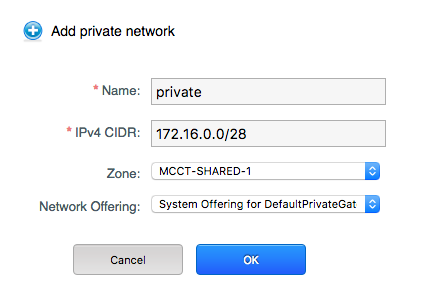
Create Private Network
If you want, you can specify a VLAN of LSwitch manually by selecting an offering that supports it. You’d only do that in special cases, as it requires manual setup that is otherwise done automatically for you.
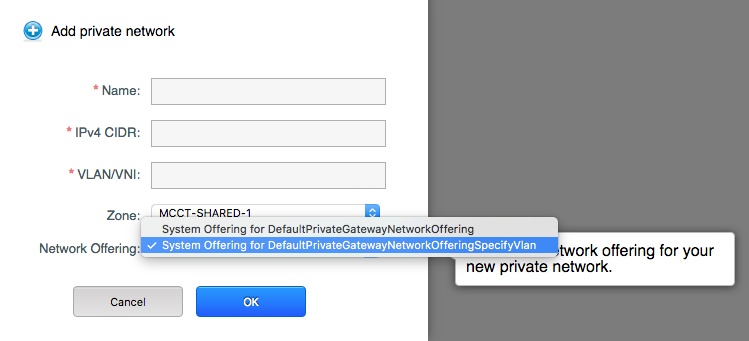
Create Private Network with a specific VLAN
Connect a VPC to the Private Network
Next, we’ll want to connect a VPC to this Private Network. That is done using a Private Gateway.
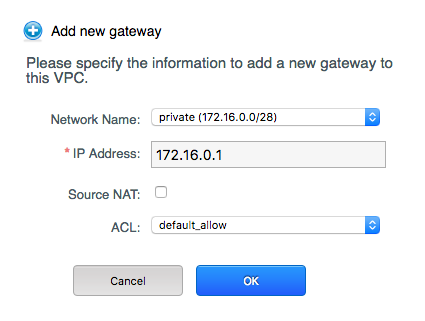
Creating a Private Gateway

Private Gateway is connected to the Private Network
Now, the VPC is connected to the Private Network. You will want to repeat this step for all VPCs you want to connect. In my case I added 3 VPCs with each one Private Gateway. Make sure they have an unique ip address on the Private Network.
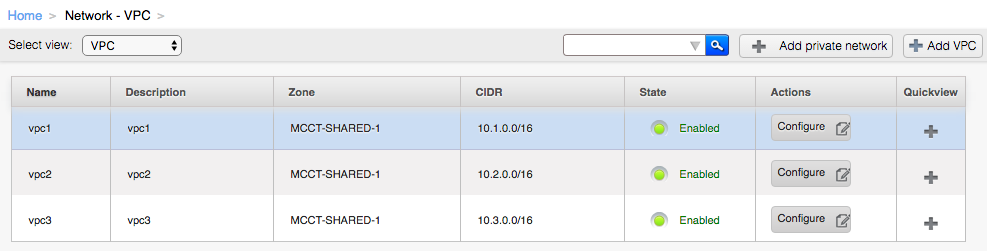
Overview of VPCs created
VPC1 has CIDR of 10.1.0.0/16 and has a Private Gateway using 172.16.0.1 connected to the Private Network. VPC2 has 172.16.0.2 and VPC3 has 172.16.0.3 as its ip address on the Private Network.
Making the VPCs aware of each other
By setting static routes to the other VPCs, to their ip address on the Private Network, it becomes easy to route traffic.
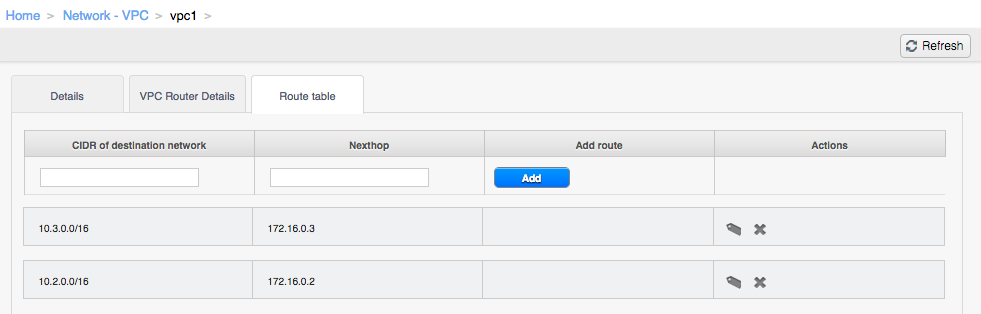
Setting routes to the other VPCs
VPC1 now knows that 10.2.0.0/16 is reachable via 172.16.0.2 (VPC2) and 10.3.0.0/16 is reachable via 172.16.0.3 (VPC3). If you fill the route table for VPC2 and VPC3 in the same way (create routes to the CIDRs of the other VPCs) then all VMS in these three VPCs can reach each other!
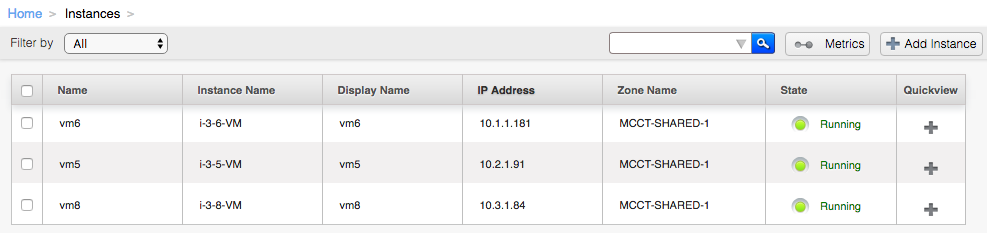
Three VMS in their own VPC
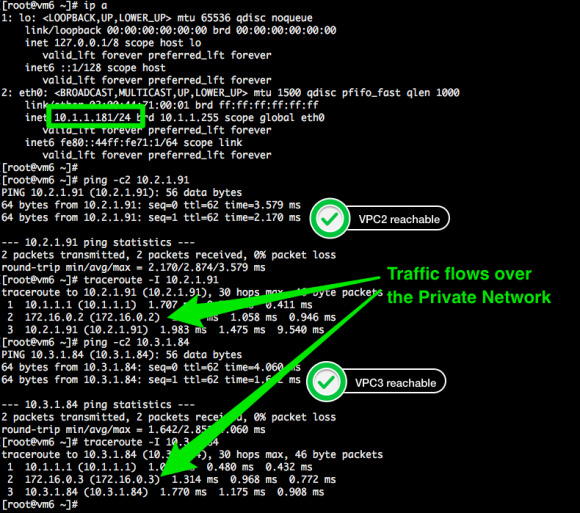
Inter-VPC traffic over the Private Network
Best of all, you can create this as a Domain Admin user.
Improvements over Apache CloudStack:
- A special network type Private was created, to make a clear distinction between types Guest, Public and Private (lots of hacks in the code removed)
- Able to use Domain Admin user, instead of ROOT user (even the RBAC in CloudStack cannot delegate the creation of Private Gateways to non-ROOT users).
- Add a Private Gateway without pre-setting up a VLAN or Lswitch
- Able to set Static Routes in the Route Table on the VPC level, rather than on the Private Gateway level. This allows setting routes to anything the kernel of the router VM accepts which is very flexible.
Conclusion
Cosmic 5.3 has made connecting VPCs together a whole lot easier. The fact that Domain Admins can now set this up (using Terraform & friends) makes it an easy to consume feature. Combined with the flexible static routes, one can basically implement any network design.


