Here are the slides from my presentation at the CloudStack Collaboration Conference in Denver:


35 posts
Here are the slides from my presentation at the CloudStack Collaboration Conference in Denver:

 As you might have noticed, I switched jobs on Feb 1st and was quite busy after that. I joined Schuberg Philis, a Mission Critical Outsourcing company in The Netherlands. I met the folks on the CloudStack Collaboration Conference in Amsterdam, back in November. I have a very cool job, as I work with a bunch of very skilled colleagues on our Mission Critical Cloud, that is powered by Apache CloudStack.
The last two months I spent quite some time working with CloudStack, debugging issues and most of all: building new capacity and migrating old so-called PODs to new ones. Recently, CloudStack 4.3 was released and I believe this is the best release ever. Feels “snappier”, has lots of fixes and new cool features. We upgraded our pre-production cloud (running ~600 VMs) and apart from one little issue everything went smooth. Impressed!
Next week, I’ll be in Denver, CO at the CloudStack Collaboration Conference. I’ll do a talk and explain why you should use configuration management and will show you how to implement configuration management in your existing environment using 5 steps. This can be quite challenging, because when a lot of manual work is done, people are usually very busy. How do you find the time to implement configuration management?
Meet me in Denver on April 9-11!
 I’ve been working a lot with CloudStack Advanced networking and find it very flexible. Recently, I had another opportunity to test its flexibility when a customer called: “We want VM’s in your CloudStack cloud, but these VM’s are only allowed be reachable from our office, and not from the public internet”. Firewalling? No, they required us to use their VPN solution.
Is CloudStack flexible enough for this to work? Yes, it is. In this blog I’ll tell you how we did it. And it doesn’t even matter what VPN device you use. This will work regardless of brand and features, as lang as it supports a public ip-address to connect over the internet to another VPN device, and has a private network behind it. All VPN devices I know of support these basic features.
VPN (Virtual Private Networking)
The client’s office is connected to the internet and has a VPN device. We received another device as well to host in our data center and the two talk to each other over the public internet in a secure way. Probably speaking IPsec or similar but that is beyond the scope of this blog.
The VPN device in the data center has a public ip-address on its WAN port but also has some ports for the internal network. We configured it to use the same network CIDR as we did in the CloudStack network we created for this customer. Let’s use 10.10.16.0/24 as an example in this blog. And now the problem: this cloud network is a tagged network and the VPN device we received is not VLAN-capable.
VLANs in the Cloud
CloudStack Advanded networking relies on VLANs. Every VLAN has its own unique ID. Switches use this VLAN ID to keep the VLAN networks apart and make sure they’re isolated from each other. Most switches support VLANs as well, and that’s were we’ll find the solution to this problem.
Configuring the switch
We connected the VPN device to our switch and set its port to UNTAGGED for the VLAN ID the CloudStack network uses. In other words, devices connected to this port now do not need to know about the VLAN. The switch will add it as traffic flows. This means the VPN device will use an ip-address in the 10.10.16.0/24 range and is able to communicate with the VM’s in the same network. The CloudStack compute nodes have their switch ports set to TAGGED and the switch makes communication between them possible.
Overview of ip-addresses:
The VM’s have their default gateway set to the VPN device’s 10.10.16.1 address. Also, the office needs to be configured in a way it knows the 10.10.16.0/24 network is handled by the VPN device located there. Users in the office will now be able to access the VM’s on the 10.10.16.0/24 network.
Conclusion
While the VM’s are hosted on our CloudStack cloud on the internet, they do not have public ip-addresses and thus are not reachable. The only public ip-address for this customer is the one configured on the VPN device in the data center. This provides the same level of security as you’d have with physical servers but adds the power of a cloud solution.
Thanks to the flexibility of the CloudStack Advanced Networking this cloud be done!
It just came to my attention that a vulnerability in Apache CloudStack was discovered, as John Kinsella writes in his post to the Apache CloudStack dev-mailinglist.
A malicious user could, for example, delete all VMs in the system. Addressing this issue is especially important for anybody using CloudStack in a public environment.
The vulnerability report has an easy work-around that I will mention here as well:
mysql -p -u cloud -h mgt-server-ip
update cloud.user set password=RAND() where id=1;
\q
Hugo Trippaers of Schuberg Philis discovered this issue. Thanks for sharing!
I’ve been building redundant storage solutions for years. At first, I used it for our webcluster storage. Nowadays it’s the base of our CloudStack Cloud-storage. If you ask me, the best way to create a redundant pair of Linux storage servers using Open Source software, is to use DRBD. Over the years it has proven to be rock solid to me.
DRBD is a Distributed Replicated Block Device. You can think of DRBD as RAID-1 between two servers. Data is mirrored from the primary to the secondary server. When the primary fails, the secondary takes over and all services remain online. DRBD provides tools for failover but it does not handled the actual failover. Cluster management software like Heartbeat and PaceMaker are made for this.
In this post I’ll show you how to install and configure DRBD, create file systems using LVM2 on top of the DRBD device, serve the file systems using NFS and manage the cluster using Heartbeat.
Installing and configuring DRBD
I’m using mostly Debian so I’ll focus on this OS. I did setup DRBD on CentOS as well. You need to use the ELREPO repository to find the right packages.
Squeeze-backports has a newer version of DRBD. If you, like me, want to use this version instead of the one in Squeeze itself, use this method to do so:
echo "
deb http://ftp.debian.org/debian-backports squeeze-backports main contrib non-free
" >> /etc/apt/sources.list
echo “Package: drbd8-utils
Pin: release n=squeeze-backports
Pin-Priority: 900
" > /etc/apt/preferences.d/drbd
Then install the DRBD utils:
apt-get update
apt-get install drbd8-utils
As the DRBD-servers work closely together, it’s important to keep the time synchronised. Install a NTP system for this job.
apt-get install ntp ntpdateYou also need a kernel module but that one is in the stock Debian kernel. If you’re compiling kernels yourself, make sure to include this module. When you’re ready, load the module:
modprobe drbdVerify if all went well by checking the active modules:
lsmod | grep drbdThe expected output is something like:
drbd 191530 4
lru_cache 12880 1 drbd
cn 12933 1 drbd
Most online tutorials instruct you to edit ‘/etc/drbd.conf’. I’d suggest not to touch that file and create one in /etc/drbd.d/ instead. That way, your changes are never overwritten and it’s clear what local changed you made.
vim /etc/drbd.d/redundantstorage.resEnter this configuration:
resource redundantstorage {
 protocol C;
 startup { wfc-timeout 0; degr-wfc-timeout 120; }
disk { on-io-error detach; }
on storage-server0.example.org {
device /dev/drbd0;
disk /dev/sda3;
meta-disk internal;
address 10.10.0.86:7788;
}
on storage-server1.example.org {
device /dev/drbd0;
disk /dev/sda3;
meta-disk internal;
address 10.10.0.88:7788;
}
}
Make sure your hostnames match the hostnames in this config file as it will not work otherwise. To see the current hostname, run:
uname -nModify /etc/hosts, /etc/resolv.conf and/or /etc/hostname to your needs and do not continue until the actual hostname matches the one you set in the configuration above.
Also, make sure you did all the steps so far on both servers.
It’s now time to initialise the DRBD device:
drbdadm create-md redundantstorage
drbdadm up redundantstorage
drbdadm attach redundantstorage
drbdadm syncer redundantstorage
drbdadm connect redundantstorage
Run this on the primary server only:
drbdadm -- --overwrite-data-of-peer primary redundantstorageMonitor the progress:
cat /proc/drbdStart the DRBD service on both servers:
service drbd startYou now have a raw block device on /dev/drbd0 that is synced from the primary to the secondary server.
Using the DRBD device
Let’s create a filesystem on our new DRBD device. I prefer using LVM since that makes it easy to manage the partitions later on. But you may also simply use the /dev/drbd0 device as any block device on its own.
Initialize LVM2:
pvcreate /dev/drbd0
pvdisplay
vgcreate redundantstorage /dev/drbd0
We now have a LVM2 volume group called ‘redundantstorage’ on device /dev/drbd0
Create the desired LVM partitions on it like this:
lvcreate -L 1T -n web_files redundantstorage
lvcreate -L 250G -n other_files redundantstorage
The partitions you create are named like the volume group. You can now use ‘/dev/redundantstorage/web_files’ and ‘/dev/redundantstorage/other_files’ like you’d otherwise use ‘/dev/sda3’ etc.
Before we can actually use them, we need to create a file system on top:
mkfs.ext4 /dev/redundantstorage/web_files
mkfs.ext4 /dev/redundantstorage/other_files
Finally, mount the file systems:
mkdir /redundantstorage/web_files
mkdir /redundantstorage/other_files
mount /dev/redundantstorage/web_files /redundantstorage/web_files
mount /dev/redundantstorage/other_files /redundantstorage/other_files
Using the DRBD file systems
Two more steps are needed to set up before we can test our new redundant storage cluster: Heartbeat to manage the cluster and NFS to make use of it. Let’s start with NFS, so Heartbeat will be able to manage that late on as well.
To install NFS server, simply run:
apt-get install nfs-kernel-serverThen setup what folders you want to export using your NFS server.
vim /etc/exports
And enter this configuration:
/redundantstorage/web_files 10.10.0.0/24(rw,async,no_root_squash,no_subtree_check,fsid=1)
/redundantstorage/other_files 10.10.0.0/24(rw,async,no_root_squash,no_subtree_check,fsid=2)
Important:
Pay attention to the the ‘fsid’ parameter. It is really important because it tells the clients that the file system on the primary and secondary are both the same. If you omit this parameter, the clients will ‘hang’ and wait for the old primary to come back online after a fail over happens. Since this is not what we want, we need to tell the clients the other server is simply the same. Fail-over will then happen almost without notice. Most tutorials I read do not tell you about this crucial step.
Make sure you have all this setup on both servers. Since we want Heartbeat to manage our NFS server, we need not to start NFS on boot. To do that, run:
update-rc.d -f nfs-common remove
update-rc.d -f nfs-kernel-server remove
Basic Heartbeat configuration
Install the heartbeat packages is simple:
apt-get install heartbeatIf you’re on CentOS, have a look at the EPEL repository. I’ve successfully setup Heartbeat with those packages as well.
To configure Heartbeat:
vim /etc/ha.d/ha.cfEnter this configuration:
autojoin none
auto_failback off
keepalive 2
warntime 5
deadtime 10
initdead 20
bcast eth0
node storage-server0.example.org
node storage-server1.example.org
logfile /var/log/heartbeat-log
debugfile /var/log/heartbeat-debug
I set ‘auto_failback’ to off, since I do not want another fail-over when the old primary comes back. If your primary server has better hardware than the secondary one, you may want to set this to ‘on’ instead.
The parameter ‘deadtime’ tells Heartbeat to declare the other node dead after this many seconds. Heartbeat will send a heartbeat every ‘keepalive’ number of seconds.
Protect your heartbeat setup with a password:
echo "auth 3
3 md5 your_secret_password
" > /etc/ha.d/authkeys
chmod 600 /etc/heartbeat/authkeys
You need to select an ip-address that will be your ‘service’-address. Both servers have their own 10.10.0.x ip-address, so choose another one in the same range. I use 10.10.0.10 in this example. Why we need this? Simply because you cannot know to which server you should connect. That’s why we will instruct Heartbeat to manage an extra ip-address and make that alive on the current primary server. When clients connect to this ip-address it will always work.
In the ‘haresources’ file you describe all services Heartbeat manages. In our case, these services are:
– service ip-address
– DRBD disk
– LVM2 service
– Two filesystems
– NFS daemons
Enter them in the order they need to start. When shutting down, Heartbeat will run them in reversed order.
vim /etc/ha.d/haresourcesEnter this configuration:
storage-server0.example.org \
IPaddr::10.10.0.10/24/eth0 \
drbddisk::redundantstorage \
lvm2 \
Filesystem::/dev/redundantstorage/web_files::/redundantstorage/web_files::ext4::nosuid,usrquota,noatime \
Filesystem::/dev/redundantstorage/other_files::/redundantstorage/other_files::ext4::nosuid,usrquota,noatime \
nfs-common \
nfs-kernel-server
Use the same Heartbeat configuration on both servers. In the ‘haresources’ file you specify one of the nodes to be the primary. In our case it’s ‘storage-server0’. When this server is or becomes unavailable, Heartbeat will start the services it knows on the other node, ‘storage-server1’ in this case (as specified in the ha.cf config file).
Wrapping up
DRBD combined with Heartbeat and NFS creates a powerful, redundant storage solution all based on Open Source software. When using the right hardware you will be able to achieve great performance with this setup as well. Think about RAID controllers with SSD-cache and don’t forget the Battery Backup Unit so you can enable the Write Back Cache.
Enjoy building your redundant storage!
Back in March I wrote a blog on how to create a network without a Virtual Router. I received a lot of questions about it. It’s also a question that pops up now and then on the CloudStack forums. In the meanwhile I’ve worked hard to implement this setup at work. In this blog I’ll describe the concept of working with a CloudStack setup that has no Virtual Router.
First some background. In Advanced Networking, VLAN’s are used for isolation. This way, multiple separated networks can exist over the same wire. More about VLAN technology in general on this wikipedia page. For VLAN’s to work, you need to configure your switch so it knows about the VLAN you use. VLAN’s have an unique id between 1 and 4096. CloudStack configures this all automatically, except for the switch. Communication between Virtual Machines in the same CloudStack network (aka VLAN) is done using the corresponding VLAN-id. This all works out-of-the-box.
It took me some time to realize how powerful this actually is. One can now combine both VM’s and physical servers in the same network, by using the same VLAN for both. Think about it for a moment. You’re now able to replace the Virtual Router with a Linux router simply by having it join the same VLAN(s) and using the Linux routing tools.
Time for an example. Say we have a CloudStack network using VLAN-id 1234, and this network is created without a Virtual Router (see instructions here). Make sure you have at least 2 VM’s deployed and make sure they’re able to talk to each other over this network. Don’t forget to configure your switch. If both VM’s are on the same compute node, networking between the VM’s works, but you won’t be able to reach the Linux router later on if the switch doesn’t know the VLAN-id.
Have a separate physical server available running Linux and connect it to the same physical network as your compute nodes are connected to. Make sure the ip’s used here are private addresses. In this example I use:
compute1: 10.0.0.1
compute2: 10.0.0.2
router1: 10.0.0.10
vm1: 10.1.1.1
vm2: 10.1.1.2
The Linux router needs two network interfaces: one to the public internet (eth0 for example) and one to the internal network, where it connects to the compute nodes (say eth1). The eth1 interface on the router has ip-address 10.0.0.10 and it should be able to ping the compute node(s). When this works, add a VLAN interface on the router called eth1.1234 (where 1234 is the VLAN-id CloudStack uses). Like this:
ifconfig eth1.1234 10.1.1.10/24 upMake sure you use the correct ip-address range and netmask. They should match the ones CloudStack uses for the network. Also, note the ‘.’ between the eth1 and the VLAN-id. Don’t confuse this with ‘:’ which just adds an alias ip.
To check if the VLAN was added, run:
cat /proc/net/vlan/eth1.1234It should return something like this:
eth1.1234 VID: 1234 REORDER_HDR: 1 dev->priv_flags: 1
 total frames received 14517733268
 total bytes received 8891809451162
 Broadcast/Multicast Rcvd 264737
 total frames transmitted 6922695522
 total bytes transmitted 1927515823138
 total headroom inc 0
 total encap on xmit 0
Device: eth1
INGRESS priority mappings: 0:0 1:0 2:0 3:0 4:0 5:0 6:0 7:0
 EGRESS priority mappings:
Tip: if this command does not work, make sure the VLAN software is installed. In Debian you’d simply run:
apt-get install vlanAnother check:
ifconfig eth1.1234It should return something like this:
eth1.1234 Link encap:Ethernet HWaddr 00:15:16:66:36:ee
 inet addr:10.1.1.10 Bcast:0.0.0.0 Mask:255.255.255.0
 inet6 addr: fe80::215:17ff:fe69:b63e/64 Scope:Link
 UP BROADCAST RUNNING MASTER MULTICAST MTU:1500 Metric:1
 RX packets:14518848183 errors:0 dropped:0 overruns:0 frame:0
 TX packets:6925460628 errors:0 dropped:15 overruns:0 carrier:0
 collisions:0 txqueuelen:0
 RX bytes:8892566186128 (8.0 TiB) TX bytes:1927937684747 (1.7 TiB)
Now, the most interesting tests: ping vm1 and vm2 from the linux router, and vice versa. It should work, because they are all using the same VLAN-id. Isn’t this cool? You just connected a physical server to a virtual one! 🙂
You now have two options to go from here:
1. Use a LoadBalancer (like Keepalived) and keep the ip’s on the VLAN private using Keepalived’s NAT routing. The configuration is exactly the same as if you had all physical servers or all virtual servers.
2. Directly route public ip’s to the VM’s. This is the most interesting one to explain a bit further. In the example above we’ve used private ip’s for the VLAN. Imagine you’d use public ip addresses instead. For example:
vm1: 8.254.123.1
vm2: 8.254.123.2
router1: 8.254.123.10 (eth1.1234; eth1 itself remains private)
This also works: vm1, vm2 and router1 are now able to ping each other. A few more things need to be done on the Linux router to allow it to route the traffic:
echo 1 > /proc/sys/net/ipv4/ip_forward
echo 1 > /proc/sys/net/ipv4/conf/eth1/proxy_arp
Finally, on vm1 and vm2, set the default gateway to router1; 8.254.123.10 in this example.
How does this work? The Linux router also answers arp requests for the ip’s in the VLAN. Whenever traffic comes by for vm1, router1 answers the arp request and routes the traffic over the VLAN to vm1. When you’d run a traceroute, you’ll see the Linux router appear as well. Of course you need to have a subnet of routable public ip’s assigned by your provider for this to work properly.
To me this setup has two major advantages:
1. No wasted resources for Virtual Routers (one for each network)
2. Public ip’s can be assigned directly to VM’s; you can even assign multiple if you like.
The drawbacks? Well, this is not officially supported nor documented. And since you are not using the Virtual Router, you’ll have to implement a lot of services on your own that were normally provided by the Virtual Router. Also, deploying VM’s in a network like this only works using the API. To me these are all challenges that make my job more interesting 😉
I’ve implemented this in production at work and we successfully run over 25 networks like this with about 100-125 VM’s. It was a lot of work to configure it all properly and to come up with a working solution. Now that it is live, I’m really happy with it!
I realize this is not a complete step-by-step howto. But I do hope this blog will serve as inspiration for others to come up with great solutions build on top of the awesome CloudStack software. Please let me know in the comments what you’ve come up with! Also, feel free to ask questions: I’ll do my best to give you some directions.
Enjoy!
After the leap second insert last night, my CloudStack 3.0 servers (or its Java processes actually) started to use a lot of CPU. Here’s how to fix it (sets the date):
date ; date -s "`date -u`" ; dateJust run this on your management- or compute node. On my CloudStack system it only occurred on the management servers. Confirmed: it occurred both on management- and compute nodes on our CloudStack system. No restart required afterwards . The load will drop immediately.
Note: restarting cloud-management alone does not fix the issue. Rebooting the machine does, however, but I’d prefer not to reboot them 🙂
MySQL seems to be affected as well, though I didn’t experience problems with it. Thanks to the guys @Mozilla for blogging about this problem and suggesting a fix.
I’ve also posted this to the CloudStack forums,so there might be some discussion as well.
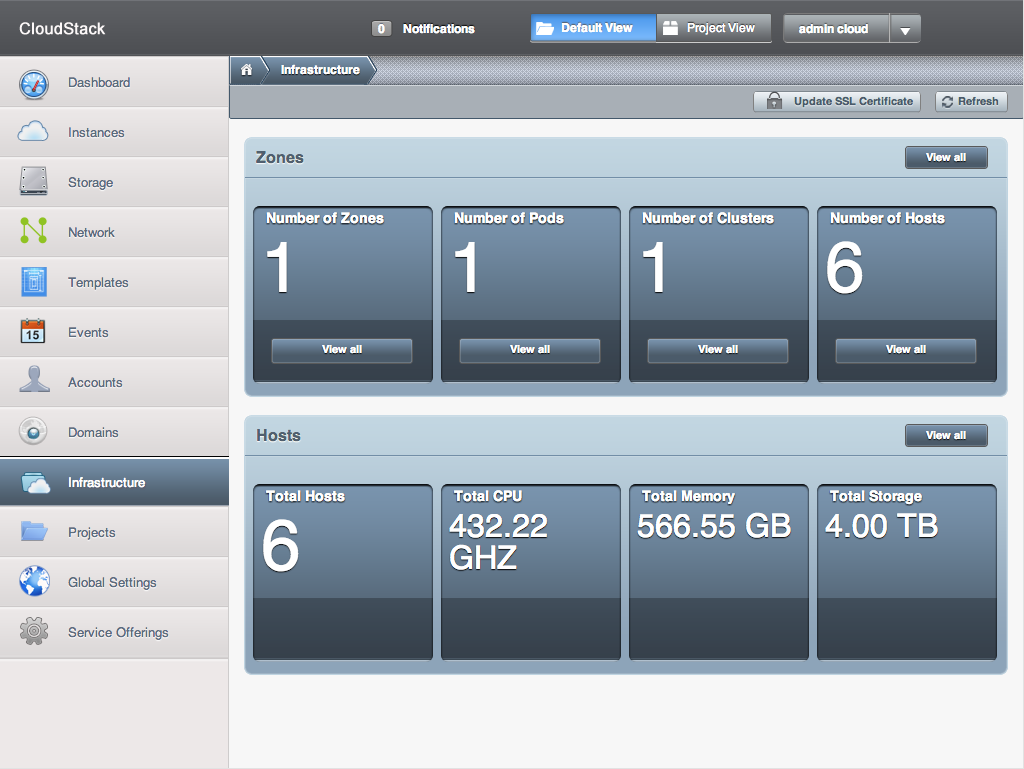
This is what our Cloud looks like in the CloudStack Dashboard. Pretty powerful 🙂
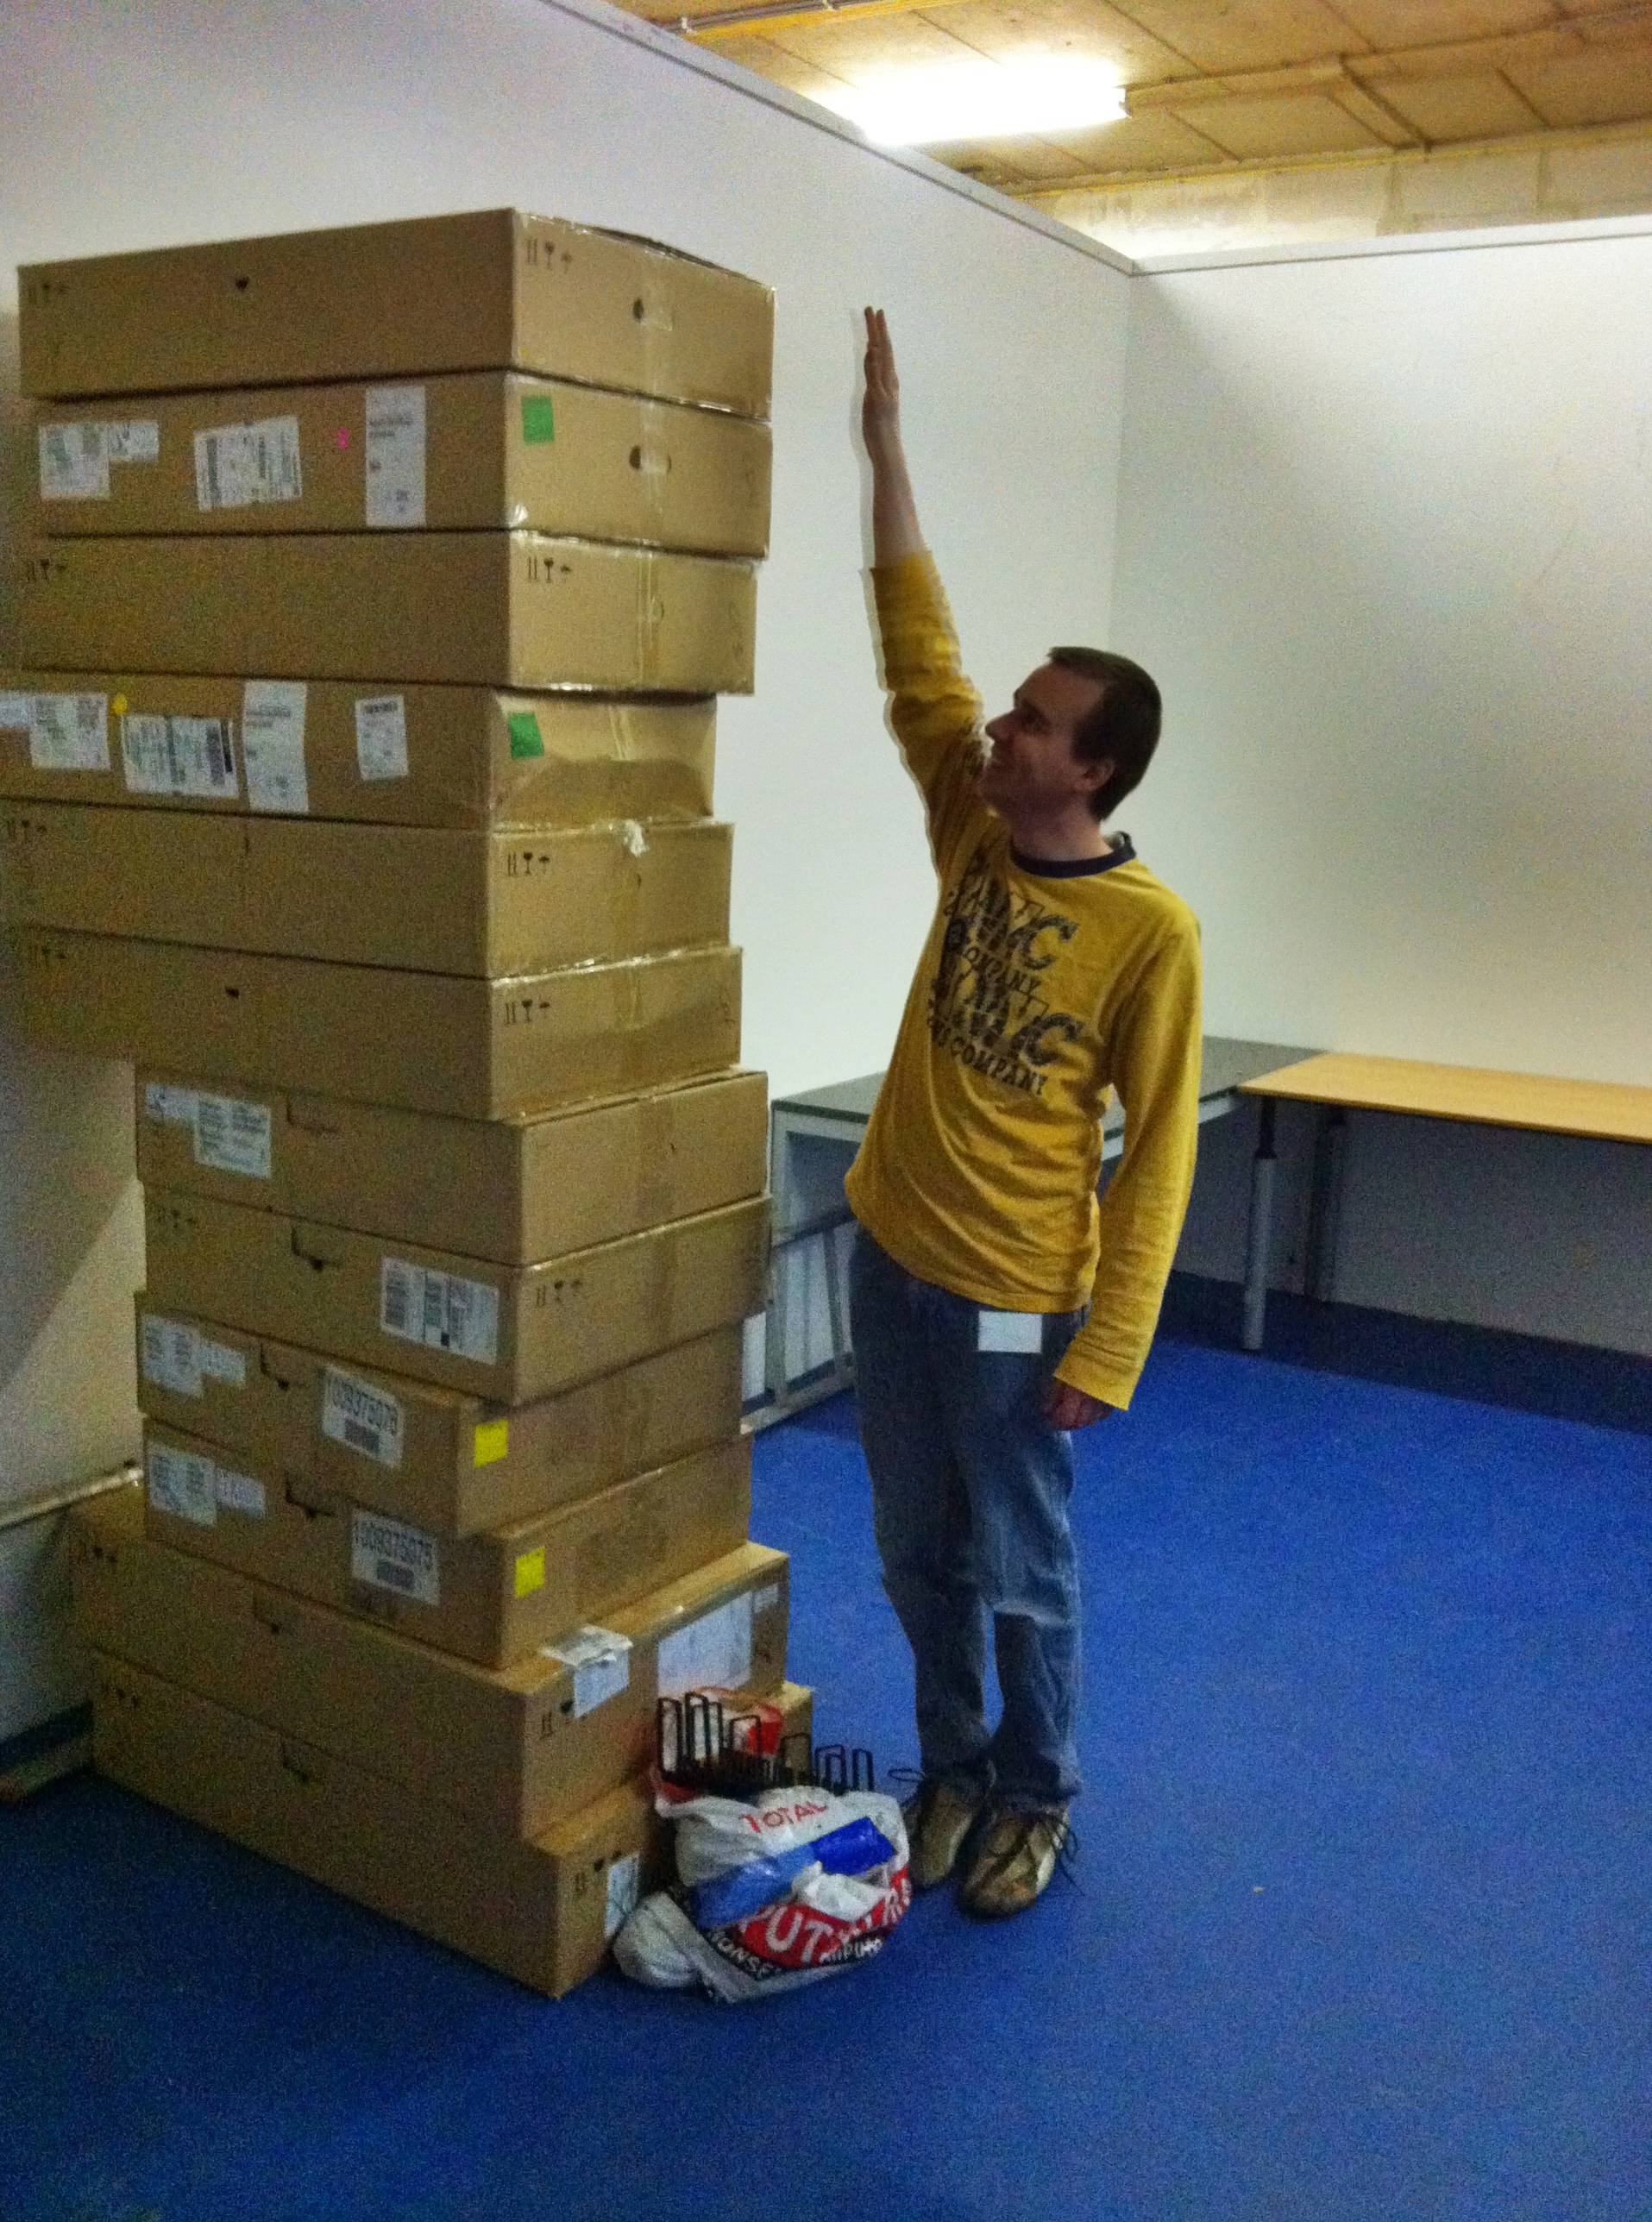
These are the boxes the hardware was in.
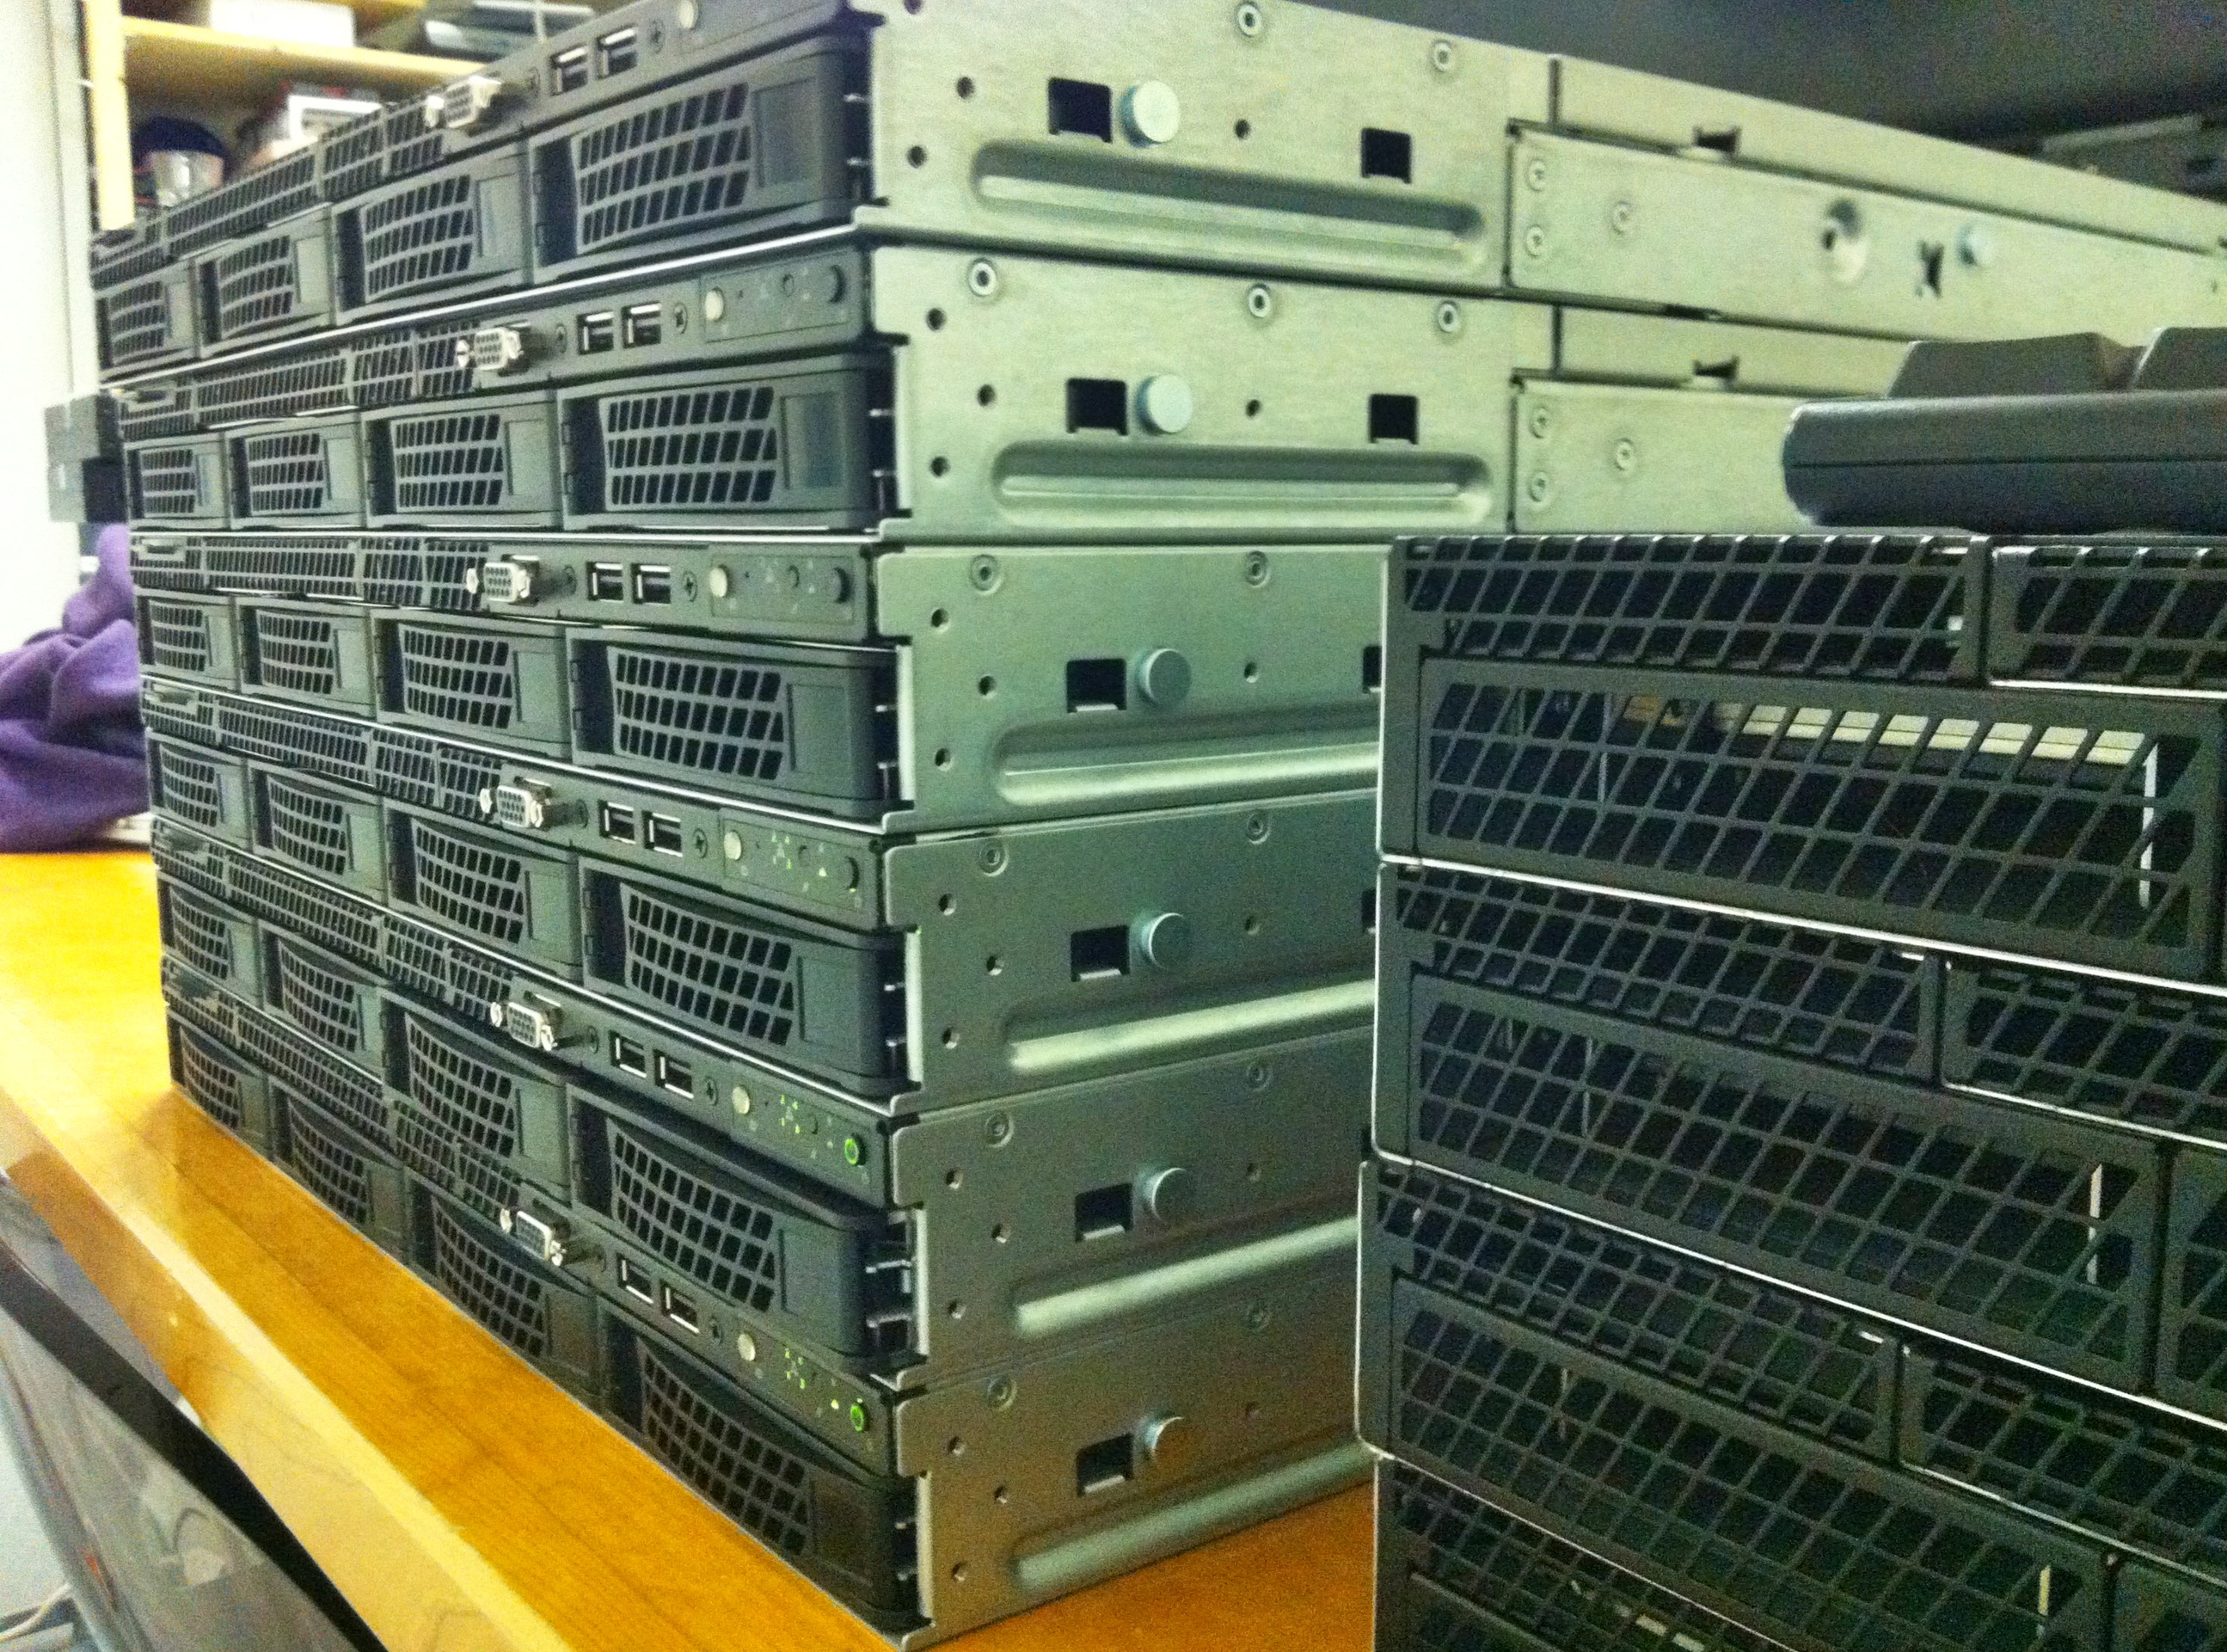
This image is taken in our lab while testing CloudStack.
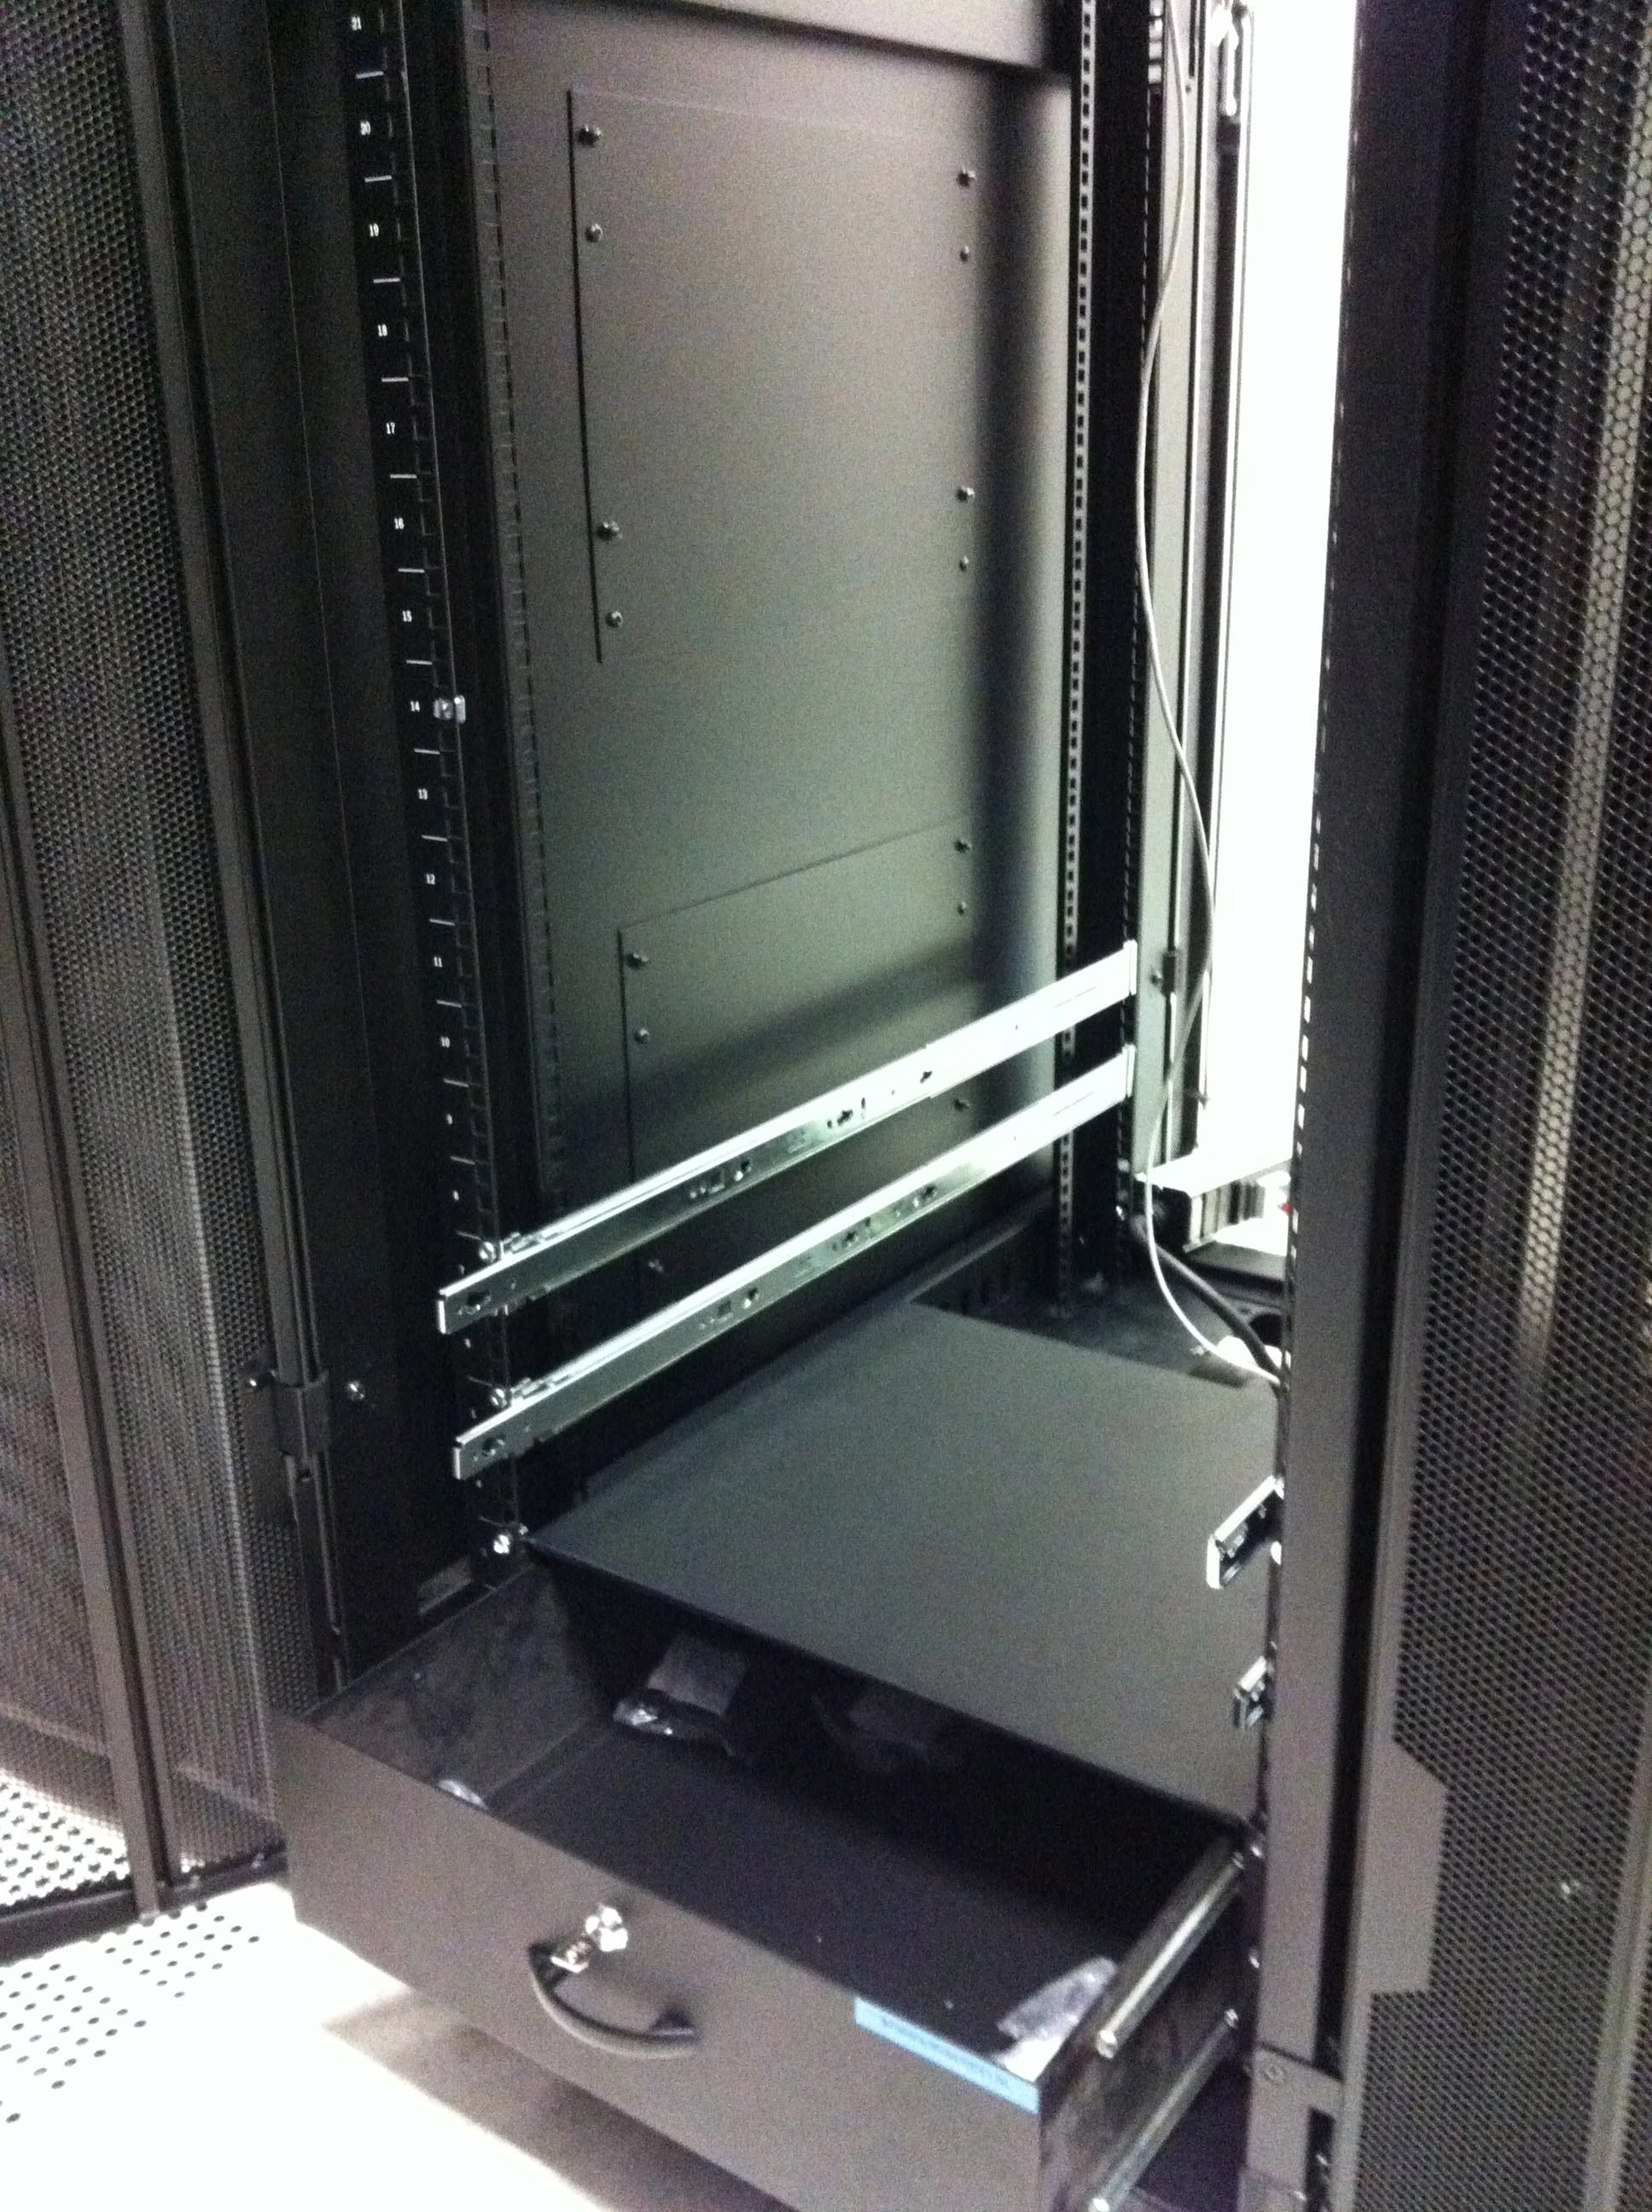
Very handy: a tray for spares in your rack!
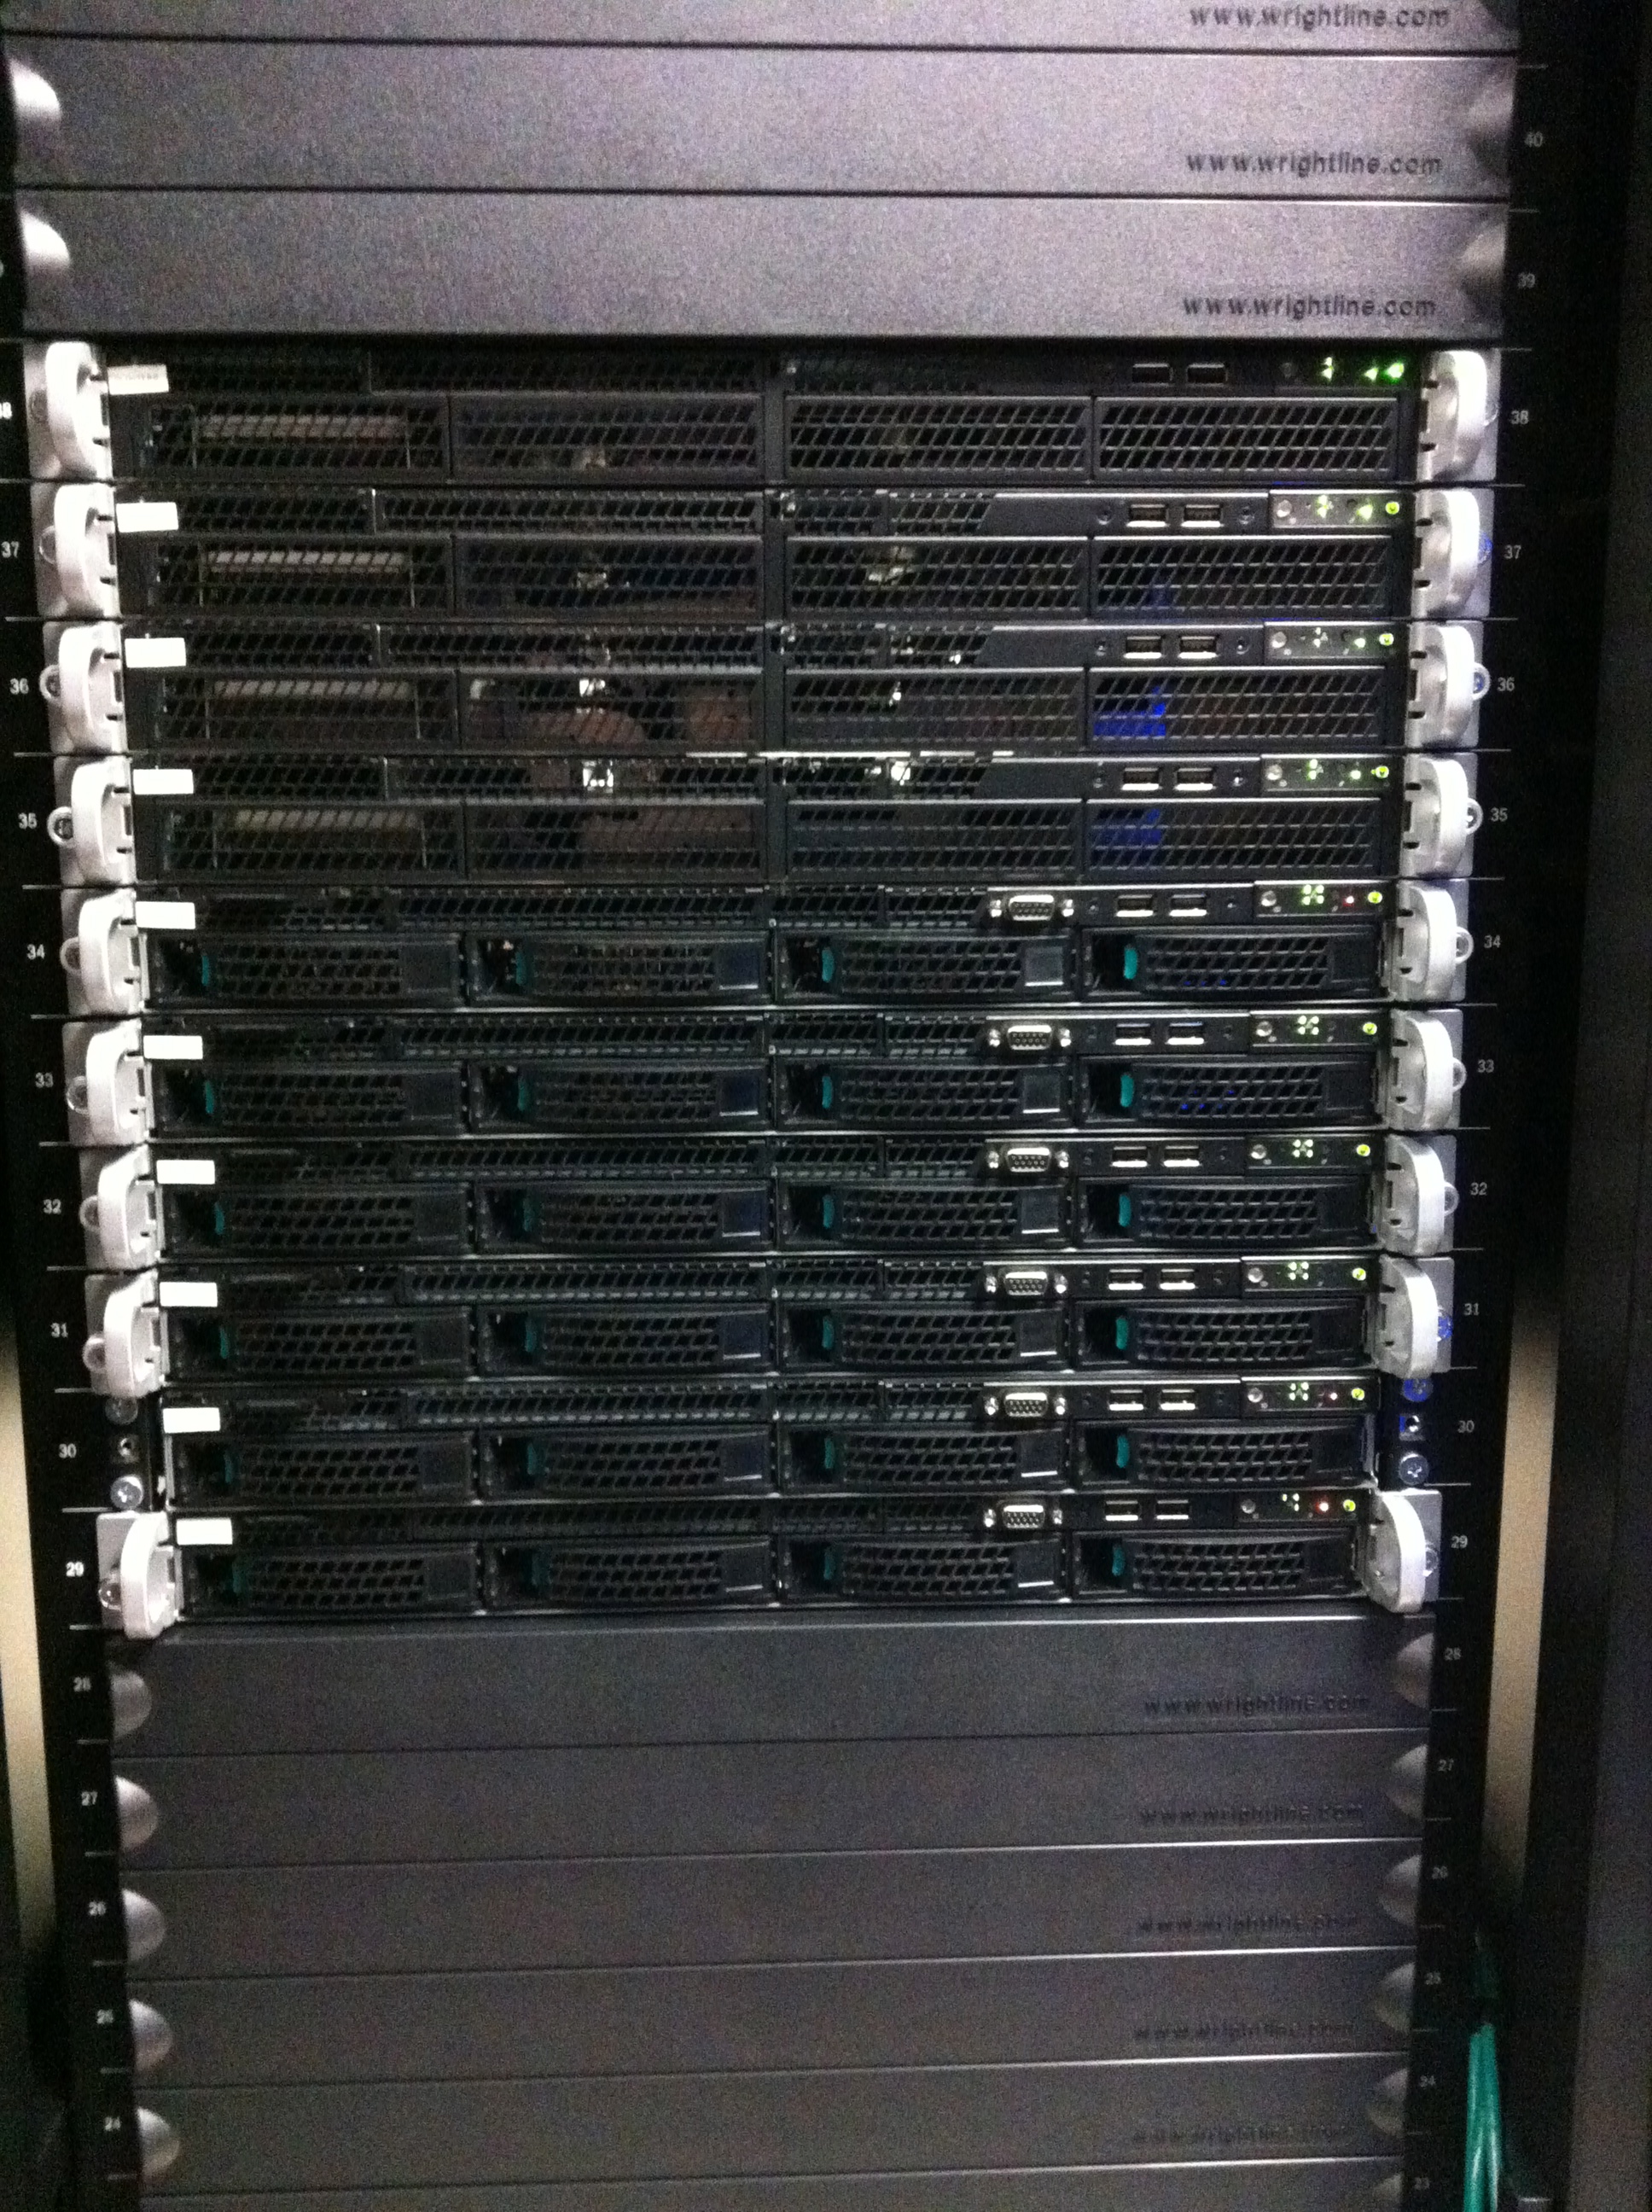
This is the front: 6 compute nodes, 2 management servers and 2 Linux routers that manage all traffic. We also have 2 big storage servers that you cannot see on this image.
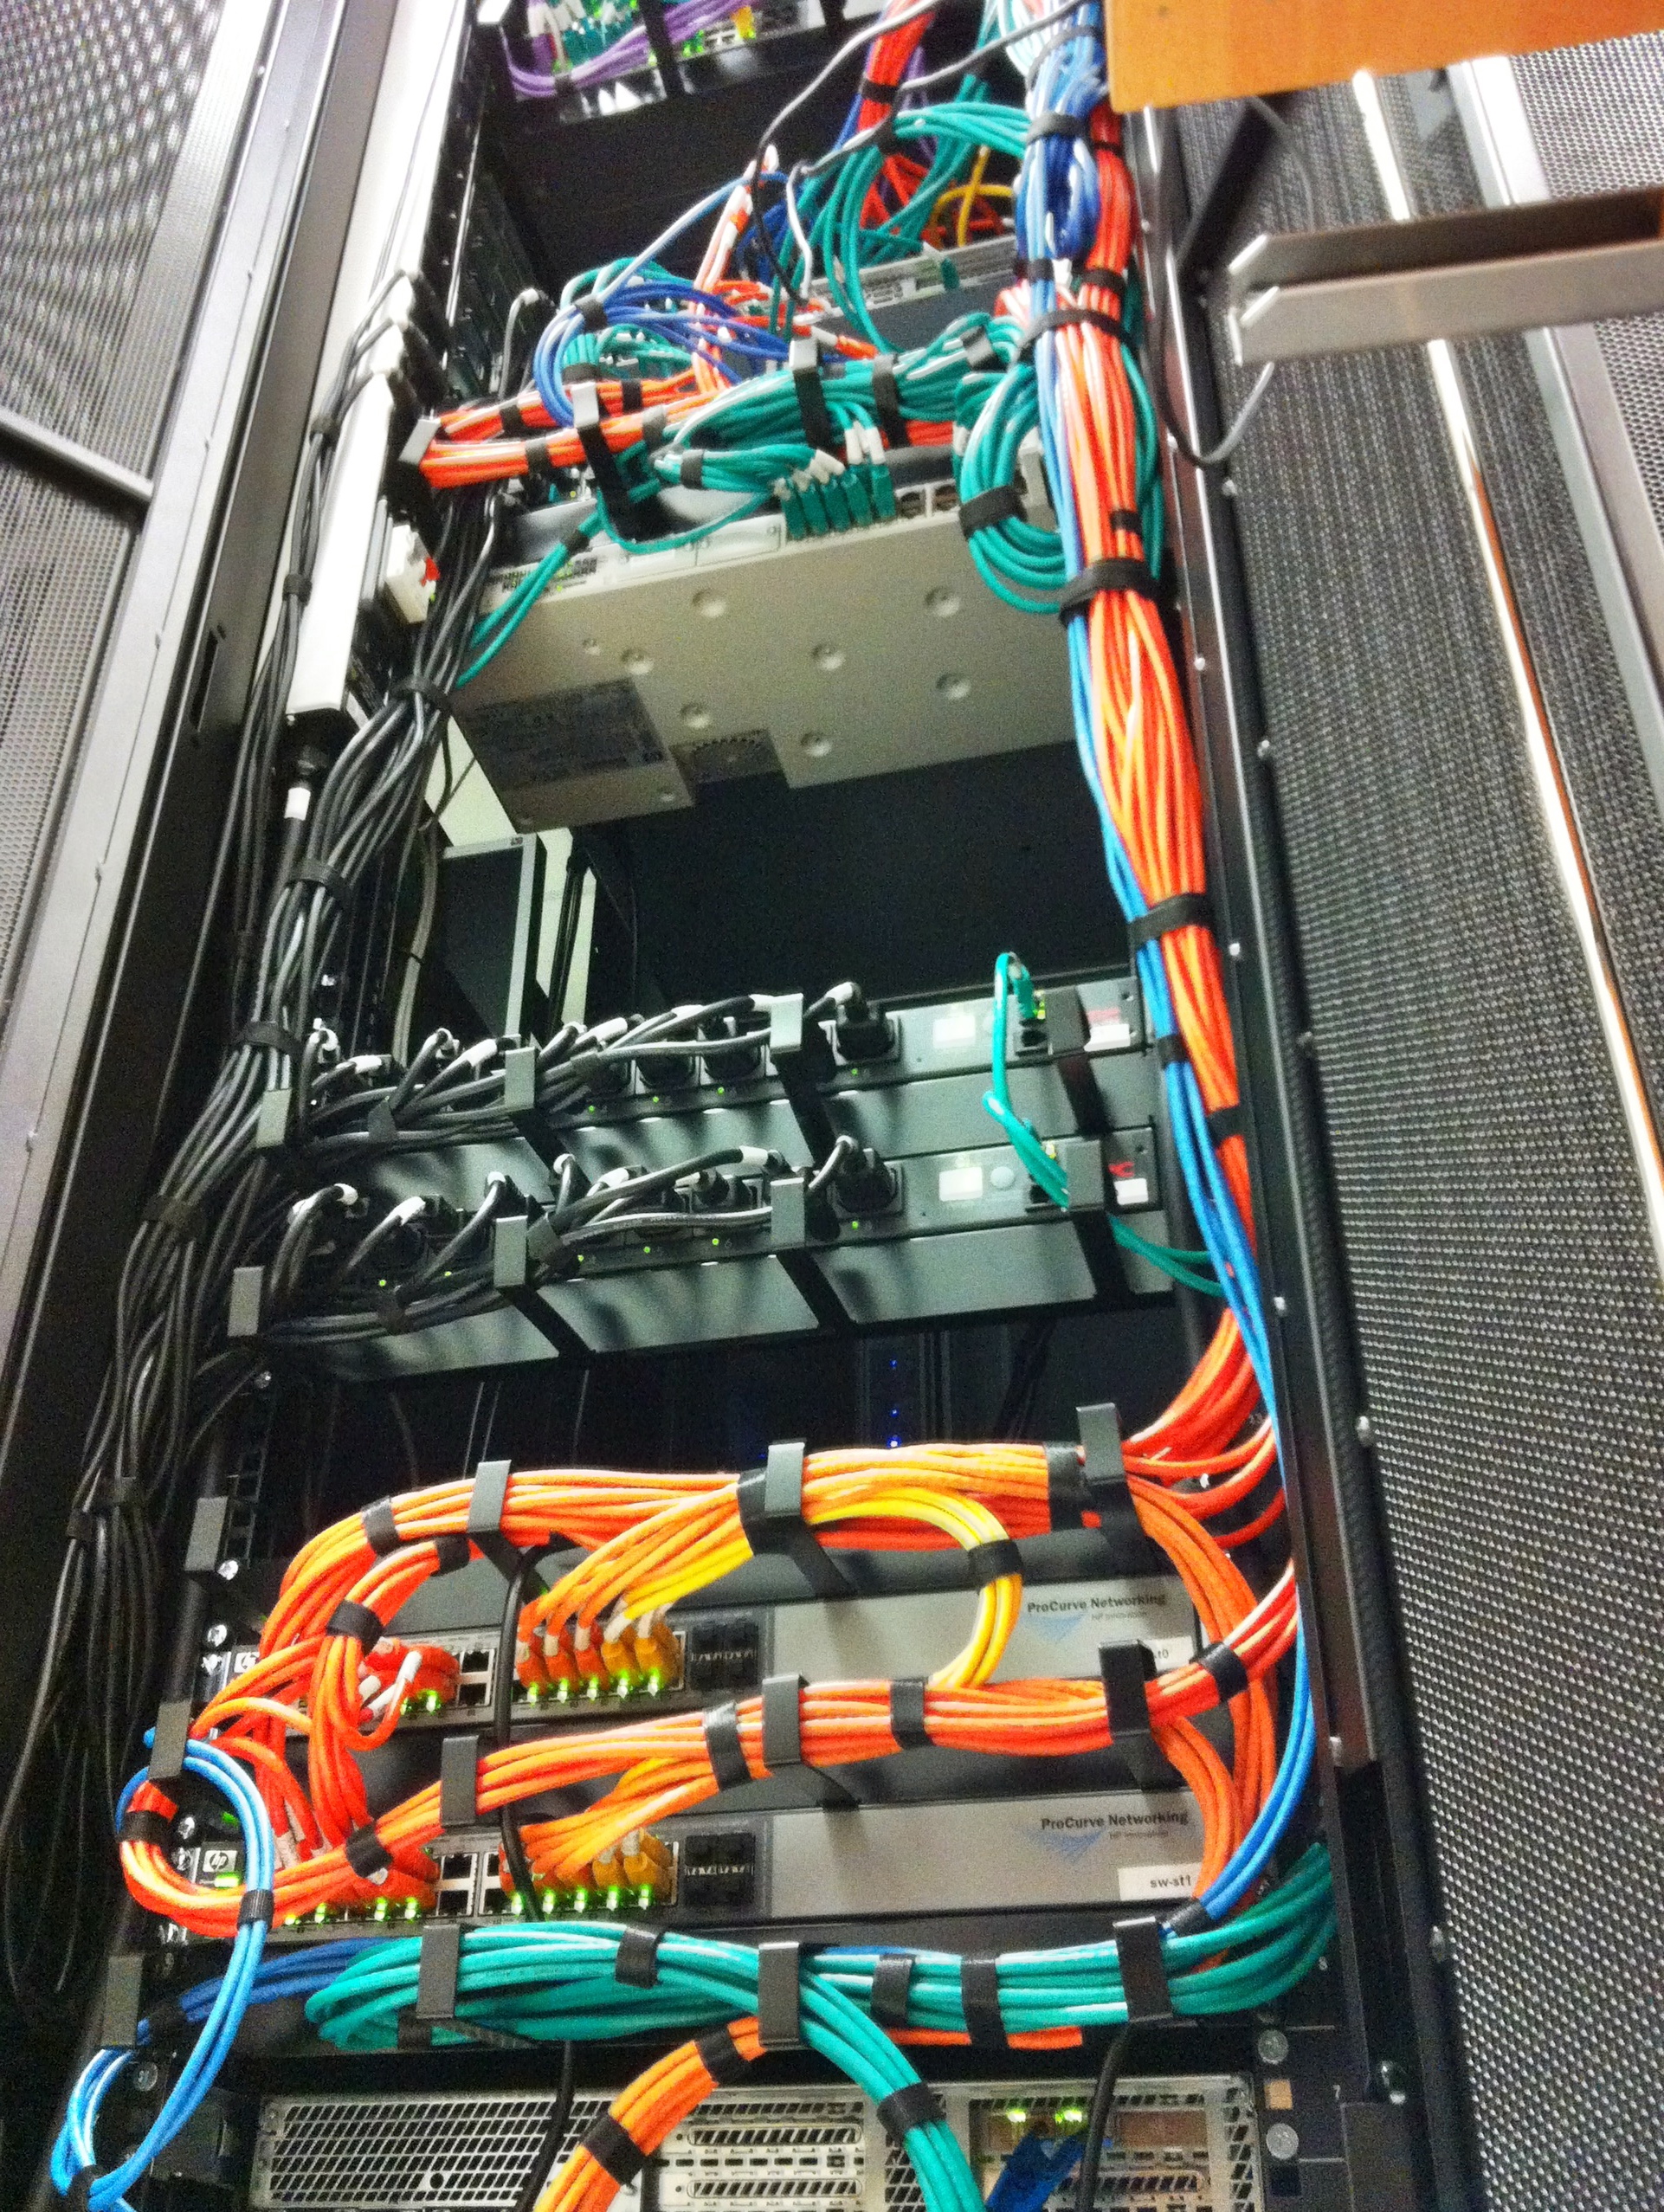
This is how the back of the rack in the data center looks like after we’ve built everything in.
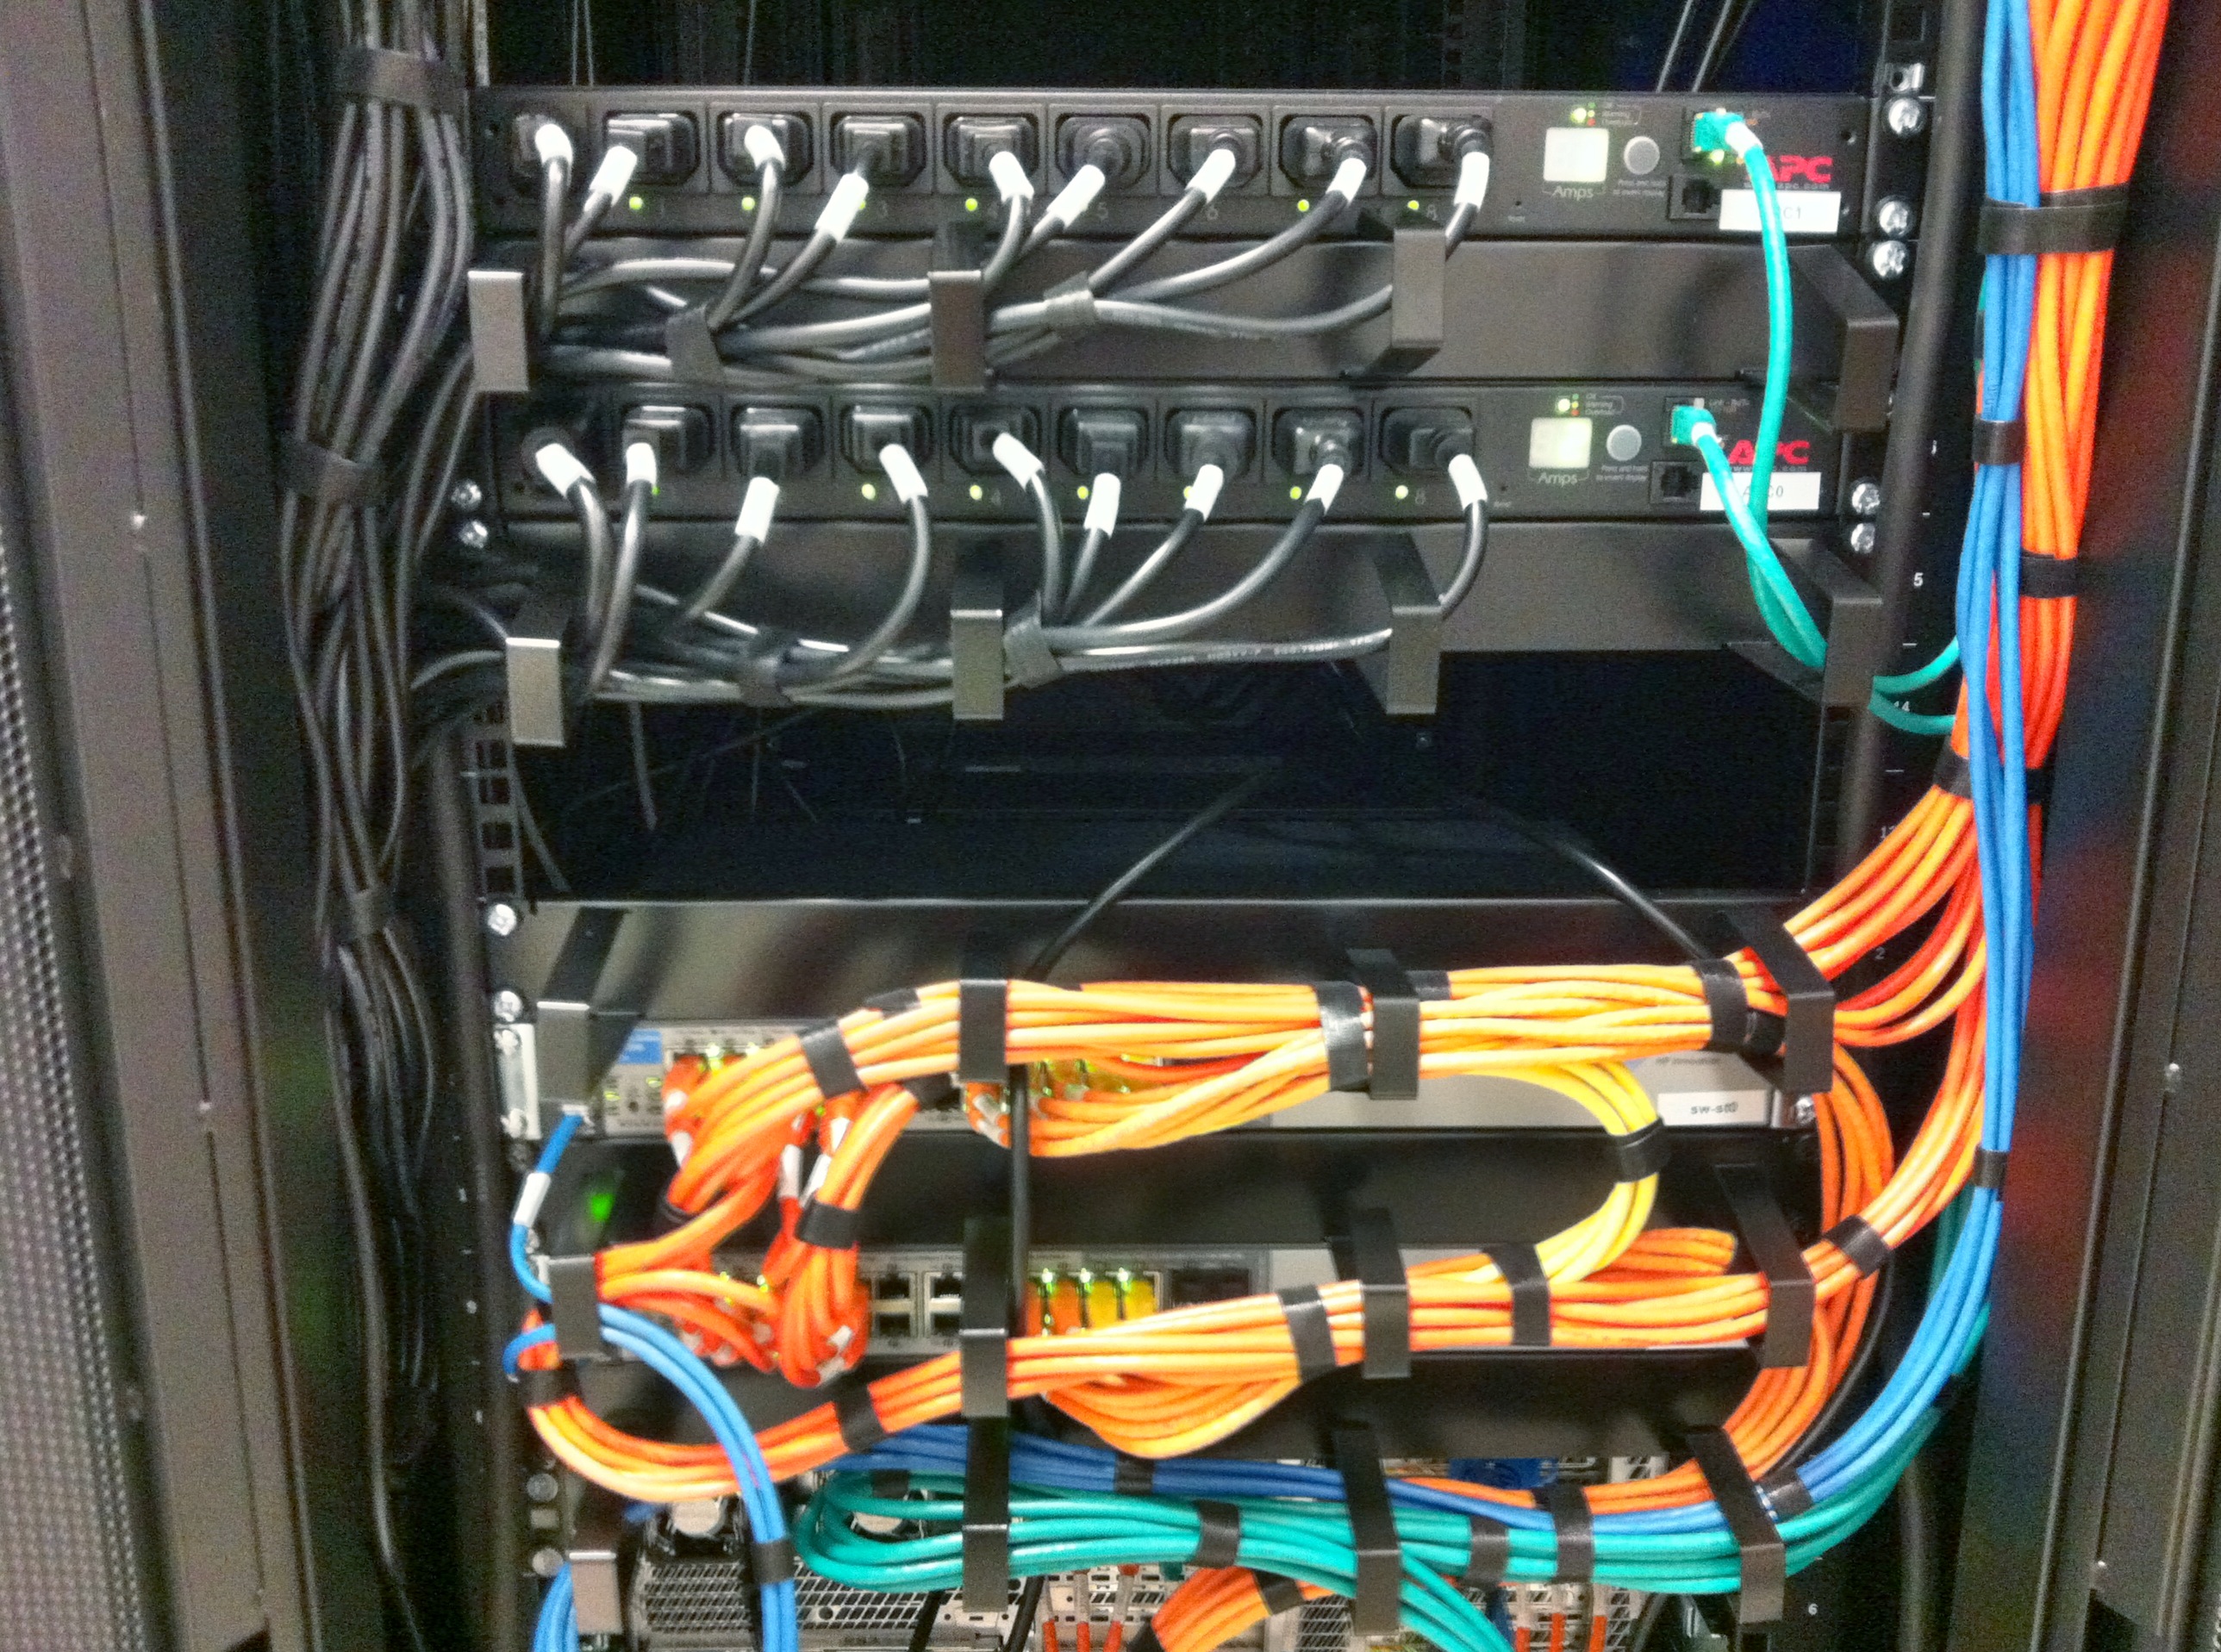
Close up of power management and storage network.
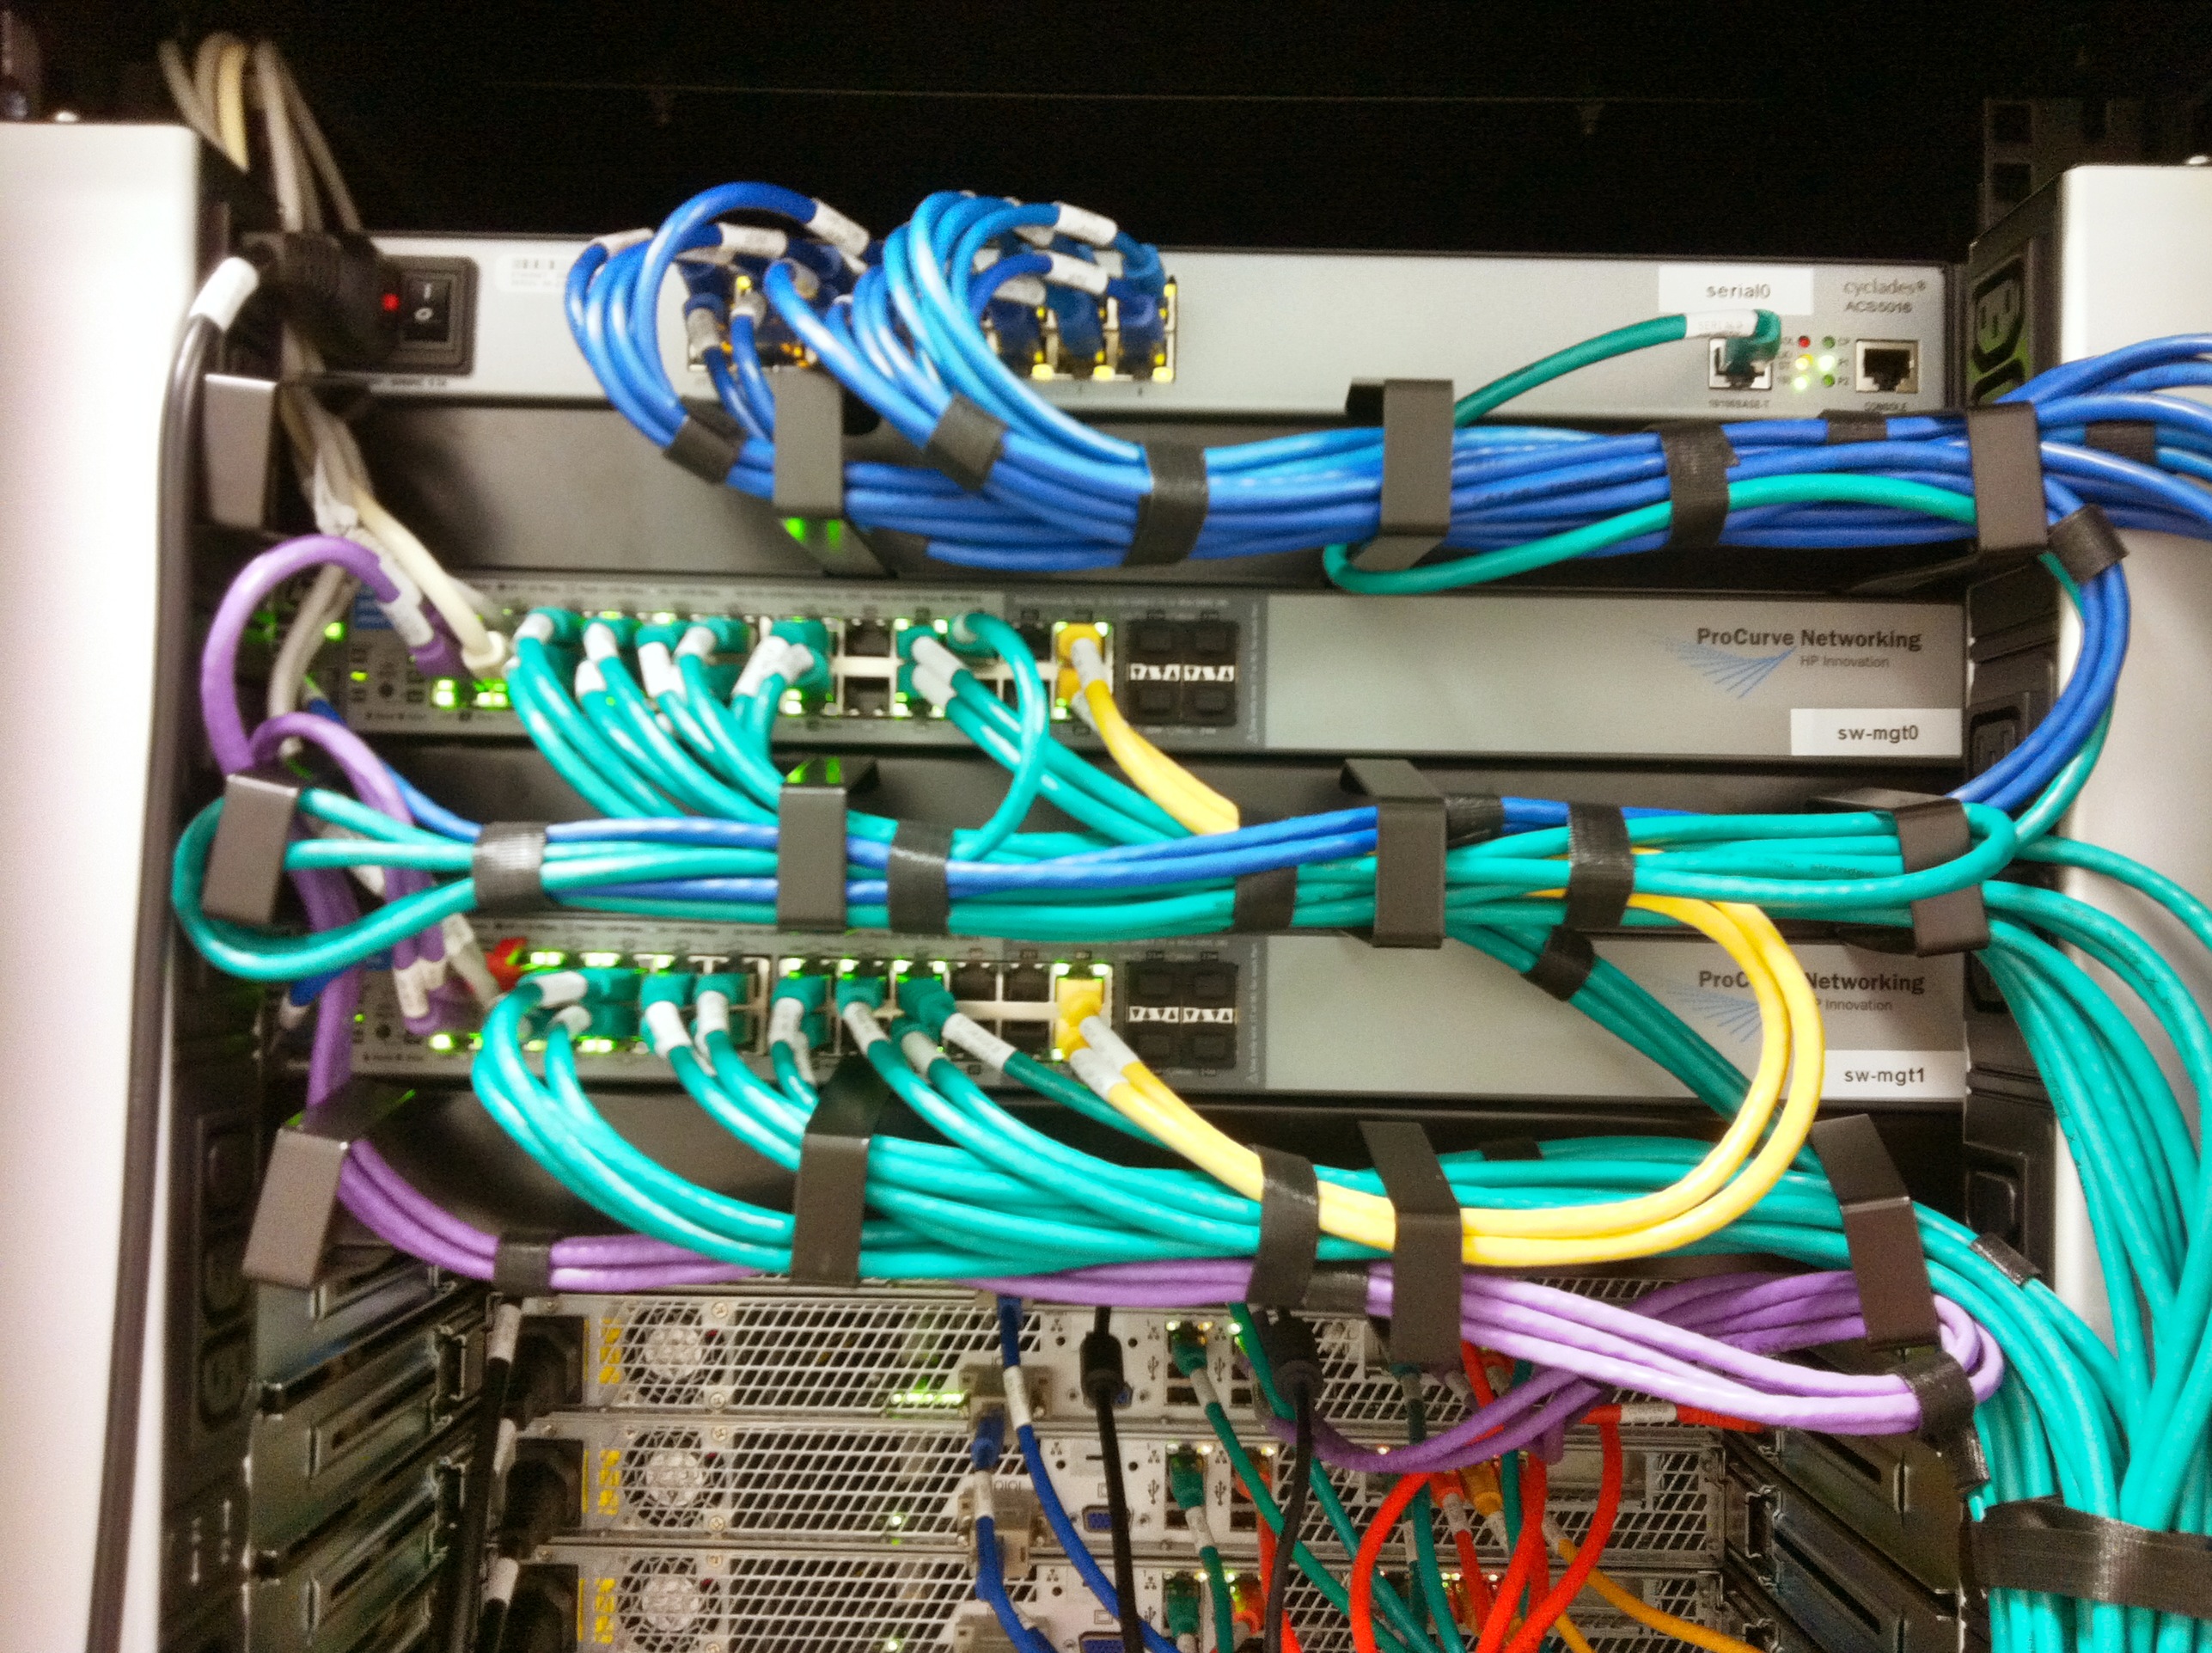
And the final image shows the serial, public, and manage networks.
We’ve labelled and documented every cable and used a separate color for each connection type (i.e. mgt network, storage network, uplinks, cross links, serial connections, etc).
I’m using CloudStack for some months now and our cloud is close to going live. It’s an awesome piece of software that is just rock solid :-). One thing I couldn’t really find is how to create high available management servers with automatic failover. I’ve come up with a solution that I’ll share in this blog post.
From the CloudStack manual:
The CloudStack Management Server should be deployed in a multi-node configuration such that it is not susceptible to individual server failures. (…) MySQL may be configured to use replication to provide for a manual failover in the event of database loss.
Of course, when building a cloud one cannot just have one management server, as that would create a big single-point-of-failure . Even though there is no impact on already running VM’s, you and your customers, for example, won’t be able to stop and start VM’s. The manual suggests looking into “MySQL replication” and when problems occur, “manually failover” to another server.
How does that work? The management server itself is stateless, which means you can have two management servers and if you’d issue a command to either of them, the result would be the same. You can distribute the load, it just doesn’t matter which management server you’ll talk to. So there’s no master nor slave: they’re just all the same. The challenge is where CloudStack stores its data: in a MySQL server. We should have one MySQL master server that handles the requests from the management servers. MySQL supports replication, which means you can add MySQL slave servers that would just stay in sync with the master using the binary logs. You cannot query them directly, that’s what the master is for. When the master dies, you can promote a slave to be the new master. But this is a manual step to take.
Personally, I’d like to automate this. Further more, my experience with MySQL master/slave in the past, is that it isn’t rock solid. Sometimes slaves would get out of sync due to some error. You at least need some monitoring to warn you when this happens. It is almost always possible to fix this, but again this is manual work and I was looking for an automatic solution. So I came up with an alternative..
Since 2005 I’m building Linux clusters at work for our webhosting and e-mail business. Using Open Source techniques, that is. One of the things I’ve been using for years is DRBD. You can think of DRBD as a network based RAID-1 mirror. Using a dedicated high speed network (Gigabit or better), DRBD keeps two disks in sync. Using another Open Source tool, Heartbeat, one can automatically fail-over from one server to another and keep the service online. Heartbeat and DRBD have a sub-second failover and in case of a complete (power) failure of the hardware, the automatic failover takes just 10 seconds. Now that’s cool!
How can this help solve the management server issue? Imagine two management servers, that use DRBD to keep a given disk in sync. This disc is mounted on /var/lib/mysql on the management server that is primary. It is not mounted on the secondary management server. Heartbeat makes sure MySQL is only run on the primary server. To make it all easy to manage, Heartbeat also takes care of an extra ip-addres that is always mounted on the primary server. We call this the “virtual ip-address”. It looks like this:
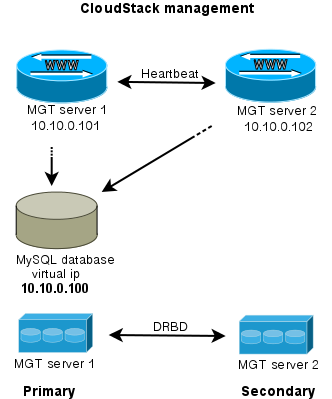
Wat do we have then? Two management servers, both run the CloudStack management software and can be used to visit the webserver, call the API etc. Both management servers use the MySQL server which is run on the primary server. Tell CloudStack to use the “virtual ip-address” as MySQL host address. DRBD will make sure the stand-in server has an up-to-date version of the MySQL disk.
If the secondary server dies, nothing happens apart from losing redundancy. What if the primary server fails?
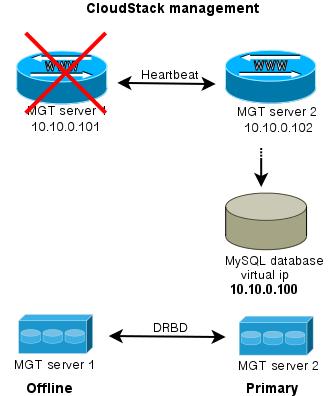
When either server goes offline, the MySQL disk and MySQL service is run on the server that is still alive. Of course also the CloudStack management is still available then. This way, you have an automatic failover for the CloudStack management server.
To extend this setup, one could easily setup a loadbalancer that distributes the traffic between the management servers. Both keepalived and haproxy can do that for you.
I hope this brings some inspiration to others working with CloudStack. If you’ve suggestions, questions or improvements let me know!
Lately I’ve been coding to automate the deployment of Virtual Machines that will run in our cloud. It’s inspired by blogs and code from Jason Hancock but implemented in a different way to meet our specific needs. Since CloudStack has a very flexible API, you can make it do anything you want. It works pretty cool so far.
From a command line script we can deploy a new VM with a certain “role”. This role has a name, like “web server” or “test-vm-db” and contains the OS template name, the datacenter name, the networks to connect to, the hardware offering (CPU/Memory/Disk) and the account and domain to use. These are all CloudStack specific settings. When calling the deployVirtualMachine() API command, CloudStack will create a VM with exactly these specs. We use a simple php cli script to add a new server, like this:

Result:
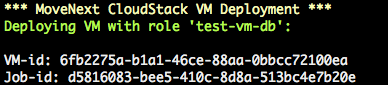
Since it is in a specific domain (defined by the role), other users in that domain can “see” and work with the new VM immediately. When you deploy for a client, they will “see” the new VM like this:
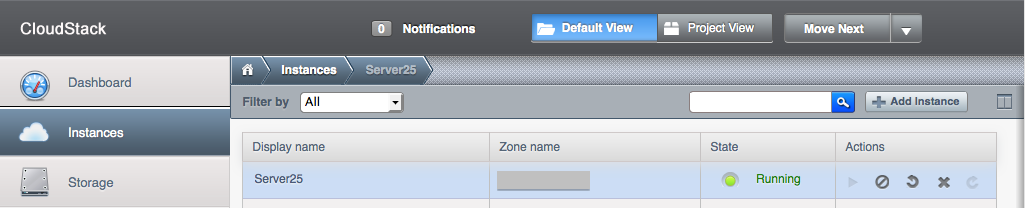
When the VM boots, it is receives its role name, “web server” for example, and sends this info to Puppet. This way, Puppet knows how to configure the new VM. It will do so and when it’s finished you have an exact same “web server” as the others. Run the script again and you’ll have another one. Puppet does not only do initial configuration, it will make sure the configuration stays consistent across the all servers it manages. When you want to change a setting, Puppet distributes it and makes sure it’s the same on all servers. All automatically!
Imagine the power behind this concept. All of a sudden you can create a script that can deploy a new web server in just minutes. Now even the loadbalancer itself can spin up a new web server to handle the higher load it receives. Or destroy a web server when there are too many idle web servers. That’s what you call elastic!
What you need to build this yourself is:
1. PHP CloudStack Client (to talk to CloudStack from PHP)
2. CloudStack API docs
3. Script to grab meta-data when VM has booted
Please see Jason Hancock‘s blog for some working examples of how he implemented it. As I said, CloudStack’s API is very flexible. But you can even extend the API, if you want to go further. Thanks for the inspiration Jason!

 | Lukas F. on Home-key in OSX-Terminal |
| Ryan Ziegler on Forwarding a local MySQL socket to a remote MySQL server |
 | Robin on HOWTO quickly add a route in Mac OSX |
| Robert K. on HOWTO remove null characters from a file |
| Dirk on Alt-key in OSX-Terminal |
| Mohammad on Alt-key in OSX-Terminal |
 | Mc.Sim on RRDtool: moving data between 32bit and 64bit architectures |
 | Bertl on HOWTO solve OpenLDAP bdb_equality_candidates errors |
 | Shashi on Setting locales correctly on Mac OSX Terminal application |
 | Sayling Low on Alt-key in OSX-Terminal |
 | Roger on Setting locales correctly on Mac OSX Terminal application |
 | belwardblog on HOWTO discover the ip address of a Raspberry Pi |
 | Guilherme Caeiro Dias on Setting locales correctly on Mac OSX Terminal application |
| Terminal Show Multiple Languages – Config9.com on Setting locales correctly on Mac OSX Terminal application |