Posts

When building new computer infrastructure, I find it important to label and document everything properly. This will help you in an emergency, especially if you are not on site and need to instruct someone on the phone. Apart from that, todays infrastructure is quite complex and one cannot remember everything by head. This blog post describes what we used when building our Cloud infrastructure.

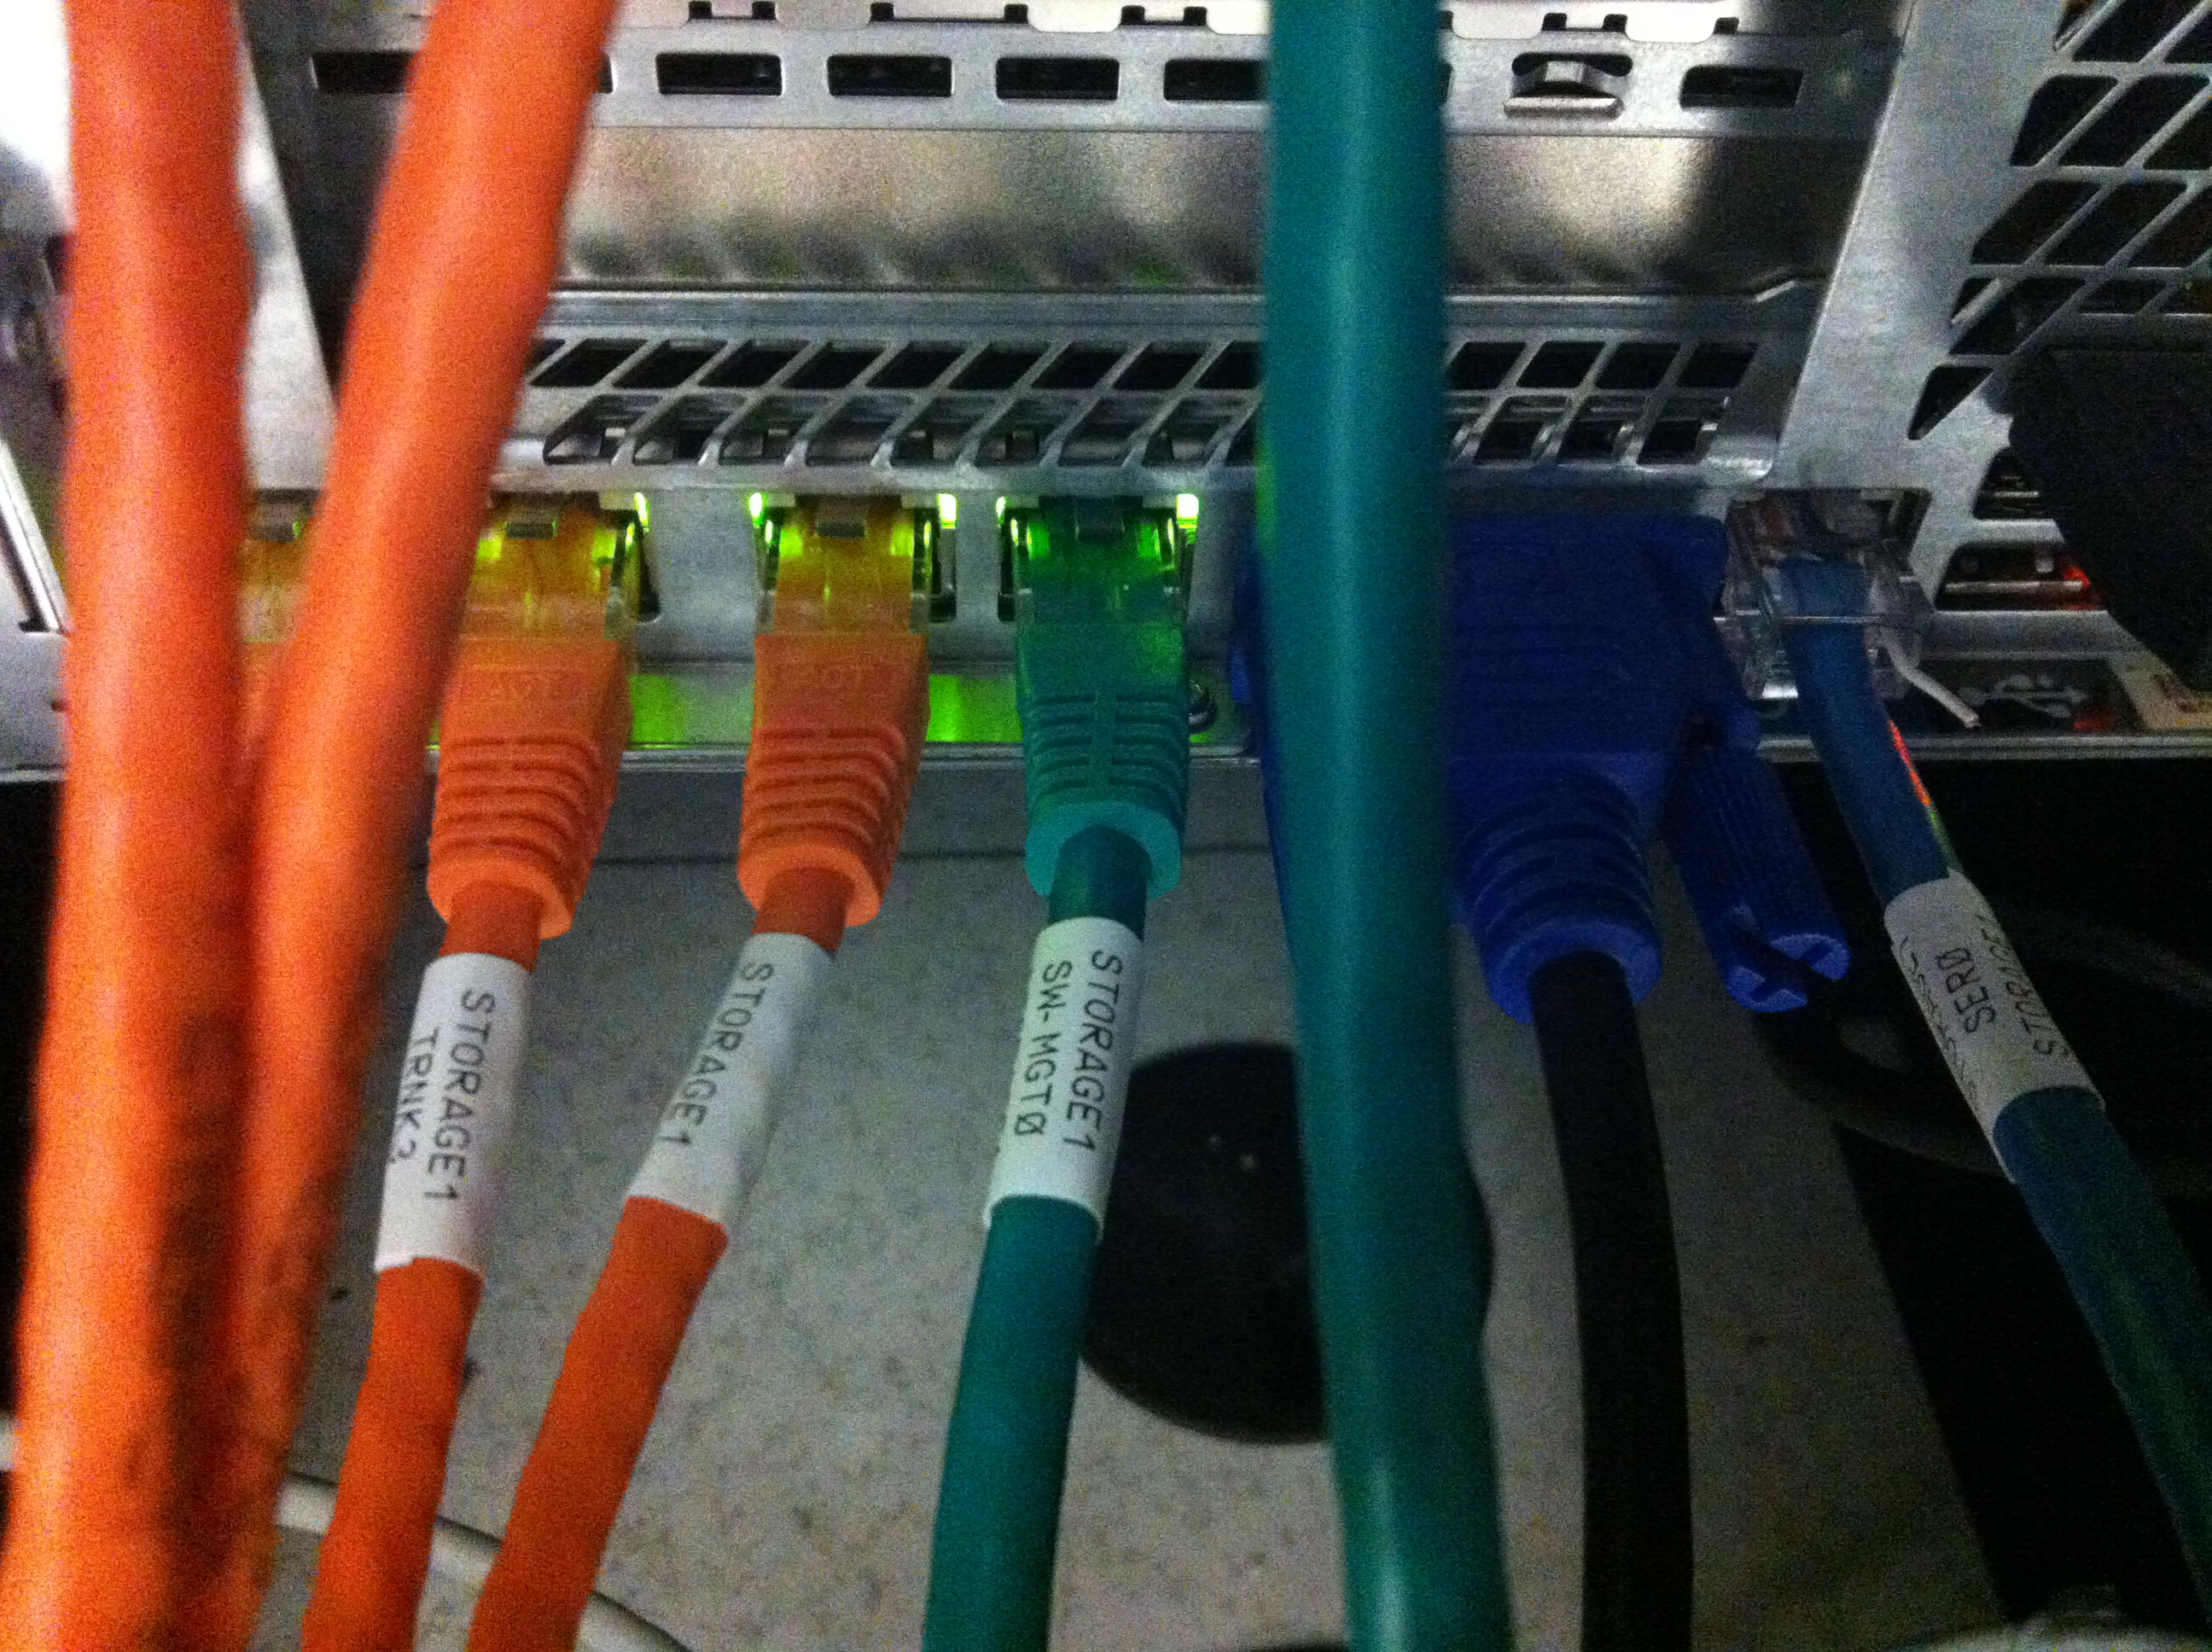
First of all, use a separate cable color for each type of connection. We used, for example, different colors for ‘storage’, ‘management’, ‘serial’ and ‘public’ traffic types. This gives a quick overview of the different cables that are in use. Make sure colors are unique, so don’t use black if you’re using black power cables.

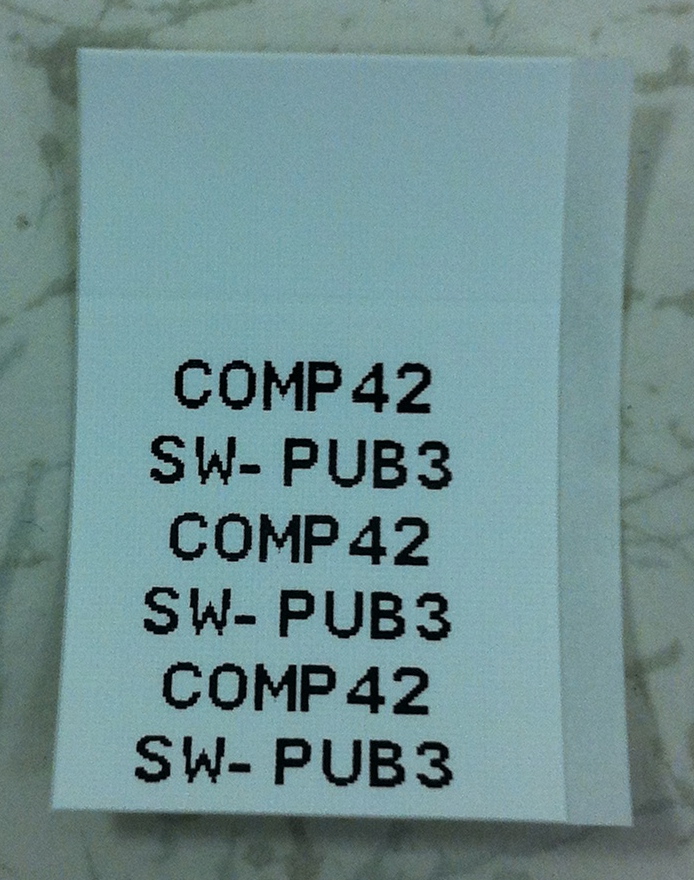
The color of the cable is the first distinction, to be even more specific we’ll label every cable as well. Most sys admins know that labeling cables in a data center is not as easy as it seems: the heat and ventilation will eventually make the labels fall off. With this in mind we’re looking for a solution.. Brady BMP21 to the rescue!

The BMP21 has a keyboard and let’s you enter any description you want. When printing, it produces a label that you can wrap around the cable. This way, the label is very solid connected to the cable and will not fall off.

As you can see in the image, it prints the two lines entered on the Brady multiple times. You can wrap the label around the cable and read what’s on it very easy. This also means you won’t have to pull off the cable to be able to read its label. Smart thinking!

An example of cables we labelled with the BMP21

As you can see it works very well and looks pretty good as well. I’m really satisfied with the device and the labels it produces!

Changes to production systems should be tested on a development system and then be deployed using configuration management (such as Puppet), if you ask me. Sometimes I first run commands by hand (on a test system) to find out the right ones, the right order, etc. In those cases I find it useful to automatically document what I type and be able to ‘replay’ it later on.

Why? Because when I write the Puppet configuration needed to deploy the change, I want to be sure all manual commands I ran make it to the Puppet manifest. Being able to replay what I did allows me to do so with ease.

Here’s how to record your key strokes using the ‘script’ Linux utility:


script change1234.script -t 2> change1234.timing

The ‘script’ utility logs all commands you enter to the file ‘change1234.script’. Furthermore it saves the timing data to a file called ‘change1234.timing’. Beware that everything is saved, including errors and typo’s.

The timing data allows to replay the script using the same timing as when the session was recorded. It gives a good representation of what happened. To replay, simply run:


scriptreplay change1234.timing change1234.script

You can replay it as many times as you like.

The .script and .timing files are just plain text files. This means you can ‘grep’ them to quickly find commands. For example, to display the ‘sed’ commands you used:


grep sed change1234.script

As you can see, saving (and documenting) your commands is easy and offers some nice features. It even allows you to forget what exactly you did… 😉

It just came to my attention that a vulnerability in Apache CloudStack was discovered, as John Kinsella writes in his post to the Apache CloudStack dev-mailinglist.

A malicious user could, for example, delete all VMs in the system. Addressing this issue is especially important for anybody using CloudStack in a public environment.

The vulnerability report has an easy work-around that I will mention here as well:


mysql -p -u cloud -h mgt-server-ip
update cloud.user set password=RAND() where id=1;
\q

Hugo Trippaers of Schuberg Philis discovered this issue. Thanks for sharing!

One-liner: restore compressed MySQL backup

— 20,531 views — 2 Comments

One-liners are always fun. Linux has pipes, streams and redirects which you can combine to do many things in just one line. Today I had to restore a MySQL backup that was gzipped. Instead of typing:


gunzip db-backup.sql.gz
mysql -p -h db.example.com dbname < db-backup.sql

You can type this instead:


gunzip < db-backup.sql.gz | mysql -p -h db.example.com dbname

The .sql.gz file is input to gunzip, the resulting (unzipped) data is piped to mysql and is used as input there.

It will preserve the .gz file and saves diskspace as the unzipped file is not saved to disk. When using big databases, this is also a time saver. When using two commands you have to wait for the file to unzip, before starting the actual import. No intervention is needed when using the one-liner.

Fixing MySQL replication after a faulty query

— 2,841 views — No comments

Today I run into an issue with MySQL replication that prevented updates from the master to appear on the slaves. When checking the slave status, MySQL reports:

Slave_IO_State: Waiting for master to send event
Slave_IO_Running: Yes
Slave_SQL_Running: No
Last_Error: Query caused different errors on master and slave.

Apparently, an error occurred on the master (like a query that was wrong) and that failed on the slave as well. But since the error messages differ (a bit) the replication was stuck on this query. Manual intervention is required to tell MySQL what to do next.

This is what I used to fix it:

mysql -p
STOP SLAVE;
SET GLOBAL SQL_SLAVE_SKIP_COUNTER = 1;
START SLAVE;

I logged in into MySQL (line 1), stopped the slave thread (line 2), skipped the one faulty query (line 3) and started the slave thread again (final line). The status now reports both a running IO and SQL thread.

mysql> show slave status\G

Output:

 Slave_IO_State: Waiting for master to send event
 Slave_IO_Running: Yes
 Slave_SQL_Running: Yes

To track my spendings, I started using the Account Tracker iPad app by Graham Haley. It’s a very solid and well written app that I’ve been using for some weeks now. I really like it, especially because it has a clearly designed gui and rich feature set. Another big plus is that the developer responds very quickly.

But, entering all transactions by hand for me was a no-go. I just don’t want to do that because it’s a lot of work and we might also forget to enter some. Furthermore, almost all transactions we do are done electronically. That’s when I started to think about importing transactions from our Bank Account into the iPad app. Fortunately the app has a feature that let’s you import a csv file. Our bank’s website also has an export feature so that should be doable!

Of course, the formats differ so a direct import is not possible. Also, I want to track spendings by category without entering the category for each and every transaction. I wanted to create something that would work as automatic as possible.

Good news: I just pushed the first public version to GitHub! Let me tell you more..

My goal was to enter all our 2012 transactions to the app. To start, I created the accounts in the app and set their opening balance to the balance on 01/01/2012.

You can create as many accounts as you like, order them in groups, sort them and so on.

That’s all (for now) you’ve to do in the app.

I assume you know how to export transactions from your Bank Account. There should be an option to download a ‘csv’ file, also often referred to as ‘Comma Separated Values’. Contact your bank, it’s a common feature.

Different banks, different export formats
Most banks have their own format (order of columns and number of them to be exact) in which they export transactions. Therefore, a solution that works for anyone out-of-the-box is not possible. But, I did the next best thing: wrote something that can be easily extended. I have accounts at two different banks: ASN Bank and Triodos Bank and have added support for both. I’ll ask some people I know for a dummy export, so I will be able to add support for more banks later on. If you want to do it yourself: the README on Github describes how to add support for your own bank.

Download the scripts
You can download my scripts for free from the GitHub project page.

Let’s see how this works
I login to my ASN Bank account and export a csv-file. The ASN Bank is pretty smart: they remember what transactions I downloaded last time, and only let me download new ones. This is pretty cool, since that prevents double transactions. Triodos Bank let’s you download transactions by a date range you enter. Be careful not to download the same transaction multiple times.

Save this file to: ./files/exported_from_bankaccount/asnbank/
If you have more than one file, just add them to the same directory. The script will combine them so you don’t have to worry about that. Different accounts is fine, as long as they are from the same bank.

To get started with the scrips, edit the settings. First, copy the example, then edit it:

cp -pr ./conf/settings.example.inc.php ./conf/settings.inc.php
vim ./conf/settings.inc.php

Add the accounts you also added to the app, like this:

$_SETTING['my_account']['0707711122'] = "ASN Account";
$_SETTING['my_account']['300.03.83.213'] = "Triodos Account";

The names of the Accounts (ASN Account and Triodos Account in this example) need to match the names in the app. See the image above. The number refers to the Account Number that is in the export file (this is your own account). Be careful to enter it exactly as in the export file. As you can see ASN Bank has no separators, while Triodos Bank has.

Categories
You will get better reports if you set a category with each transaction. The script supports a system where transactions can be matched to categories. For example, when I buy something at ‘Albert Heijn’ or ‘Digros’, it’s always ‘Groceries’. You enter them like this to the settings file:


$_SETTING['billing_category']['Albert Heijn'] = "Groceries";
$_SETTING['billing_category']['Digros'] = "Groceries";
$_SETTING['billing_category']['BP '] = "Fuel";
$_SETTING['billing_category']['Shell'] = "Fuel";

There is no limit in how many you can add. All you need to know is that the first one that maches, is used (it works top down). In the example above, when ‘Albert Heijn’ is in the description of the transaction, the category is set to ‘Grocaries’. When ‘Shell’ is found, the category is set to ‘Fuel’. I hope you get the idea. It works for both spendings and income.

If no match is found, the category ‘Unknown’ is used. (configurable in the settings file) When this happens, the script warns you, so you can easily see what line did not match any category. You can either safely ignore it, or add an extra category to the settings (and re-run the script). You just have to do it once, all transactions that match will be handled automatically from then onwards. But remember: you can always edit the categories in the app later on as well. Even split them between two categories.

Also have a look at the timezone setting, if you’re not in ‘Europe/Amsterdam’, like me. It is used to calculate the right date in the ’18/09/2012′ format since the app expects to read it like this.

Generating the import csv file
To start generating, run this command:

php run_import_asnbank.php

Make sure you select the script that matches the Bank Account(s) you want to process.

When everything goes well, it tells you where to find the generated file. If something goes wrong it tells you what went wrong.

Done! Wrote file ./files/generated_ipad_import/import_asnbank_20120918161644.csv
Please open the file for manual review, then upload it to the Account Tracker iPad app.

Importing the generated file
Time to import the generated file. I’ll show you using some screenshots:

1. Open the app, tap Settings, tap Backups, tap ‘Import / Export by WiFi’. It looks like this:

2. On your computer, open a browser and enter the url shown. A page will be displayed that looks like this one:

3. Click ‘Choose File’ and select the generated file on your computer. Then click ‘Copy’ to transfer it to your device.

4. Back to your device: click ‘Stop’ and select the file you just uploaded. A screen like this appears:

5. Click ‘Import CSV File’ to import the file. The app will validate your file. When the file is corrupt, a clear message is displayed:

In this case, the ‘Account Name’ in the app does not match the one in the settings file. Double check! If all goes well you’ll see:

6. Now, click ‘Import’!

The transactions are imported successfully. Now go to the Accounts screen and let’s a look to the ‘ASN Account’. You will notice the balance changed. When you tap on the account, you’ll see its transactions:

As you can see, the transaction has been added and it detected ‘Groceries’ as category. In a bit more detail:

Now, that’s cool, isn’t it?! 🙂 You should check if the balance now matches the one on your bank’s website. If you entered the correct opening balance and imported all transactions, the balance should match.

Budgets
It becomes even better when you setup Budgets in the app. You can create a Budget once you have a category. Just tap ‘Budgets’, then ‘+’, and select ‘Groceries’. Finally, enter the budget:

The spendings (and income too) are then calculated against this budget. It gives a pretty clear picture:

In this example we’ve imported a single transaction. I’ve added over 600 transactions at once and that works perfect. The app detects transfers between your own accounts and does not calculate those as spending. That only works when you add all your accounts, of course.

Once you have some data, you can play with the reports and see how money comes in and goes out. It’s pretty detailed and very well designed. You can even export to PDF to save the report somewhere offline.

Don’t forget to protect the app with a PIN code. This way, when you lose your device your data cannot be seen. A PIN code on the backups as well is coming.

I really recommend the Account Tracker app and hope my scripts will be useful to others as well. Let me know!

Sed inline editing different on Mac OSX?

— 5,666 views — 5 Comments

Sed is very powerful, I use it a lot on Linux servers I manage. Today I was working on a local git repository on Mac OSX Mountain Lion when I run into some trouble.

Usually, to replace text in a file with new text I run:

sed -i 's/Find this text/Replace with this/' file_to_replace_in.txt

While this works on Linux, it does not on Mac OSX:

sed: -i may not be used with stdin

The manpage on OSX says:

Edit files in-place, saving backups with the specified extension.
If a zero-length extension is given, no backup will be saved.

Aha, it wants to save a backup file. So I changed my command to:

sed -i '.bak' 's/Find this text/Replace with this/' file_to_replace_in.txt

This works, although it leaves a backup file ‘file_to_replace_in.txt.bak’ behind. This is great if you’re not sure, but can be annoying as well. To stop it making backups you specify an empty extension, like so:

sed -i '' 's/Find this text/Replace with this/' file_to_replace_in.txt

This allows me to quickly find & replace again, like when working on Linux 🙂

I’ve been building redundant storage solutions for years. At first, I used it for our webcluster storage. Nowadays it’s the base of our CloudStack Cloud-storage. If you ask me, the best way to create a redundant pair of Linux storage servers using Open Source software, is to use DRBD. Over the years it has proven to be rock solid to me.

DRBD is a Distributed Replicated Block Device. You can think of DRBD as RAID-1 between two servers. Data is mirrored from the primary to the secondary server. When the primary fails, the secondary takes over and all services remain online. DRBD provides tools for failover but it does not handled the actual failover. Cluster management software like Heartbeat and PaceMaker are made for this.

In this post I’ll show you how to install and configure DRBD, create file systems using LVM2 on top of the DRBD device, serve the file systems using NFS and manage the cluster using Heartbeat.

Installing and configuring DRBD
I’m using mostly Debian so I’ll focus on this OS. I did setup DRBD on CentOS as well. You need to use the ELREPO repository to find the right packages.

Squeeze-backports has a newer version of DRBD. If you, like me, want to use this version instead of the one in Squeeze itself, use this method to do so:

echo "
deb http://ftp.debian.org/debian-backports squeeze-backports main contrib non-free
" >> /etc/apt/sources.list

echo “Package: drbd8-utils Pin: release n=squeeze-backports Pin-Priority: 900 " > /etc/apt/preferences.d/drbd

Then install the DRBD utils:

apt-get update
apt-get install drbd8-utils

As the DRBD-servers work closely together, it’s important to keep the time synchronised. Install a NTP system for this job.

apt-get install ntp ntpdate

You also need a kernel module but that one is in the stock Debian kernel. If you’re compiling kernels yourself, make sure to include this module. When you’re ready, load the module:

modprobe drbd

Verify if all went well by checking the active modules:

lsmod | grep drbd

The expected output is something like:

drbd 191530 4 
lru_cache 12880 1 drbd
cn 12933 1 drbd

Most online tutorials instruct you to edit ‘/etc/drbd.conf’. I’d suggest not to touch that file and create one in /etc/drbd.d/ instead. That way, your changes are never overwritten and it’s clear what local changed you made.

vim /etc/drbd.d/redundantstorage.res

Enter this configuration:

resource redundantstorage {
 protocol C;
 startup { wfc-timeout 0; degr-wfc-timeout 120; }

disk { on-io-error detach; } on storage-server0.example.org { device /dev/drbd0; disk /dev/sda3; meta-disk internal; address 10.10.0.86:7788; } on storage-server1.example.org { device /dev/drbd0; disk /dev/sda3; meta-disk internal; address 10.10.0.88:7788; } }

Make sure your hostnames match the hostnames in this config file as it will not work otherwise. To see the current hostname, run:

uname -n

Modify /etc/hosts, /etc/resolv.conf and/or /etc/hostname to your needs and do not continue until the actual hostname matches the one you set in the configuration above.

Also, make sure you did all the steps so far on both servers.

It’s now time to initialise the DRBD device:

drbdadm create-md redundantstorage
drbdadm up redundantstorage
drbdadm attach redundantstorage
drbdadm syncer redundantstorage
drbdadm connect redundantstorage

Run this on the primary server only:

drbdadm -- --overwrite-data-of-peer primary redundantstorage

Monitor the progress:

cat /proc/drbd

Start the DRBD service on both servers:

service drbd start

You now have a raw block device on /dev/drbd0 that is synced from the primary to the secondary server.

Using the DRBD device
Let’s create a filesystem on our new DRBD device. I prefer using LVM since that makes it easy to manage the partitions later on. But you may also simply use the /dev/drbd0 device as any block device on its own.

Initialize LVM2:

pvcreate /dev/drbd0
pvdisplay
vgcreate redundantstorage /dev/drbd0

We now have a LVM2 volume group called ‘redundantstorage’ on device /dev/drbd0

Create the desired LVM partitions on it like this:

lvcreate -L 1T -n web_files redundantstorage
lvcreate -L 250G -n other_files redundantstorage

The partitions you create are named like the volume group. You can now use ‘/dev/redundantstorage/web_files’ and ‘/dev/redundantstorage/other_files’ like you’d otherwise use ‘/dev/sda3’ etc.

Before we can actually use them, we need to create a file system on top:

mkfs.ext4 /dev/redundantstorage/web_files
mkfs.ext4 /dev/redundantstorage/other_files

Finally, mount the file systems:

mkdir /redundantstorage/web_files
mkdir /redundantstorage/other_files
mount /dev/redundantstorage/web_files /redundantstorage/web_files
mount /dev/redundantstorage/other_files /redundantstorage/other_files

Using the DRBD file systems
Two more steps are needed to set up before we can test our new redundant storage cluster: Heartbeat to manage the cluster and NFS to make use of it. Let’s start with NFS, so Heartbeat will be able to manage that late on as well.

To install NFS server, simply run:

apt-get install nfs-kernel-server

Then setup what folders you want to export using your NFS server.

vim /etc/exports

And enter this configuration:

/redundantstorage/web_files 10.10.0.0/24(rw,async,no_root_squash,no_subtree_check,fsid=1)
/redundantstorage/other_files 10.10.0.0/24(rw,async,no_root_squash,no_subtree_check,fsid=2)

Important:
Pay attention to the the ‘fsid’ parameter. It is really important because it tells the clients that the file system on the primary and secondary are both the same. If you omit this parameter, the clients will ‘hang’ and wait for the old primary to come back online after a fail over happens. Since this is not what we want, we need to tell the clients the other server is simply the same. Fail-over will then happen almost without notice. Most tutorials I read do not tell you about this crucial step.

Make sure you have all this setup on both servers. Since we want Heartbeat to manage our NFS server, we need not to start NFS on boot. To do that, run:

update-rc.d -f nfs-common remove
update-rc.d -f nfs-kernel-server remove

Basic Heartbeat configuration
Install the heartbeat packages is simple:

apt-get install heartbeat

If you’re on CentOS, have a look at the EPEL repository. I’ve successfully setup Heartbeat with those packages as well.

To configure Heartbeat:

vim /etc/ha.d/ha.cf

Enter this configuration:

autojoin none
auto_failback off
keepalive 2
warntime 5
deadtime 10
initdead 20
bcast eth0
node storage-server0.example.org
node storage-server1.example.org
logfile /var/log/heartbeat-log
debugfile /var/log/heartbeat-debug

I set ‘auto_failback’ to off, since I do not want another fail-over when the old primary comes back. If your primary server has better hardware than the secondary one, you may want to set this to ‘on’ instead.

The parameter ‘deadtime’ tells Heartbeat to declare the other node dead after this many seconds. Heartbeat will send a heartbeat every ‘keepalive’ number of seconds.

Protect your heartbeat setup with a password:

echo "auth 3
3 md5 your_secret_password
" > /etc/ha.d/authkeys
chmod 600 /etc/heartbeat/authkeys

You need to select an ip-address that will be your ‘service’-address. Both servers have their own 10.10.0.x ip-address, so choose another one in the same range. I use 10.10.0.10 in this example. Why we need this? Simply because you cannot know to which server you should connect. That’s why we will instruct Heartbeat to manage an extra ip-address and make that alive on the current primary server. When clients connect to this ip-address it will always work.

In the ‘haresources’ file you describe all services Heartbeat manages. In our case, these services are:
– service ip-address
– DRBD disk
– LVM2 service
– Two filesystems
– NFS daemons

Enter them in the order they need to start. When shutting down, Heartbeat will run them in reversed order.

vim /etc/ha.d/haresources

Enter this configuration:

storage-server0.example.org \
IPaddr::10.10.0.10/24/eth0 \
drbddisk::redundantstorage \
lvm2 \
Filesystem::/dev/redundantstorage/web_files::/redundantstorage/web_files::ext4::nosuid,usrquota,noatime \
Filesystem::/dev/redundantstorage/other_files::/redundantstorage/other_files::ext4::nosuid,usrquota,noatime \
nfs-common \
nfs-kernel-server

Use the same Heartbeat configuration on both servers. In the ‘haresources’ file you specify one of the nodes to be the primary. In our case it’s ‘storage-server0’. When this server is or becomes unavailable, Heartbeat will start the services it knows on the other node, ‘storage-server1’ in this case (as specified in the ha.cf config file).

Wrapping up
DRBD combined with Heartbeat and NFS creates a powerful, redundant storage solution all based on Open Source software. When using the right hardware you will be able to achieve great performance with this setup as well. Think about RAID controllers with SSD-cache and don’t forget the Battery Backup Unit so you can enable the Write Back Cache.

Enjoy building your redundant storage!

Back in March I wrote a blog on how to create a network without a Virtual Router.  I received a lot of questions about it. It’s also a question that pops up now and then on the CloudStack forums. In the meanwhile I’ve worked hard to implement this setup at work. In this blog I’ll describe the concept of working with a CloudStack setup that has no Virtual Router.

First some background. In Advanced Networking, VLAN’s are used for isolation. This way, multiple separated networks can exist over the same wire. More about VLAN technology in general on this wikipedia page. For VLAN’s to work, you need to configure your switch so it knows about the VLAN you use. VLAN’s have an unique id between 1 and 4096. CloudStack configures this all automatically, except for the switch. Communication between Virtual Machines in the same CloudStack network (aka VLAN) is done using the corresponding VLAN-id. This all works out-of-the-box.

It took me some time to realize how powerful this actually is. One can now combine both VM’s and physical servers in the same network, by using the same VLAN for both. Think about it for a moment. You’re now able to replace the Virtual Router with a Linux router simply by having it join the same VLAN(s) and using the Linux routing tools.

Time for an example. Say we have a CloudStack network using VLAN-id 1234, and this network is created without a Virtual Router (see instructions here). Make sure you have at least 2 VM’s deployed and make sure they’re able to talk to each other over this network. Don’t forget to configure your switch. If both VM’s are on the same compute node, networking between the VM’s works, but you won’t be able to reach the Linux router later on if the switch doesn’t know the VLAN-id.

Have a separate physical server available running Linux and connect it to the same physical network as your compute nodes are connected to. Make sure the ip’s used here are private addresses. In this example I use:

compute1: 10.0.0.1
compute2: 10.0.0.2
router1: 10.0.0.10
vm1: 10.1.1.1
vm2: 10.1.1.2

The Linux router needs two network interfaces: one to the public internet (eth0 for example) and one to the internal network, where it connects to the compute nodes (say eth1). The eth1 interface on the router has ip-address 10.0.0.10 and it should be able to ping the compute node(s). When this works, add a VLAN interface on the router called eth1.1234 (where 1234 is the VLAN-id CloudStack uses). Like this:

ifconfig eth1.1234 10.1.1.10/24 up

Make sure you use the correct ip-address range and netmask. They should match the ones CloudStack uses for the network. Also, note the ‘.’ between the eth1 and the VLAN-id. Don’t confuse this with ‘:’ which just adds an alias ip.

To check if the VLAN was added, run:

cat /proc/net/vlan/eth1.1234

It should return something like this:

eth1.1234 VID: 1234 REORDER_HDR: 1 dev->priv_flags: 1
 total frames received 14517733268
 total bytes received 8891809451162
 Broadcast/Multicast Rcvd 264737
 total frames transmitted 6922695522
 total bytes transmitted 1927515823138
 total headroom inc 0
 total encap on xmit 0
Device: eth1
INGRESS priority mappings: 0:0 1:0 2:0 3:0 4:0 5:0 6:0 7:0
 EGRESS priority mappings:

Tip: if this command does not work, make sure the VLAN software is installed. In Debian you’d simply run:

apt-get install vlan

Another check:

ifconfig eth1.1234

It should return something like this:

eth1.1234 Link encap:Ethernet HWaddr 00:15:16:66:36:ee 
 inet addr:10.1.1.10 Bcast:0.0.0.0 Mask:255.255.255.0
 inet6 addr: fe80::215:17ff:fe69:b63e/64 Scope:Link
 UP BROADCAST RUNNING MASTER MULTICAST MTU:1500 Metric:1
 RX packets:14518848183 errors:0 dropped:0 overruns:0 frame:0
 TX packets:6925460628 errors:0 dropped:15 overruns:0 carrier:0
 collisions:0 txqueuelen:0 
 RX bytes:8892566186128 (8.0 TiB) TX bytes:1927937684747 (1.7 TiB)

Now, the most interesting tests: ping vm1 and vm2 from the linux router, and vice versa. It should work, because they are all using the same VLAN-id. Isn’t this cool? You just connected a physical server to a virtual one! 🙂

You now have two options to go from here:

1. Use a LoadBalancer (like Keepalived) and keep the ip’s on the VLAN private using Keepalived’s NAT routing. The configuration is exactly the same as if you had all physical servers or all virtual servers.

2. Directly route public ip’s to the VM’s. This is the most interesting one to explain a bit further. In the example above we’ve used private ip’s for the VLAN. Imagine you’d use public ip addresses instead. For example:

vm1: 8.254.123.1
vm2: 8.254.123.2
router1: 8.254.123.10 (eth1.1234; eth1 itself remains private)

This also works: vm1, vm2 and router1 are now able to ping each other. A few more things need to be done on the Linux router to allow it to route the traffic:


echo 1 > /proc/sys/net/ipv4/ip_forward
echo 1 > /proc/sys/net/ipv4/conf/eth1/proxy_arp

Finally, on vm1 and vm2, set the default gateway to router1; 8.254.123.10 in this example.

How does this work? The Linux router also answers arp requests for the ip’s in the VLAN. Whenever traffic comes by for vm1, router1 answers the arp request and routes the traffic over the VLAN to vm1. When you’d run a traceroute, you’ll see the Linux router appear as well. Of course you need to have a subnet of routable public ip’s assigned by your provider for this to work properly.

To me this setup has two major advantages:

1. No wasted resources for Virtual Routers (one for each network)
2. Public ip’s can be assigned directly to VM’s; you can even assign multiple if you like.

The drawbacks? Well, this is not officially supported nor documented. And since you are not using the Virtual Router, you’ll have to implement a lot of services on your own that were normally provided by the Virtual Router. Also, deploying VM’s in a network like this only works using the API. To me these are all challenges that make my job more interesting 😉

I’ve implemented this in production at work and we successfully run over 25 networks like this with about 100-125 VM’s. It was a lot of work to configure it all properly and to come up with a working solution. Now that it is live, I’m really happy with it!

I realize this is not a complete step-by-step howto. But I do hope this blog will serve as inspiration for others to come up with great solutions build on top of the awesome CloudStack software. Please let me know in the comments what you’ve come up with! Also, feel free to ask questions: I’ll do my best to give you some directions.

Enjoy!

How do you think I can improve my blog?

— 84 views — No comments

Now that I have some time off, I enjoy spending some of it on my blog. I played with some WordPress settings and redesigned the right column. My most important goal here is to make sharing easy.

Why? Because I benefit a lot from what others post and want to give back a bit. That’s why I write my blogs. If you find them useful, it’s now easy to share them on Twitter, Facebook, Linked-In and others. The more people benefit, the better, don’t you think?

Finally, to give my blog a personal touch, I changed the address bar to: blog.remibergsma.com

How do you think I can improve my blog? I appreciate your feedback 🙂