Posts

HOWTO update a forked Git repo

— 390 views — No comments

git_logoWhen contributing to open source projects, it’s pretty common these days to fork the project on Github, add your contribution, and then send your work as a so-called “pull request” to the project for inclusion. It’s nice, clean and fast. I did this last week to contribute to Apache CloudStack. When I wanted to contribute again today, I had to figure out how to get my “forked” repo up-to-date before I could send a new contribution.

Remember, you can read/write to your fork but only-read from the upstream repository.

Adding upstream as a remote
When you clone your forked repo to a local development machine, you get it setup like this:

git remote -v
origin [email protected]:remibergsma/cloudstack.git (fetch)
origin [email protected]:remibergsma/cloudstack.git (push)

As this refers to the “static” forked version, no new commits come in. For that to happen, we need to add the original repo as an extra “remote” that we’ll call “upstream”:

git remote add upstream https://github.com/apache/cloudstack

Now, run the same command again and you’ll see two:

git remote -v
origin [email protected]:remibergsma/cloudstack.git (fetch)
origin [email protected]:remibergsma/cloudstack.git (push)
upstream https://github.com/apache/cloudstack (fetch)
upstream https://github.com/apache/cloudstack (push)

The cloned git repo is now configured to both the forked and the upstream repo.

Let’s fetch the updates from upstream:

git fetch upstream

Sample output:

remote: Counting objects: 151, done.
remote: Compressing objects: 100% (123/123), done.
remote: Total 151 (delta 39), reused 0 (delta 0)
Receiving objects: 100% (151/151), 153.30 KiB | 0 bytes/s, done.
Resolving deltas: 100% (39/39), done.
From https://github.com/apache/cloudstack
   2f2ff4b..49cf2ac  4.4        -> upstream/4.4
   aca0f79..66b7738  4.5        -> upstream/4.5
* [new branch]      hotfix/4.4/CLOUDSTACK-8073 -> upstream/hotfix/4.4/CLOUDSTACK-8073
   85bb685..356793d  master     -> upstream/master
   b963bb1..36c0c38  volume-upload -> upstream/volume-upload

We now got the new updates in. Before you continue, be sure to be on the master branch:

git checkout master

Then we will rebase the new changes to our own master branch:

git rebase upstream/master

You can achieve the same by merging, but rebasing is usually cleaner and doesn’t add the extra merge commit.

Sample output:

Updating 4e1527e..356793d
Fast-forward
SSHKeyPairResponse.java                       | 12 ++++++++++++
SolidFireSharedPrimaryDataStoreLifeCycle.java | 33 +++++++++++++++++++++++++++++++++
RulesManagerImpl.java                         |  2 +-
ManagementServerImpl.java                     |  5 +----
4 files changed, 47 insertions(+), 5 deletions(-)

Finally, update your fork at Github with the new commits:

git push origin master

Branches other than master
Imagine you want to track another branch and sync that as well.

git checkout -b 4.5 origin/4.5

This will setup a local branch called ‘4.5’ that is linked to ‘origin/4.5’.

If you want to get them in sync again later on, the workflow is similar to above:

git checkout 4.5
git fetch upstream
git rebase upstream/4.5
git push origin 4.5

Automating this process
I wrote this script to synchronise my clones with upstream:


#!/bin/bash

Sync upstream repo with fork repo

Requires upstream repo to be defined

Check if local repo is specified and exists

if [ -z $1 ]; then echo “Please specify repo to sync: $0 <dir>” exit 1 fi if [ ! -d $1 ]; then echo “Dir $1 does not exist!” exit 1 fi

Go into git repo and update

cd $1

Check upstream

git remote -v | grep upstream >/dev/null 2>&1 RES=$?

if [ $RES -gt 0 ]; then echo “Upstream repo not defined. Please add it: git remote add http://github.com/..." exit 1 fi

Update and push

git fetch upstream git rebase upstream/master git push origin master

Execute like this:

./update_origin_with_upstream.sh /path/to/git/repo


Happy contributing!

Be the automator!

— 223 views — No comments

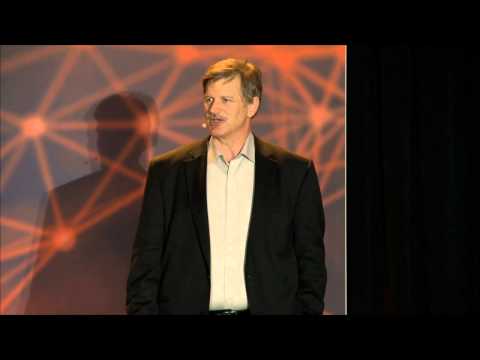
Today I saw an awesome video of a presentation by Glenn O’Donnell.

In his presentation, Glenn states that it’s not about technology, it’s about services. Service design is modular with a logical structure. Approach it as a system and try to improve it as a whole, not just tiny pieces of it. To do that, you need systems engineers. Although most are lazy, or, as Glenn puts it: “Locally brilliant, globally stupid”.

Accept we have no full control
The whole eco system includes a lot of infrastructure and application components. Including services from third parties. We tend to zoom in a lot but then we miss the point: it’s not about the servers, the storage and the network. It’s about how it all works together. And let’s face it, we’ll not have full control over the eco system because it contains components managed by third parties.

We IT people have a hard time accepting we have no control. We think we’re the only one that can maintain that server. But in fact, software can do better and will put us out of business. That software is already out there today.

In this new world, we need people with a different skill set that can manage this complex eco system. It’s all software these days. Obviously the application is software, but so is the infrastructure on which it runs. Cloud infrastructure is all software defined. Even physical servers should be software controlled, instead of manipulating them manually.

How? Well, you can automate if you have a model. The model is a software description of reality. Tools consume this model and create reality out of it.

 ne the automator model

Software Model drives Automation Tool that produces the Service.

Glenn compares this with building a plane: first models are build and simulated before they ever put a plane in the air. Makes sense, right?

We should not be on the command line
This means we should not be on the command line. Let’s get away from the command line! We should manipulate the model instead, and let the model create or change reality. This model is our system software, which we should treat the same way as we treat application software. It’s software, and we can automate software.  By the way, no automation means no DevOps because it’s gonna be too slow.

You’ll also get a better quality because human beings are bad at repetitive tasks. And it’s a waste having smart people do repetitive work. Software can do that instead. The model is the language, the secret code.

Automate yourself out of your job
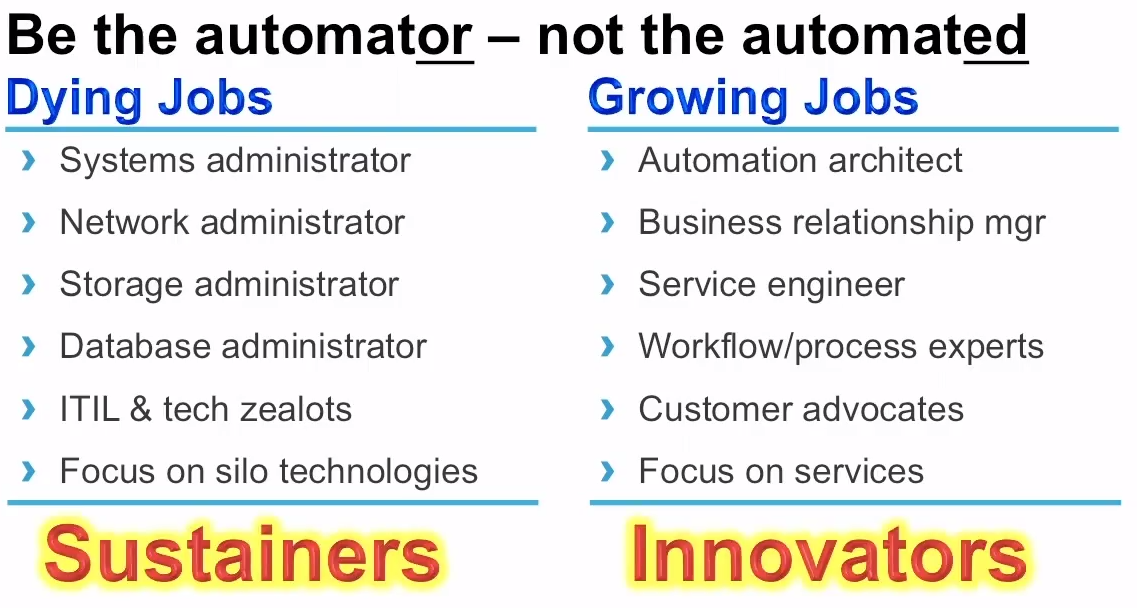
Although this is cool, it does render some jobs obsolete. Glenn states that if you have “administrator” in jour job title, you’ll be replaced by software (that can do better). But don’t worry, there will be other, more interesting jobs, instead. Automate yourself out of your job. It’s fun! In short: be the automator, not the automated.

be the automator jobs

To drive this movement, we need innovators! Geeks are innovators 🙂 Geeks love change, they automate, they create, and they want to move on to the next interesting thing to discover.

Next to Geeks, there are also Geek Imposters. They might do the same job, but they hate change and want to keep everything as it is. To them, Glenn has a nice advice: “Learn to say: Would you like fries with that?“.

View the video of Glenn’s presentation:

Geeks are changing the world. If you think you are a Geek that loves change and loves automation, you could be what we call a Cupfighter at Schuberg Philis.

Are you a Cupfighter?

Watch this video on YouTube

This video is now private on YouTube.

If you think you are a Cupfighter, please contact me and we’ll change the world 😉

CloudMonkey is an easy way to interact with the CloudStack API without the need to do any code writing. Think of it like a way to “query” the CloudStack infrastructure. Very useful in day-to-day operations to get a “quick look” at things.

Version 5.3 is on its way, and recently I had a look at it. I used my MacBook Pro for this, and it came with some challenges to get it working. So, I’m writing down here how to get CloudMonkey 5.3 working on either MacOSX Mavericks (10.9) or the new Yosemite (10.10).

Installing CloudMonkey from source
Since I wanted to look at the latest (not yet released) version I used the source from git. If you want to use the latest stable version, please skip to the next section where I discuss installing using PIP.

Let’s install from source:

git clone https://github.com/apache/cloudstack-cloudmonkey.git

Something like this should happen:

Cloning into 'cloudstack-cloudmonkey'...
remote: Counting objects: 782, done.
remote: Total 782 (delta 0), reused 0 (delta 0)
Receiving objects: 100% (782/782), 236.67 KiB | 359.00 KiB/s, done.
Resolving deltas: 100% (427/427), done.
Checking connectivity... done.

If it doesn’t work, you might need to install Git or install the Command Line Developer tools. Just follow the on-screen instructions and you’ll be fine.

Next, compile the source:

make build

It’ll give some output, and as long as it doesn’t error out you’re fine. Then install using sudo:

sudo make install

CloudMonkey has now been installed to /usr/local/bin.

Installing CloudMonkey from PIP
Alternatively, you can use PIP to install. PIP is a tool to easy install Python software and there’s a PIP for CloudMonkey as well. At the time of writing, there is a 5.2 version that you can install.

First install to the latest version of PIP:

sudo easy_install --upgrade pip

If CloudMonkey is already installed, uninstall it first (your config is saved):

sudo pip uninstall cloudmonkey

Then install it again:

sudo pip install cloudmonkey

Running CloudMonkey

To run it, just type:

cloudmonkey

 CloudMonkey should then welcome you:

When you see this, CloudMonkey is installed successfully.

On Mac OSX Yosemite this worked out-of-the box, although on Mavericks it did not:

Remis-MBP:git remi$ cloudmonkey 
Traceback (most recent call last):
  File "/usr/local/bin/cloudmonkey", line 5, in <module>
    from pkg_resources import load_entry_point
  File "/System/Library/Frameworks/Python.framework/Versions/2.7/Extras/lib/python/pkg_resources.py", line 2603, in <module>
    working_set.require(__requires__)
  File "/System/Library/Frameworks/Python.framework/Versions/2.7/Extras/lib/python/pkg_resources.py", line 666, in require
    needed = self.resolve(parse_requirements(requirements))
  File "/System/Library/Frameworks/Python.framework/Versions/2.7/Extras/lib/python/pkg_resources.py", line 565, in resolve
    raise DistributionNotFound(req)  # XXX put more info here
pkg_resources.DistributionNotFound: requests
Remis-MBP:git remi$

There’s a lot written on this online, but most stuff did not work for me. This did the trick for me:

sudo curl https://bitbucket.org/pypa/setuptools/raw/bootstrap/ez_setup.py | python

It (re)installs ‘setuptools’ and that made it work.

Configuring CloudMonkey

Before CloudMonkey will do anything useful, you need to point it to a CloudStack API endpoint. I’m using my DevCloud environment here. The API keys can be generated in the UI:

Copy the API keys from the CloudStack UI

If no keys are displayed, click the icon on the right to generate keys. Then setup CloudMonkey:

set apikey whMTYFZh3n7C4M8VCSpwEhpqZjYkzhYTufcpaLPH9hInYGTx4fOnrJ3dgL-3AZC_STMBUeTFQgqlETPEile4_A
set secretkey 9Z0S5-ryeoCworyp2x_tuhw5E4bAJ4JTRrpNaftTiAl488q5rvUt8_pG7LxAeg3m_VY-AafXQj-tVhkn9tFv1Q
set url http://127.0.0.1:8080/client/api

Make sure to copy your own keys, as the ones here will only work on my local test CloudStack environment.

Finally, test the connection by syncing the API’s. Run this inside CloudMonkey:

sync

CloudMonkey responds:

466 APIs discovered and cached

Depending on your permissions (root, admin, user) and version of CloudStack, you’ll see more or less APIs being discovered.

A cool new (experimental) feature is tab completion, aka paramcompletion. Enable it like (run inside CloudMonkey):

set paramcompletion true

You’ll then be able to use the TAB key to auto-complete the UUIDs. Let me show you with an example:

CloudMonkey auto-complete feature in action (called paramcomplete)

I typed:

li<tab> vi<tab>m<tab> id<tab><tab>aa<tab><enter>

This auto-completes to the line you see in the image, and it displays the result as well.

Conclusion

CloudMonkey is a great tool to query the CloudStack infrastructure. Setting it up is not hard as we’ve seen. Justplay with it, and you’ll discover a great number of features. If you find bugs, be sure to contact Rohid Yadav, the author of CloudMonkey. The documentation can be found here.

Have fun with CloudMonkey!

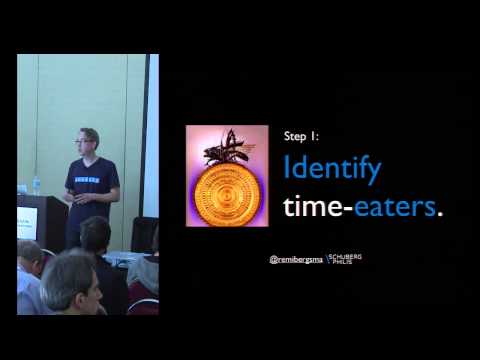
Watch my talk “Start using Configuration Management in 5 steps”, at the CloudStack Collaboration Conference, Denver, Co, USA (April 9-11 2014).

Here are the slides from my presentation at the CloudStack Collaboration Conference in Denver:


Deep-dive into CloudStack again!

— 127 views — No comments

CloudStack Collaboration ConferenceAs you might have noticed, I switched jobs on Feb 1st and was quite busy after that. I joined Schuberg Philis, a Mission Critical Outsourcing company in The Netherlands. I met the folks on the CloudStack Collaboration Conference in Amsterdam, back in November. I have a very cool job, as I work with a bunch of very skilled colleagues on our Mission Critical Cloud, that is powered by Apache CloudStack.

The last two months I spent quite some time working with CloudStack, debugging issues and most of all: building new capacity and migrating old so-called PODs to new ones. Recently, CloudStack 4.3 was released and I believe this is the best release ever. Feels “snappier”, has lots of fixes and new cool features. We upgraded our pre-production cloud (running ~600 VMs) and apart from one little issue everything went smooth. Impressed!

Next week, I’ll be in Denver, CO at the CloudStack Collaboration Conference. I’ll do a talk and explain why you should use configuration management and will show you how to implement configuration management in your existing environment using 5 steps. This can be quite challenging, because when a lot of manual work is done, people are usually very busy. How do you find the time to implement configuration management?

Meet me in Denver on April 9-11!

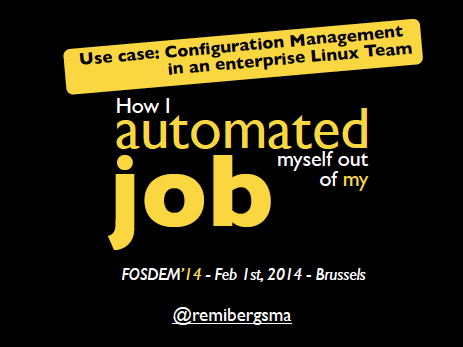
Configuration management in an Enterprise Linux Team — How I automated myself out of my job

Thanks to the FOSDEM video team for this video! It nicely integrates the slides and me talking! It’s just a pity the sound from the camera was used instead of the mic I was wearing. Therefore you hear a lot of noises from the people outside the room, on the hallway (there were >100 people that did not fit in the room anymore!). But anyway, enjoy the recording 🙂

Here are the slides of the talk I just gave in the Configuration Management devroom at FOSDEM’14:

fosdem14_title_remi

I’m currently finalizing the CFEngine 3 setup at my $current_work because by the end of the month I will start a new job. In a little over a year, I fully automated the Linux sysadmin team. From now on, only 2 sysadmins are needed to keep everything running. Since almost everything is automated using CFEngine 3, it’s very important that CFEngine is running at all times so it can keep an eye on the systems and thus prevent problems from happening.

I’ve developed an init script, that makes sure CFEngine is installed and bootstrapped to the production CFEngine policy server. This init script is added in the post-install phase of the automatic installation. This gets everything started and from there on CFEngine kicks in and takes control. That same init script is also maintained with CFEngine. This is done so it cannot easily be removed or disabled.

Also, when CFEngine is not running (anymore) it should be restarted. A cron job is setup to do this. This cron job is also setup using CFEngine. It is using regular cron on the OS, of course. If all else fails, this cron job can also install CFEngine in the event it might be removed. Last thing it does, is automatically recover from ‘SIGPIPE’ bug we sometimes encounter on SLES 11.

To summarize:
– an init script (runs every boot) makes sure CFEngine is installed and bootstrapped
– a hourly cron job makes sure the CFEngine daemons are actually running
– CFEngine itself ensures both the cron job and init script are properly configured

This makes it a bit harder to (accidentally) remove CFEngine, don’t you think?!

Reporting servers that do not talk to the Policy server anymore
Now, imagine someone figures a way to disable CFEngine anyway. How would we know? The CFEngine Policy server can report this using a promise. It reports it via syslog, so it will show up in Logstash. The bundle looks like this:

bundle agent notseenreport
{
        classes:
                "display_report" expression => "Hr08.Min00_05";
    vars:
            # Default to empty list
            "myhosts" slist =&gt; { };

            display_report::
                    "myhosts" slist =&gt; { hostsseen("24","notseen","name") };

    reports:
            "CFHub-Production: Did not talk to $(myhosts) for over 24 hours now";

}

We’ve set this up on both Production and Pre-Production Policy servers.

How to temporary disable CFEngine?
On the other side, sometimes you want to temporary disable CFEngine. For example to debug an issue on a test server. After a discussion in our team, we came up with an easy solution: when a so-called ‘Do Not Run‘ file exists on a server, we should instruct CFEngine to do nothing. We use the file ‘/etc/CFEngine_donotrun‘ for this, so you’d need ‘root‘ privileges or equal to use it.

In ‘promise.cf‘ a class is set when the file is found:

"donotrun" expression => fileexists("/etc/CFEngine_donotrun");

For our setup we’re using a method detailed in ‘A CFEngine Case Study‘. We added the new class:

!donotrun::
        "sequence"  slist => getindices("bundles");
        "inputs" slist => getvalues("bundles");

donotrun:: “sequence” slist => {}; “inputs” slist => {};

reports: donotrun:: “The ‘DoNotRun’ file was found at /etc/CFEngine_donotrun, exiting.”;

In other words, when the ‘Do Not Run‘ file is found, this is reported to syslog and no bundles are included for execution: CFEngine then does effectively nothing.

An overview of servers that have a ‘Do Not Run‘ file appears in our Logstash dashboard. This makes them visible and we look into then on a regular basis. It’s good practice to put the reason why in the ‘Do Not Run‘ file, so you know why it was disabled and when. Of course, this should only be used for a small period of time.

Making sure CFEngine runs at all times makes your setup more robust, because CFEngine fixes a lot of common problems that might occur. On the other hand, having an easy way to temporary disable CFEngine also prevents all kind of hacks to ‘get rid of it’ while debugging stuff (and then forgetting to turn it back on). I’ve found this approach to work pretty good.

Update:
After publishing this post, I got some nice feedback. Both Nick Anderson (in the comments) and Brian Bennett (via twitter) pointed me into the direction of CFEngine’s so called ‘abortclasses‘ feature. The documentation can be found on the CFEngine site. To implement it, you need to add the following to a ‘body agent control‘ statement. There’s one defined in ‘cf_agent.cf‘, so you could simply add:


abortclasses => { "donotrun" };

Another nice thing to note, is that others have also implemented similar solutions. Mitch Lewandowski told me via twitter he uses a filed simply called ‘/nocf‘ for this purpose and Nick Anderson (in the comments) came up with an even funnier name: ‘/COWBOY‘.

Thanks for all the nice feedback! 🙂