Posts

Lately I’ve been coding to automate the deployment of Virtual Machines that will run in our cloud. It’s inspired by blogs and code from Jason Hancock but implemented in a different way to meet our specific needs. Since CloudStack has a very flexible API, you can make it do anything you want. It works pretty cool so far.

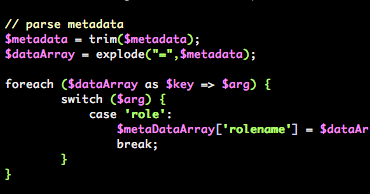
From a command line script we can deploy a new VM with a certain “role”. This role has a name, like “web server” or “test-vm-db” and contains the OS template name, the datacenter name, the networks to connect to, the hardware offering (CPU/Memory/Disk) and the account and domain to use. These are all CloudStack specific settings. When calling the deployVirtualMachine() API command, CloudStack will create a VM with exactly these specs. We use a simple php cli script to add a new server, like this:

Result:
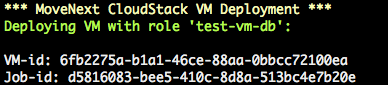
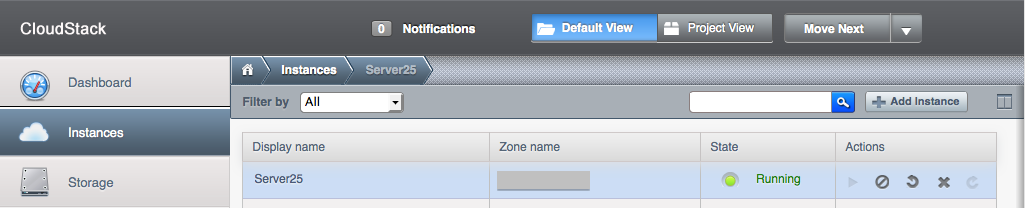
Since it is in a specific domain (defined by the role), other users in that domain can “see” and work with the new VM immediately. When you deploy for a client, they will “see” the new VM like this:
When the VM boots, it is receives its role name, “web server” for example, and sends this info to Puppet. This way, Puppet knows how to configure the new VM. It will do so and when it’s finished you have an exact same “web server” as the others. Run the script again and you’ll have another one. Puppet does not only do initial configuration, it will make sure the configuration stays consistent across the all servers it manages. When you want to change a setting, Puppet distributes it and makes sure it’s the same on all servers. All automatically!

Imagine the power behind this concept. All of a sudden you can create a script that can deploy a new web server in just minutes. Now even the loadbalancer itself can spin up a new web server to handle the higher load it receives. Or destroy a web server when there are too many idle web servers. That’s what you call elastic!

What you need to build this yourself is:
1. PHP CloudStack Client (to talk to CloudStack from PHP)
2. CloudStack API docs
3. Script to grab meta-data when VM has booted

Please see Jason Hancock‘s blog for some working examples of how he implemented it. As I said, CloudStack’s API is very flexible. But you can even extend the API, if you want to go further. Thanks for the inspiration Jason!

Today while I was running I realized I’ve been doing a lot of coding lately. Coding our new infrastructure to be exact. I remembered Kris Buytaert’s talk about DevOps back in February when I was in Antwerp. One of the key statements is that there are ‘sysadmin coders’ and not ‘sysadmins’ and ‘coders’. The only way to achieve great results, is when these two work together and communicate with each other. The idea’s behind this are called DevOps. IT Operations starts using code to manage configurations and infrastructure instead of doing it by hand over and over again. Thanks to CloudStack and Puppet this is now possible. Ideally, you would not have two groups, but one. Stephen Nelson-Smith from jedi.be describes it like this:

So, the Devops movement is characterized by people with a multidisciplinary skill set – people who are comfortable with infrastructure and configuration, but also happy to roll up their sleeves, write tests, debug, and ship features. These are people who making connections, because they can – because they have feet in multiple camps, they can be ambassadors, peace makers, facilitators and communicators. And the point of the movement is to identify these, currently rare, people and encourage them, compare ideas, and start to identify, train, recruit and popularize this way of doing IT.

More on Stephen’s blog..

I didn’t realize back then what this would mean because I was focused on CloudStack and the tools around it. But it is not only about the tools, it’s the way you look at managing infrastructure and development. What we’re doing looks like DevOps but we’re not there yet ;-). In the coming weeks I’ll spend some more time reading about DevOps to see how we can implement this in our organization. Because I really believe this is the way to go..

Remote Linux systems usually have to be available all the time. Although Linux is rock solid and stable, an occasional crash can occur. For example when there’s a problem with hardware or software. The last thing you want, is that a Linux server got a kernel panic and then waits forever for someone to reboot it.

Of course there’s monitoring, and there are APC’s too, which can reboot the server. This is like pulling the plug. It usually takes some time for monitoring to notify a sysadmin and then for the sysadmin to reboot the server. And, when using IPMI devices (especially the older ones that share a network connection with the server), a kernel panic could make them unavailable, too. I’ve had that on many occasions. Then you end up driving to the data center or call someone to reset the server. I hate that 😉

In our setup, most servers are in clusters. This means losing one server should not be a problem. But you still want a server to be available again as soon as possible, to be able to handle future problems.

There’s a way to configure Linux to reboot automatically, say 10, seconds after a kernel panic occurs. This will quickly and automatically have the server up again. Should rebooting not help, then bad luck and there’s probably some failing hardware part. You’ve then to drive to the data center anyway.

So, how to do that? Well, there are several options to set this parameter. To test this out, use this command:

/sbin/sysctl -w kernel.panic=10

Note that this setting will not survive a reboot. If you want it to remain active, add this line to /etc/sysctl.conf:

kernel.panic=10

To check the current setting, issue:

cat /proc/sys/kernel/panic

It is wise to implement some sort of monitoring on reboots or uptime. You definitely want to read the logfiles and find out what exactly happened that led to the kernel panic.

Great run, great weather!

— 53 views — No comments

Today is a very nice day with a lot of sun shine. This morning I decided to go for a run, to get rid of the stress and to enjoy being outside. Just running for some time makes me calm and relax again. I love that feeling!

I haven’t been running for almost a year. Today I took my Garmin Forerunner 305 with me. The nice thing is that the device has a GPS chip and can track many things, like distance, pace, heartbeat, calories etc. When I got home, I uploaded the run data to the MapMyRun website. It produces these nice images:

As you’ll probably see the distance and pace are not quite impressive yet 😉 Over time it should get better.. and as long as it makes me feel good it’s ok with me!

When working in shells, it’s very useful to have syntax highlighting. In vim it’s just ‘:sy on’ and you’re done. For those of you using GNU Nano, I’ll show you how to enable syntax highlighting as well.

To start, we’ll need some files which tell nano what to display in what color. Here is an example of such a file for PHP:

nano /usr/share/nano/php.nanorc

syntax “php” “.php|.inc$” color white start="<?(php)?" end="?>" color magenta start="<[^?]" end="[^?]>" color magenta “$[a-zA-Z_0-9]” color brightblue “->[a-zA-Z_0-9]” color cyan “([)|(])” color brightyellow “(var|class|function|echo|case|break|default|exit|switch|if|else|elseif|@|while|return|public|private|proteted|static)\s” color brightyellow “&lt;(try|throw|catch|operator|new)&gt;” color white “=” color green “[,{}()]” color green “==” color brightgreen “(’[^’]’)|("[^”]")" color yellow start="" color yellow start="/*" end="*/" color yellow start="#" end="$" color yellow “//.*"

Then we tell nano where this file is to be found:

nano /etc/nanorc

And add this line:

## PHP
include "/usr/share/nano/php.nanorc"

You then should see this when editing a PHP file with nano:

You can do the same for Bash files. Here’s the config file:

nano /usr/share/nano/sh.nanorc

syntax “sh” “.sh$” icolor brightgreen “^[0-9A-Z_]+()” color green “&lt;(case|do|done|elif|else|esac|exit|fi|for|function|if|in|local|read|return|select|shift|then|time|until|while)&gt;” color green “({|}|(|)|;|]|[|`|\|$|<|>|!|=|&||)” color green “-[Ldefgruwx]&gt;” color green “-(eq|ne|gt|lt|ge|le|s|n|z)&gt;” color brightblue “&lt;(cat|cd|chmod|chown|cp|echo|env|export|grep|install|let|ln|make|mkdir|mv|rm|sed|set|tar|touch|umask|unset)&gt;” icolor brightred “${?[0-9A-Z_!@#$?-]+}?” color cyan “(^|[[:space:]])#.$” color brightyellow “”(\.|[^”])"" “’(\.|[^’])’” color ,green “[[:space:]]+$"

It’s pretty easy to customize if you want. So now you never have to edit scripts without syntax highlighting again!

Tweak the OSX Terminal to display colors

— 3,104 views — No comments

Today I came across a nice post by Tod Werth, who created a nice theme for the OSX Terminal program called IR_Black.

All you have to do is download his schema and open in it Terminal. Then tweak the colors a bit to fully meet our needs.

Last step: enable colors in your profile:

vim ~/.bash_profile

Add this line:

export CLICOLOR=1;

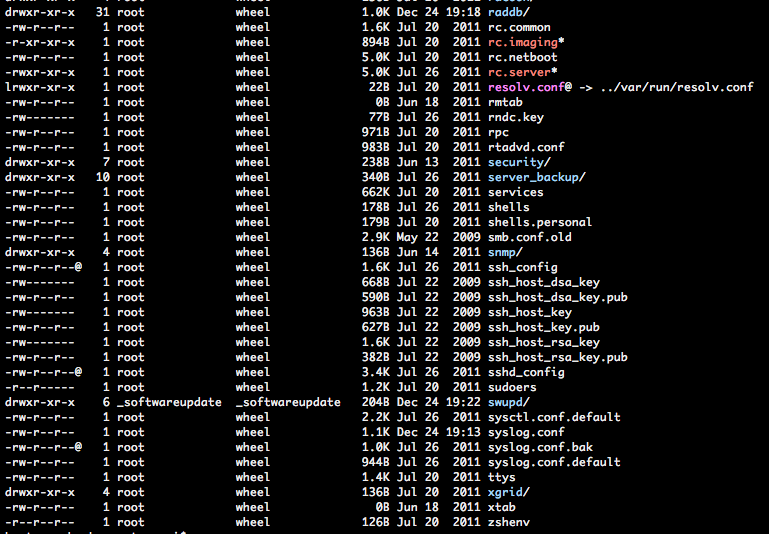
When you open a  new window and enter a simple ‘ls’ command, it looks like this:

So that is pretty cool 🙂 Thanks Todd!

Update:
I found that using these setting brought some trouble when working in vim and nano. Changing the terminal from “xterm-256color” to “xterm-color” fixed that for me.

Networking in CloudStack 3.0 is awesome; the Virtual Router provides many cool features like LoadBalancing, PortForwarding, (s)NAT, DHCP, VPN and so on. When a new network is created and being used, a Virtual Router is automatically launched to support these features. Since the Virtual Router is a Single Point of Failure, you should turn on the HA (High Available) option; which actually addes a 2nd Virtual Router on each network. While this is pretty cool, it makes the number of System VM’s go up and when you don’t need them it’s kind of wasting resources.

For example, when I was creating a network for the web servers to talk privately to the database, I didn’t need a Virtual Router. All I want is them to be able to do networking to each other and that is all. When using the default settings, a Virtual Router is launched anyway.

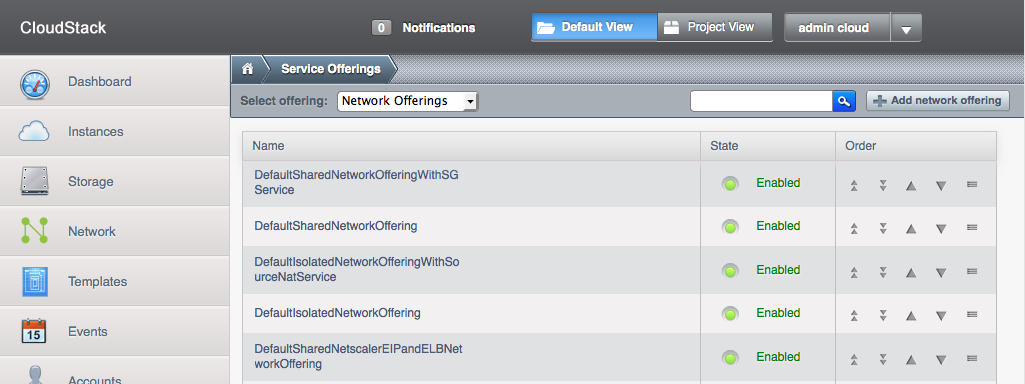
So how to tell CloudStack you don’t need a Virtual Router? Well, this is done through Service Offerings. You find this option on the menu at the left, it’s the last option. Select Network Offerings and a list is displayed.


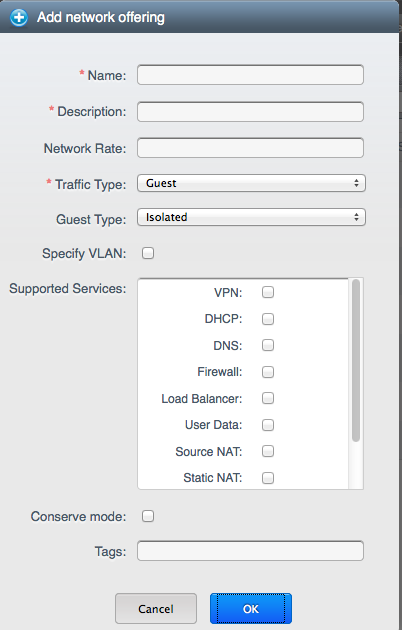
Click Add Network Offering at the right and fill in the form. When you do not select any service, you’ll create a Network Offering for which CloudStack does not spin off Virtual Routers.

Now, when you create a new Guest Network, make sure to select the Network Offering you just created. This will make sure your new Guest network will have no Virtual Router launched when in use 🙂

Update: I’ve written another blog with more details on how to use this network. Also have a look at the comments in both blogs for some examples and idea’s. Feel free to ask me any questions you have below!

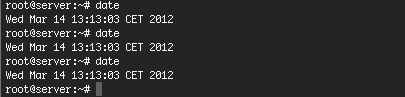
We still have some older hardware running for non-critical and lightweight operations. Since upgrading these old boxes to Debian Squeeze weird things started to happen. After some time, the system clock stops working and that results in processes to crash and new ones unable to start. Of course, nothing works properly on any computer without a working system clock. Here you see how that looks like:

First thought was to replace the CMOS battery, but that didn’t help and it occurred on multiple machines around the same time. Rebooting solves the problem for a while but 24-36 hours later the system clock stops again. Sometimes the problem stays away much longer. Also, some servers with the same hardware do not seem to have the problem. It seems hardware related. But is that really true?

Since the server crashes it is kinda hard to figure out what exactly happens. Logs aren’t properly written anymore and system processes are unreliable. Sometimes it is possible to access the server via SSH, sometimes it isn’t.

Today this happened again with one of our servers. Fortunately I was able to SSH into the machine and I found this warning in the logs:

Mar  14 13:00:05 server kernel: [97383.660485] Clocksource tsc unstable (delta = 4686838547 ns)

TSC is the Time Stamp Counter. Processors have dynamically changed clock speed (ofc to save power). The TSC is supposed to tick at the CPU rate so on frequency change, this ought to happen. The kernel will automatically switch to something else. This is true for modern hardware, this old CPU is set to constant_tsc (when using cat /proc/cpuinfo it’s one of the flags). It is thus supposed to run at the same frequency at all times.

The system might have multiple available clock sources. You can list the available clock sources in a system like this:

cat /sys/devices/system/clocksource/clocksource0/available_clocksource

On my system this returns:

tsc acpi_pm jiffies

To see which one is actually in use, issue:

cat /sys/devices/system/clocksource/clocksource0/current_clocksource

On my system this returns:

tsc

So this tells me I’m using ‘tsc’ as a Clock Source, and my system has two more options. Since I’m having trouble with ‘tsc’, let’s change the Clock Source from ‘tsc’ to ‘acpi_pm’.

echo acpi_pm > /sys/devices/system/clocksource/clocksource0/current_clocksource

Verify the new setting like this:

cat /sys/devices/system/clocksource/clocksource0/current_clocksource

It should now return ‘acpi_pm”.

This can be done at run time, when you reboot the setting is lost. It is a great way to test the setting. To make it permanent, add this line to the boot parameters in /boot/grub/menu.lst:

notsc clocksource=acpi_pm

I’ve just changed this on the server and I’m really curious whether this will be the solution to prevent the hangs! At least the time is still ticking.. 😉

If anyone has more suggestions or info, please let me know! I’ll keep you posted.

Update: Just reached 4 days of uptime!

Update 2: Today it’s 4 month’s after I wrote this blog. The machine is still up & running and has reached 106 days of uptime!

Update 3: After 7 months (222 days of uptime) I finally retired the machine since we migrated to our CloudStack cloud. The fix described above really works 🙂

HOWTO backup an OpenLDAP server

— 10,107 views — No comments

In a previous post I described howto restore a OpenLDAP server from backup . But how to backup Open LDAP?

The backups I make consist of two parts:

1. First backup the LDAP database itself using a program called ‘slapcat.’ Slapcat  is  used  to generate an LDAP Directory Interchange Format (LDIF) output based upon the contents of a given LDAP database. This is a text version of your database which can be imported later. Think of it as a SQL-backup for relational databases. Anyway, here’s how to run slapcat on the OpenLDAP server:

slapcat -l backup.ldif

This will backup the whole database into the file called ‘backup.ldif’. You can then use this file to restore an OpenLDAP server later, using slapadd. Be sure to run this in a backup script from crontab and have a backup at least once per day.

2. Second thing I do, is backing up the config of the OpenLDAP server. This config is usually in /etc/ldap. Back it up using a tar, or using a technique like rsnapshot.

When you have this in place (and save the backups on a different place), you’ll be able to rebuild an OpenLDAP server without problems.

Loads of sleeping MySQL connections?

— 3,516 views — No comments

Then probably the code is not properly disconnecting the MySQL connection. The time MySQL waits for the next command to be send, can be controlled by the ‘wait_timeout’ parameter. The default is a massive 28800 seconds (8h). Setting this value too low gives ‘MySQl server has gone away’ errors, so be careful.

Debugging scripts that create many ‘sleeping’ connections is challenging. An easy solution is setting the ‘wait_timeout’ parameter to something low after the MySQL connection is started. This setting is then valid only for this current session.

Issue this query after every connect:

SET wait_timeout=60;

Database administrators can permanently change this setting in ‘/etc/mysql/my.cnf’ or by issuing a

SET GLOBAL wait_timeout=60;

to change it during runtime. Don’t forget to edit ‘my.cnf’ also, otherwise the setting is back to default the next time MySQL restarts.