Posts

I’ve had some trouble when using the Mac OSX Terminal app for some time now. Until today, it just gave me some annoying warnings from time to time. Like when installing an application with apt-get in Debian:

perl: warning: Setting locale failed.
perl: warning: Please check that your locale settings:
LANGUAGE = (unset),
LC_ALL = (unset),
LC_CTYPE = “UTF-8”,
LANG = “en_US.UTF-8”
are supported and installed on your system.
perl: warning: Falling back to the standard locale (“C”).
locale: Cannot set LC_CTYPE to default locale: No such file or directory
locale: Cannot set LC_ALL to default locale: No such file or directory

It did work, so nothing too serious. I’ve also found applications, like iotop for example, that refuses to start when LC_ALL was unset. But a quick

EXPORT LC_ALL=$LANG

made the application start, so I didn’t take the time to investigate it further. Today I run into a more serious issue that cost me quite some time to figure out.

I had stopped the pure-ftpd deamon to do some maintenance and then started it again. It did start without error, but connecting failed:

server:~# ftp ftp.server.nl
Connected to ftp.server.nl.
perl: warning: Setting locale failed.
ftp>

Nothing had changed in the ftp configuration. After some debugging and trial & error, I found out that when I started the deamon from within a shell on Ubuntu it worked, but when I started it within a shell on my MacBook, it didn’t.

When looking at the locales I found:

server:~# locale
locale: Cannot set LC_CTYPE to default locale: No such file or directory
locale: Cannot set LC_ALL to default locale: No such file or directory
LANG=en_US.UTF-8
LC_CTYPE=UTF-8
LC_NUMERIC=”en_US.UTF-8″
LC_TIME=”en_US.UTF-8″
LC_COLLATE=”en_US.UTF-8″
LC_MONETARY=”en_US.UTF-8″
LC_MESSAGES=”en_US.UTF-8″
LC_PAPER=”en_US.UTF-8″
LC_NAME=”en_US.UTF-8″
LC_ADDRESS=”en_US.UTF-8″
LC_TELEPHONE=”en_US.UTF-8″
LC_MEASUREMENT=”en_US.UTF-8″
LC_IDENTIFICATION=”en_US.UTF-8″
LC_ALL=

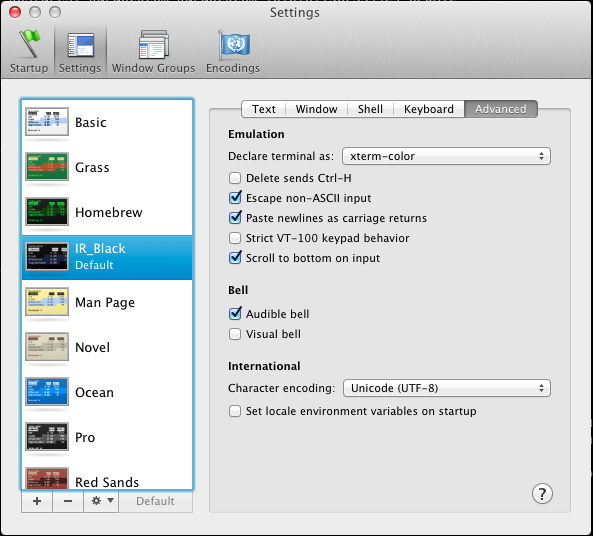
Notice the two errors at the top. I talked to a colleague about this and he suggested looking at the Terminal app settings. There I found a setting called “Set locale environment variables on startup” which was activated. The setting is located in Preferences | Settings | Advanced. I’ve unchecked the button now as you can see in this screenshot:
When closing the Terminal app, and reopening it again, I tried again:

server:~# locale
LANG=en_US.UTF-8
LC_CTYPE=”en_US.UTF-8″
LC_NUMERIC=”en_US.UTF-8″
LC_TIME=”en_US.UTF-8″
LC_COLLATE=”en_US.UTF-8″
LC_MONETARY=”en_US.UTF-8″
LC_MESSAGES=”en_US.UTF-8″
LC_PAPER=”en_US.UTF-8″
LC_NAME=”en_US.UTF-8″
LC_ADDRESS=”en_US.UTF-8″
LC_TELEPHONE=”en_US.UTF-8″
LC_MEASUREMENT=”en_US.UTF-8″
LC_IDENTIFICATION=”en_US.UTF-8″
LC_ALL=

No more errors! I tried restarting the pure-ftpd deamon from my Terminal app and it now works as expected. Even the warnings and errors when installing applications in Debian (apt-get) are gone. In fact, it seems this is the way it is supposed to work.

Glad I’ve fixed this 🙂

Update: As Reza mentions in the comments, it’s also possible to fix this problem on the server side. This is the best way to go if you want to fix this for your users. Thanks Reza!

After many weeks of preparation we moved MD’s equipment from the EUNetworks datacenter in Amsterdam, to Gyrocenter DC-2. This is also our new datacenter where we’ve built a CloudStack cloud.

Most servers were virtualized before this migration and only had to be removed during this operation. Others will be virtualized in the coming months. Fortunately most services had only some downtime during the night.

We also moved MD’s backup location (Redbus) and integrated it with our equipment in Global Switch.

As you can see, our Team of 5 worked very hard. Enjoy this video impression!

Watch this video on YouTube

This video is now private on YouTube.

After the leap second insert last night, my CloudStack 3.0 servers (or its Java processes actually) started to use a lot of CPU. Here’s how to fix it (sets the date):

date ; date -s "`date -u`" ; date

Just run this on your management- or compute node. On my CloudStack system it only occurred on the management servers. Confirmed: it occurred both on management- and compute nodes on our CloudStack system. No restart required afterwards . The load will drop immediately.

Note: restarting cloud-management alone does not fix the issue. Rebooting the machine does, however, but I’d prefer not to reboot them 🙂

MySQL seems to be affected as well, though I didn’t experience problems with it.  Thanks to the guys @Mozilla for blogging about this problem and suggesting a fix.

I’ve also posted this to the CloudStack forums,so there might be some discussion as well.

Meet our shiny new CloudStack Cloud

— 1,699 views — No comments

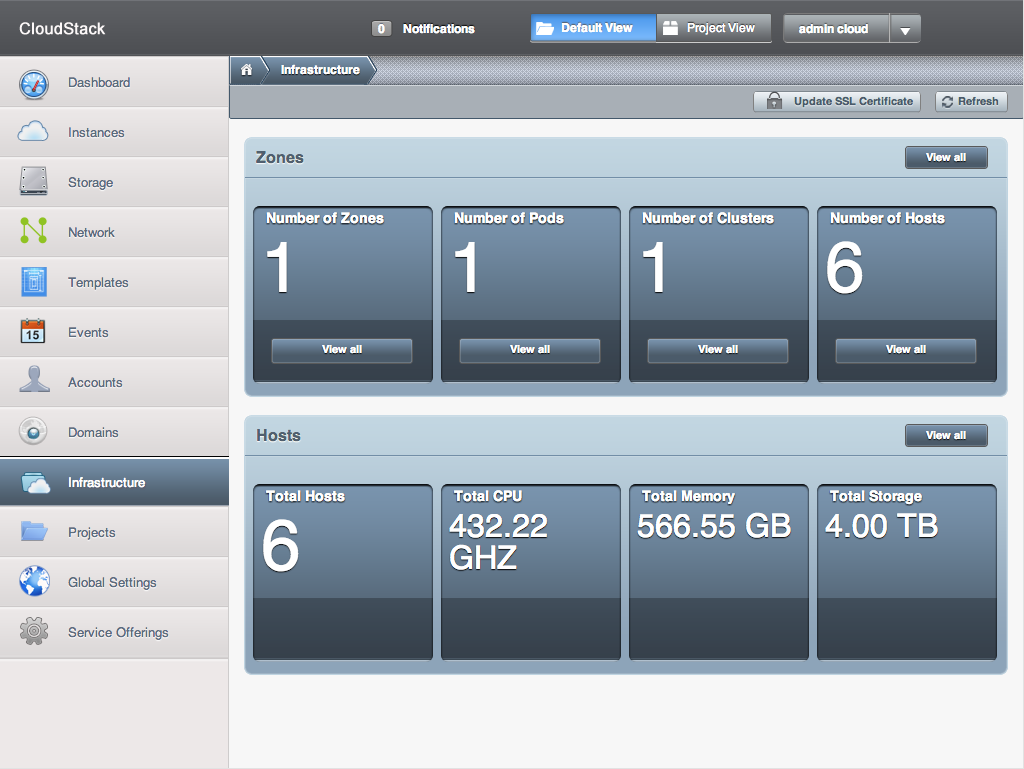
This is what our Cloud looks like in the CloudStack Dashboard. Pretty powerful 🙂


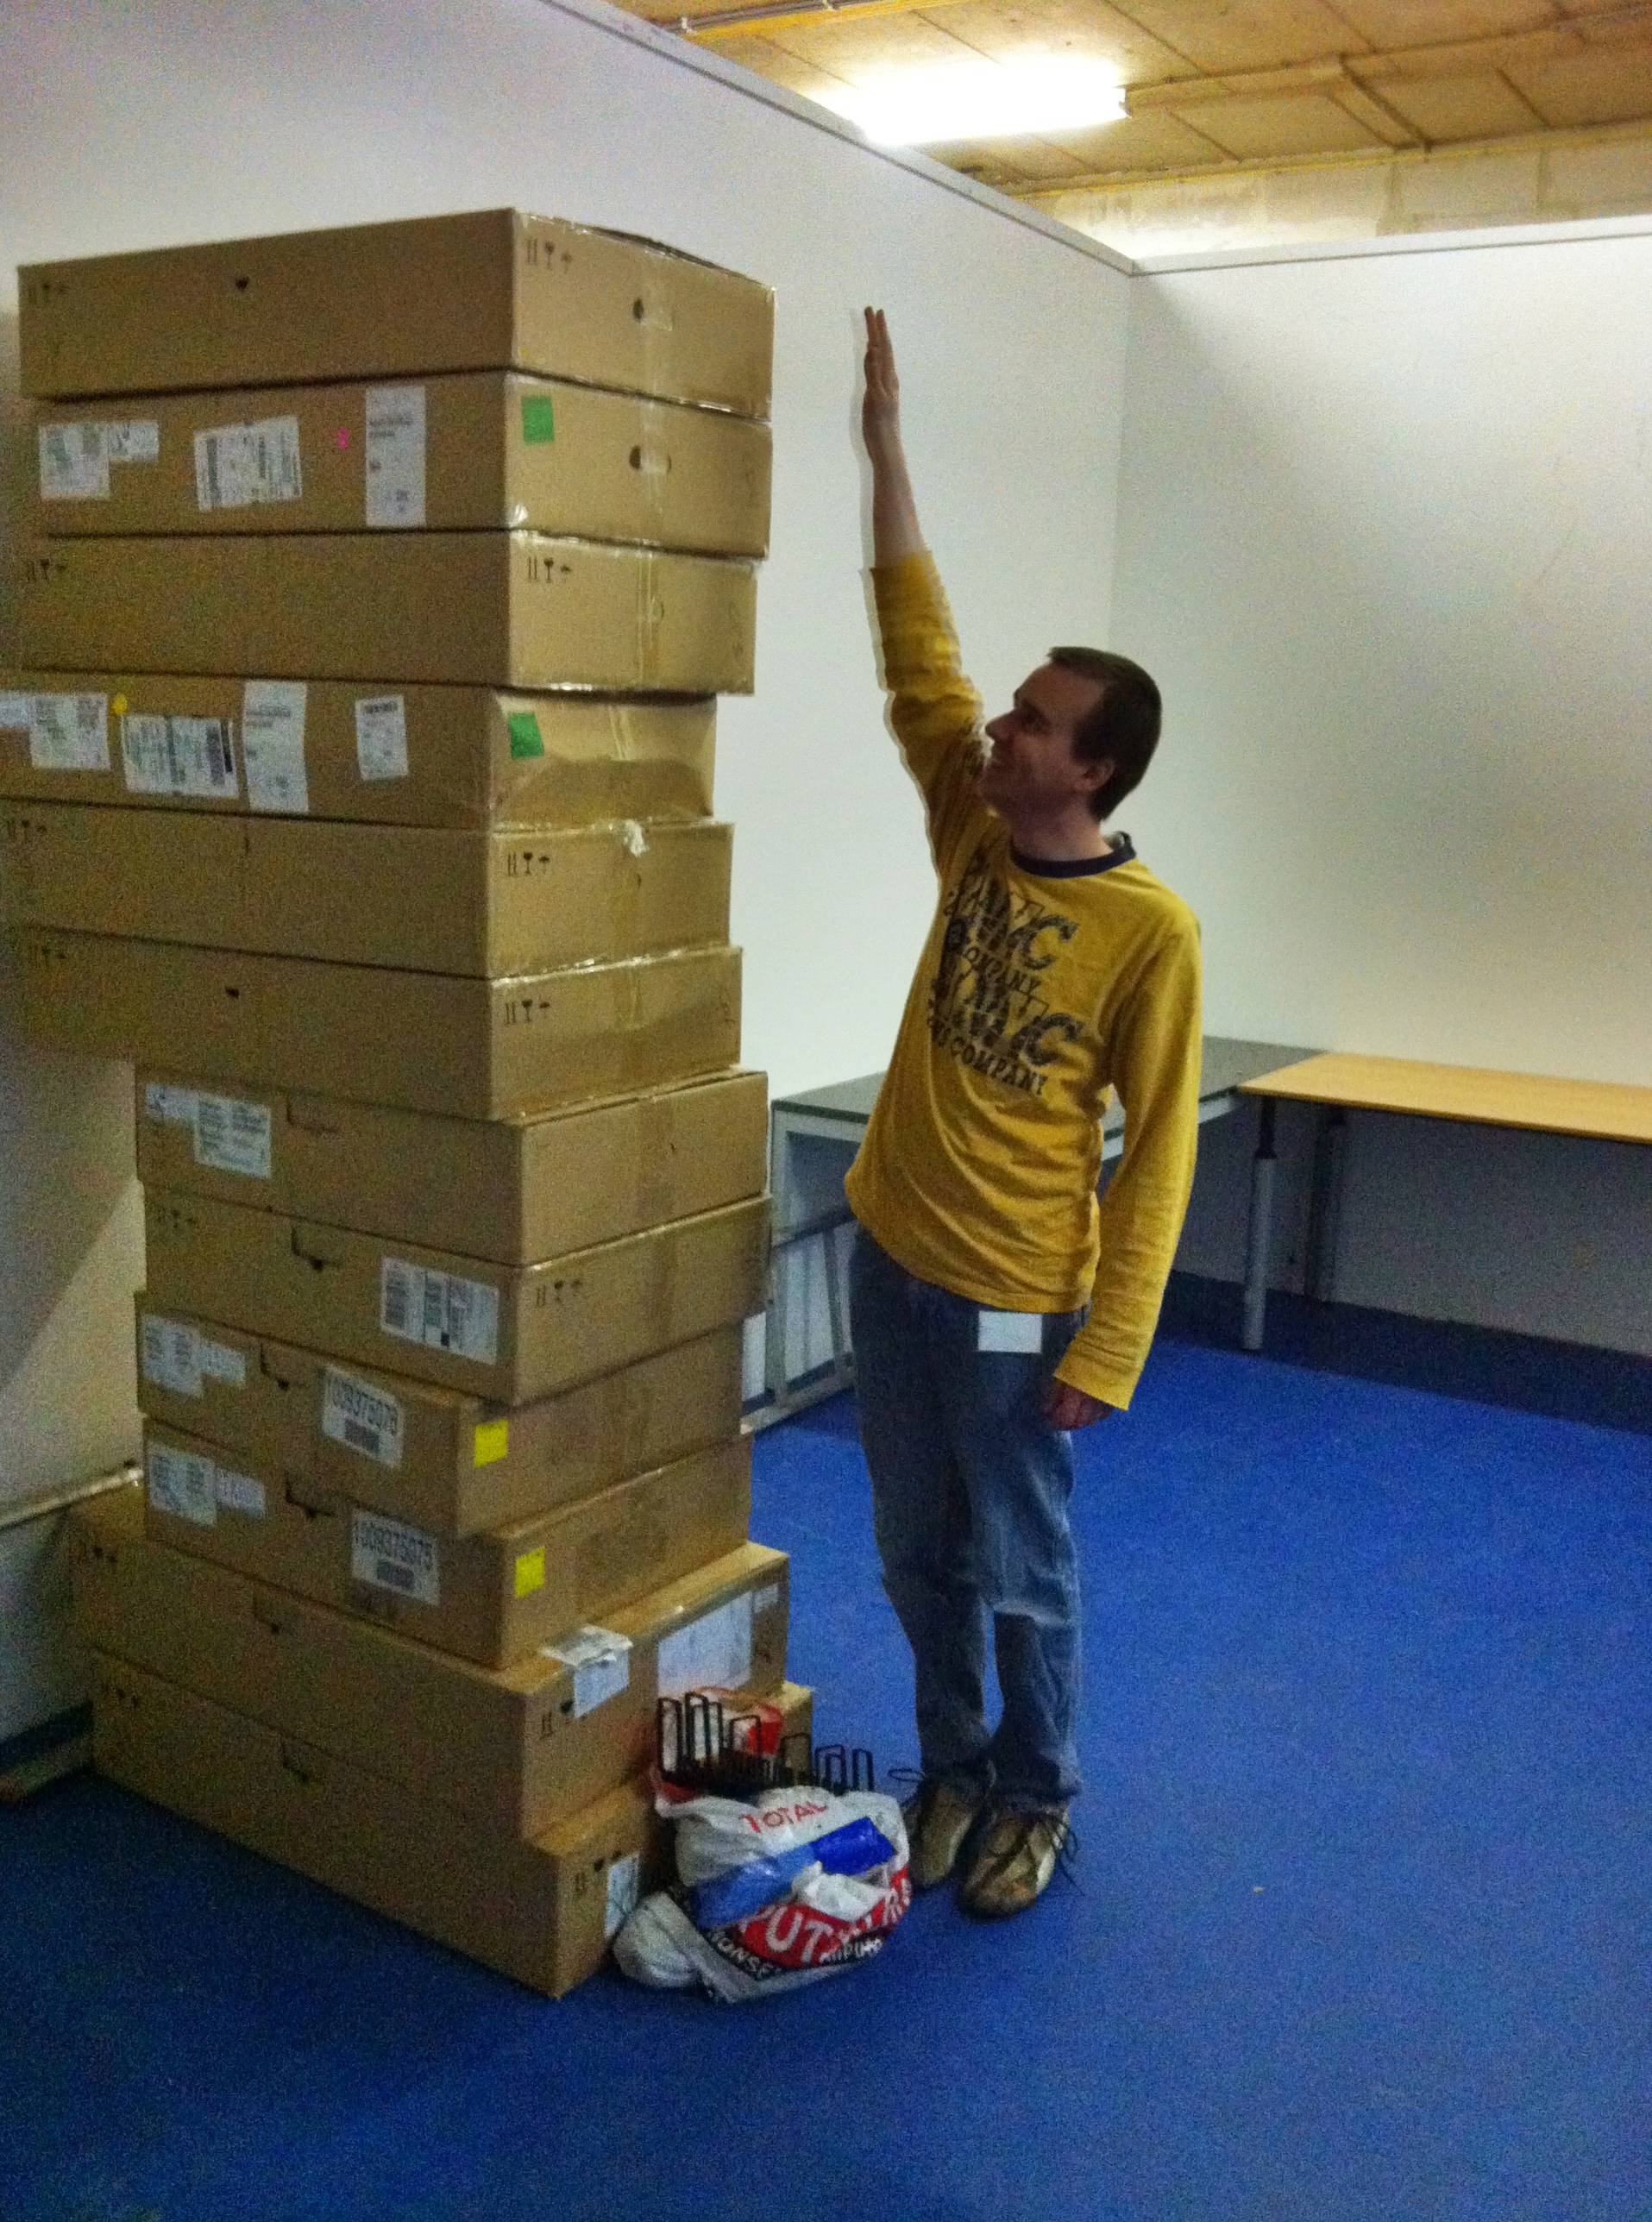
These are the boxes the hardware was in.


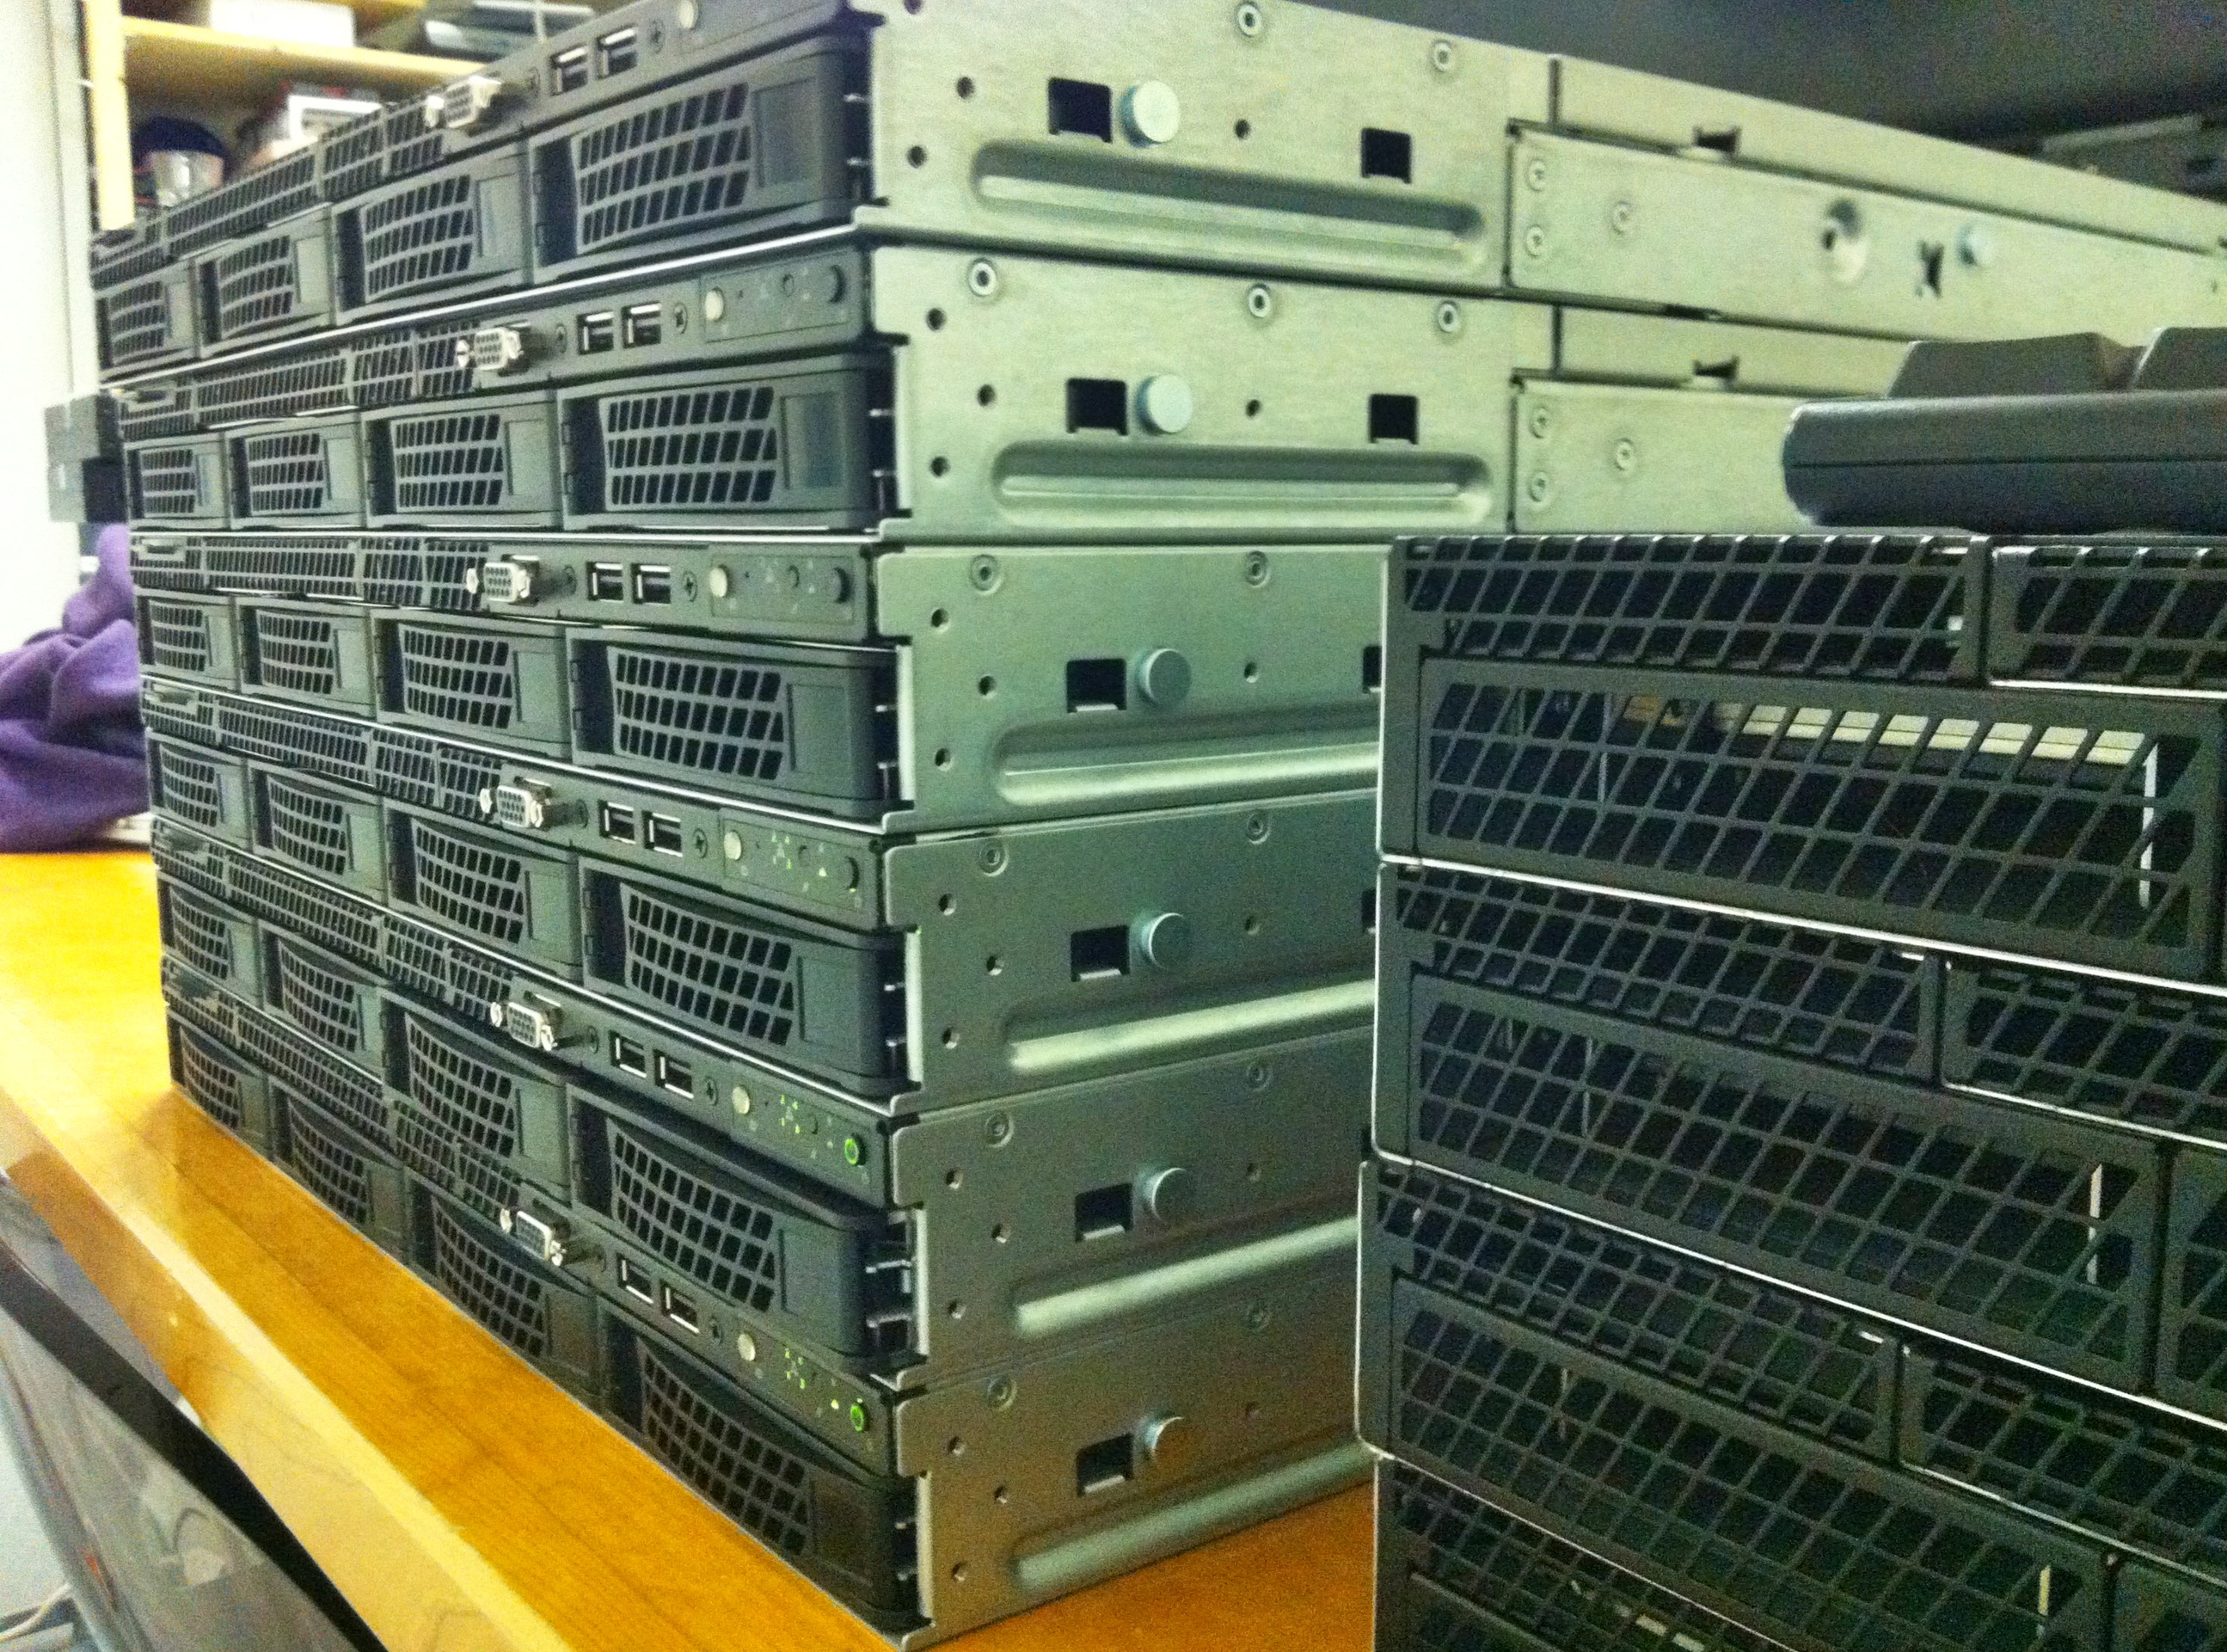
This image is taken in our lab while testing CloudStack.


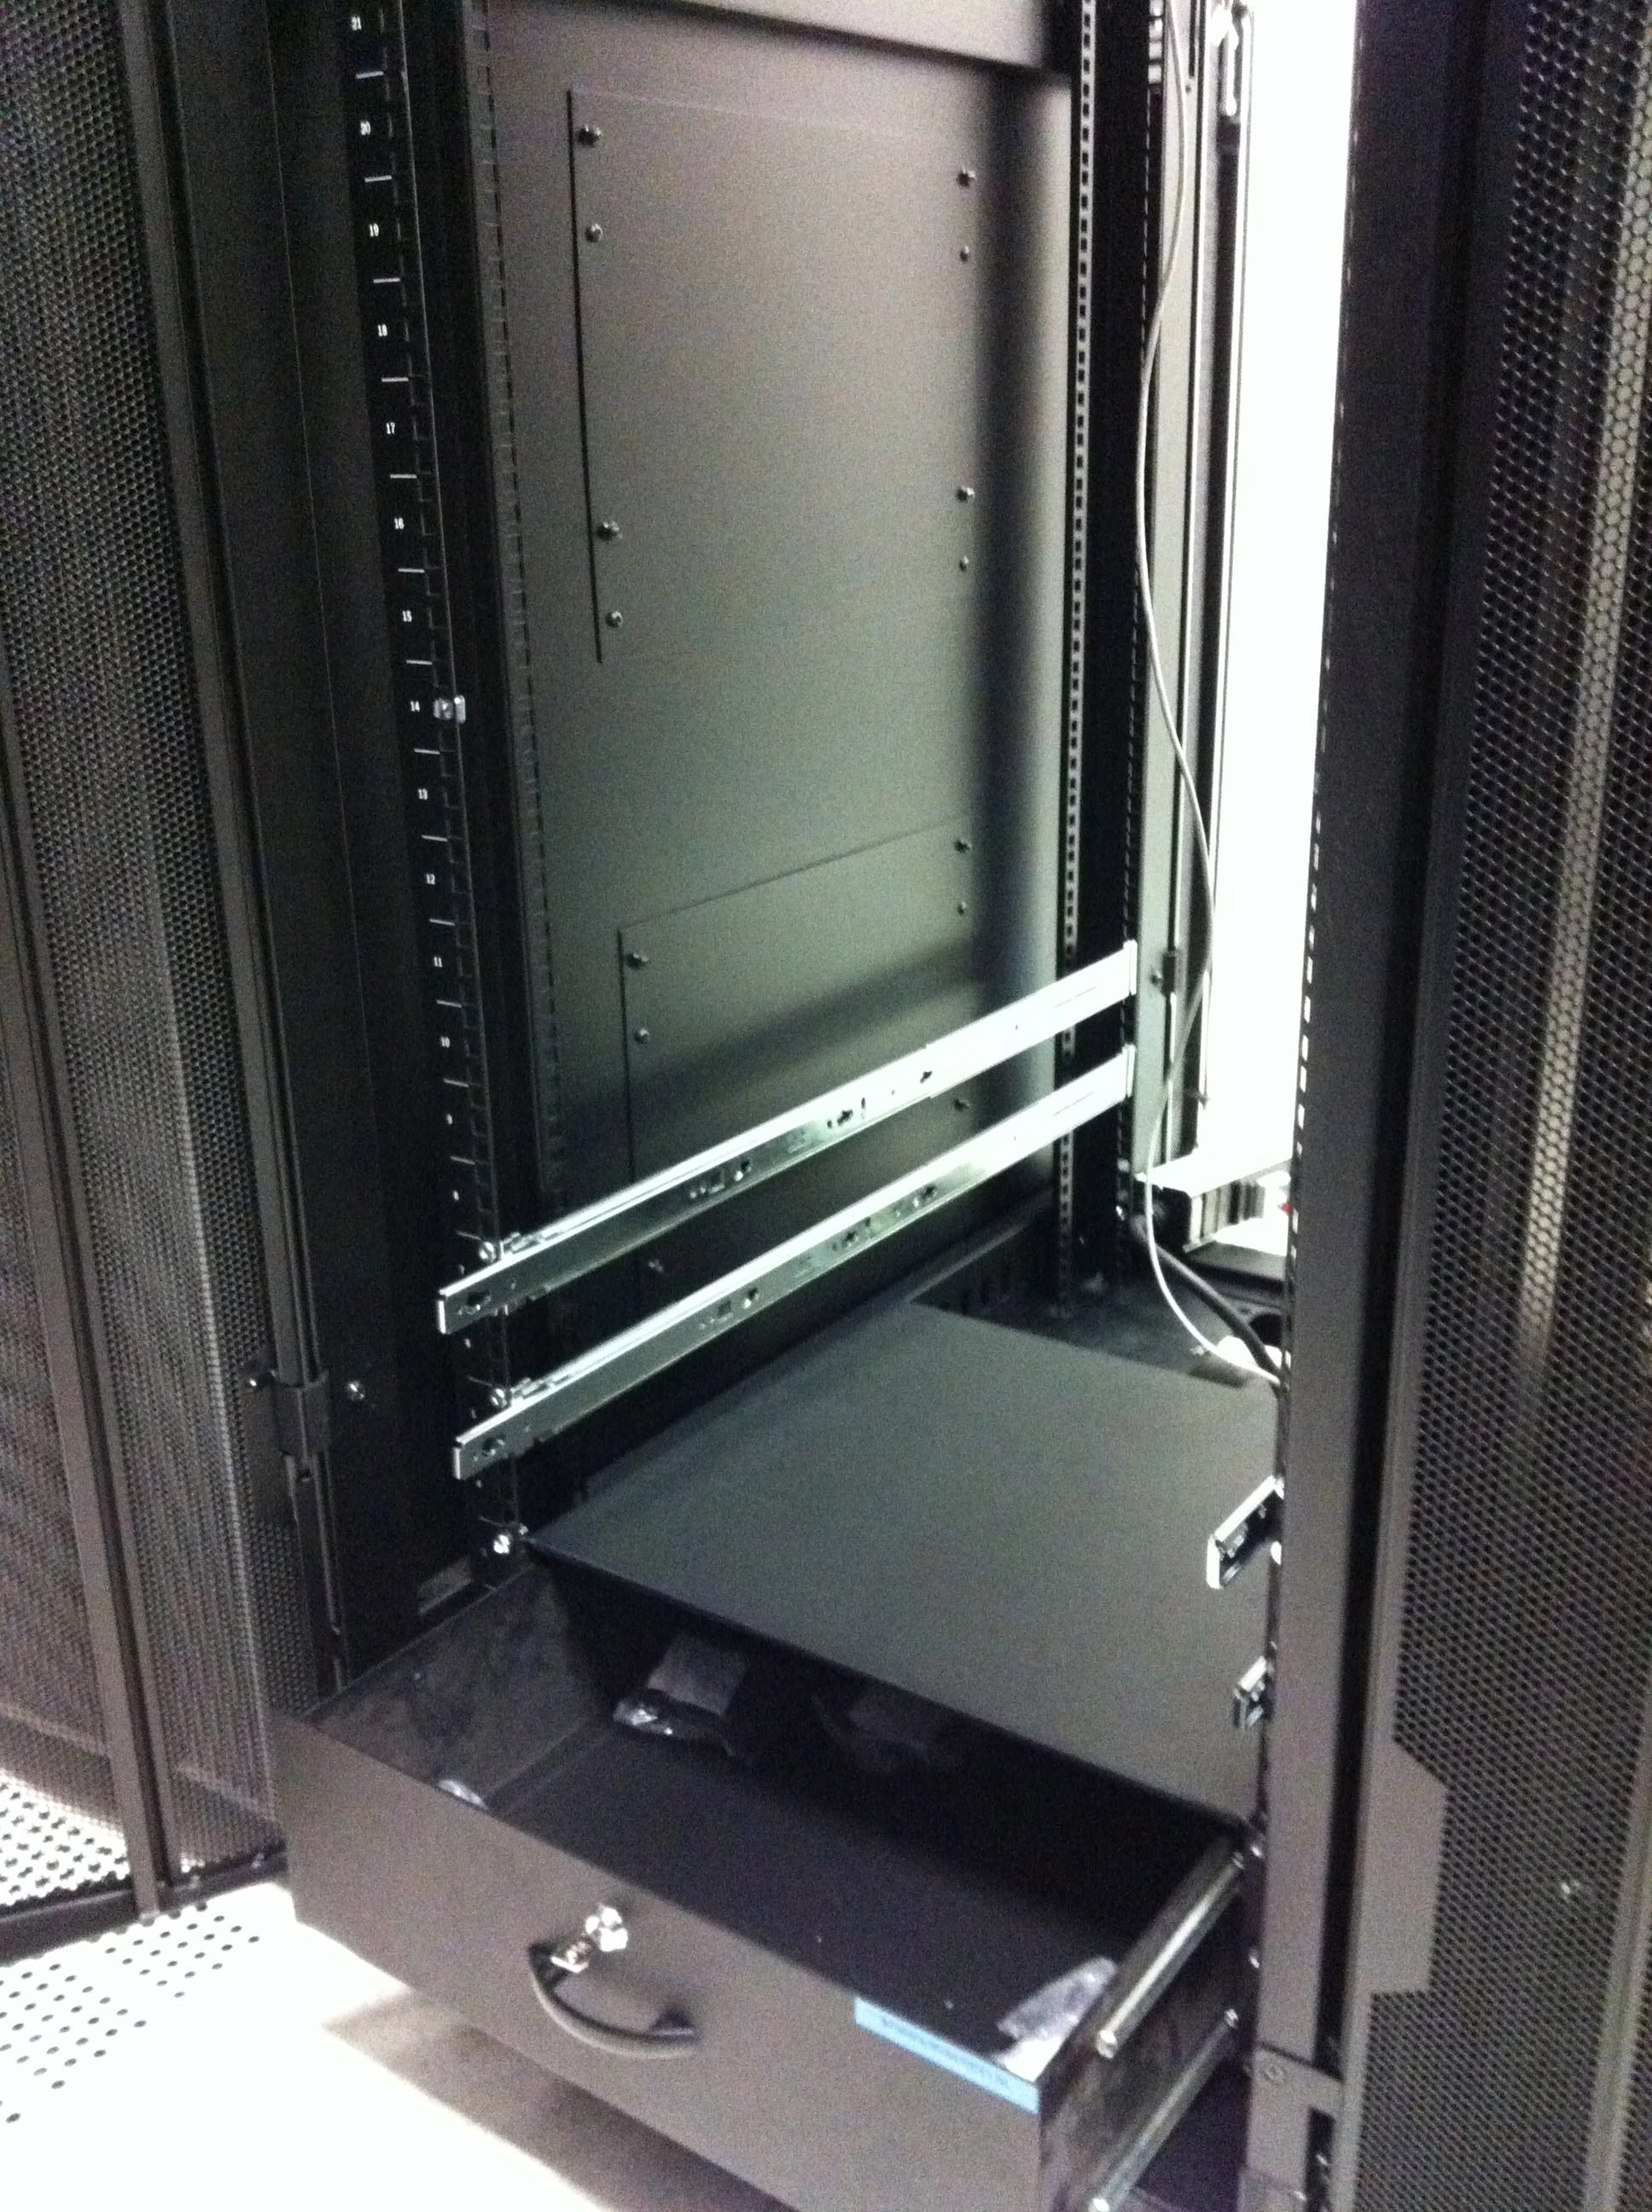
Very handy: a tray for spares in your rack!


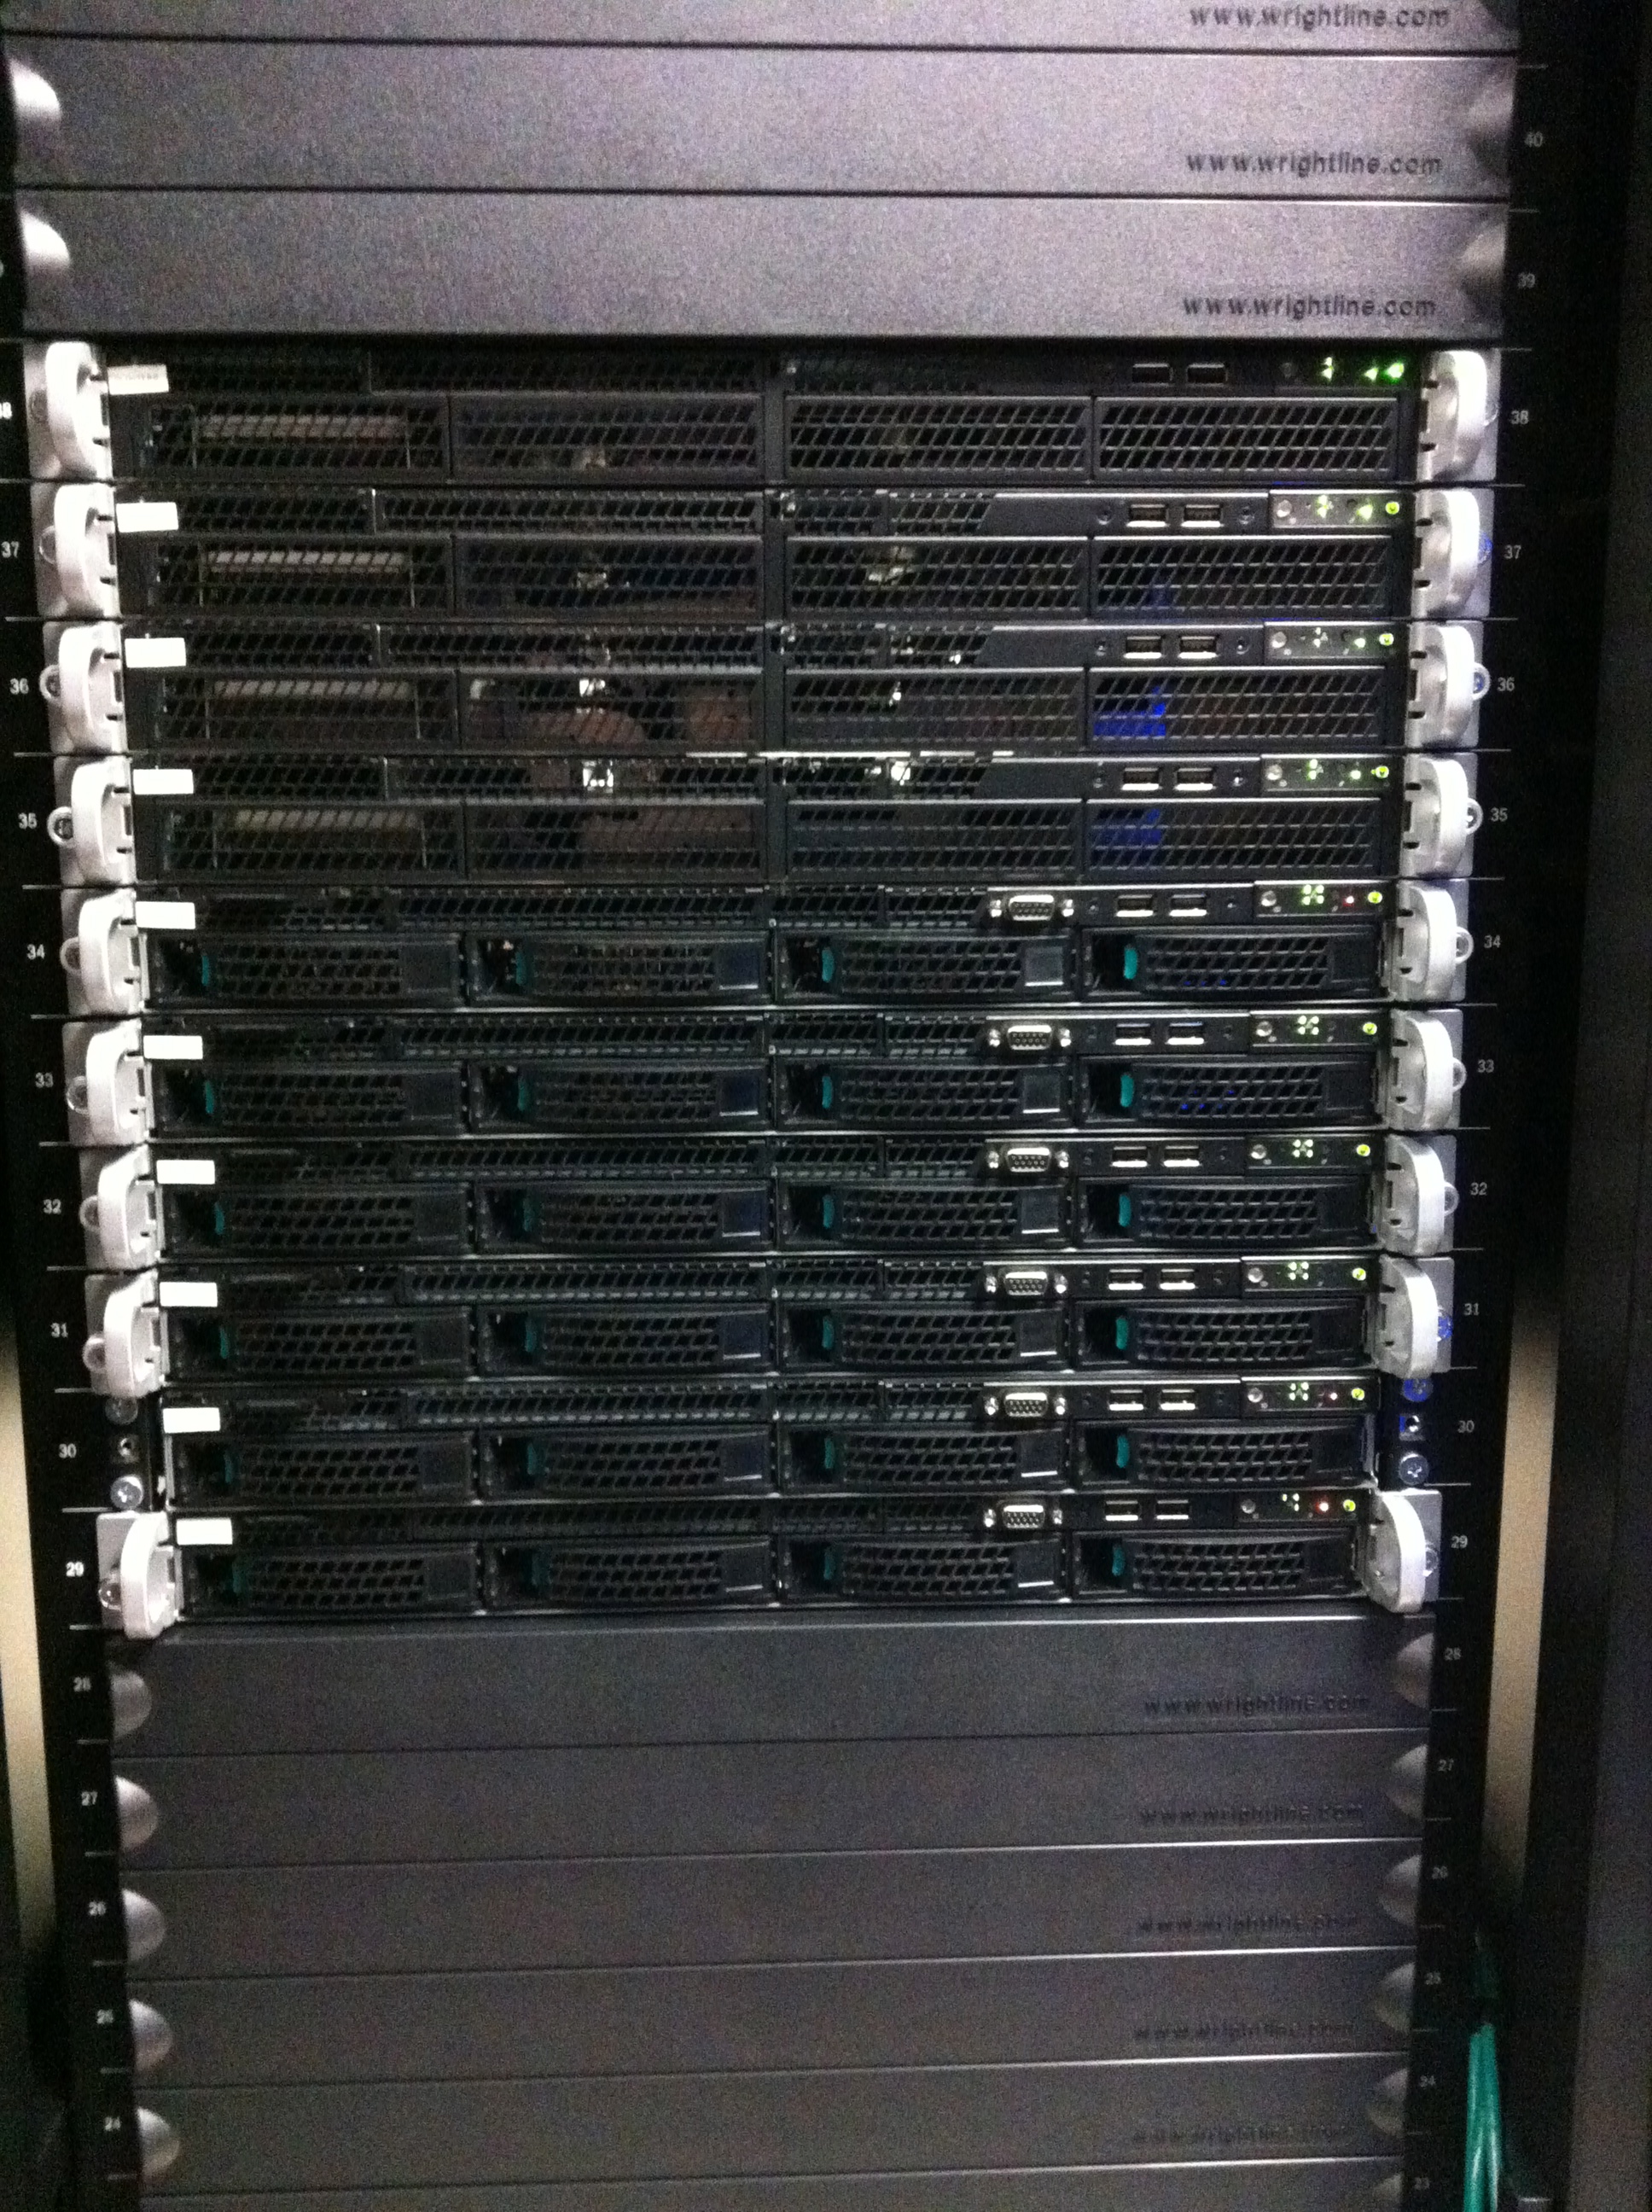
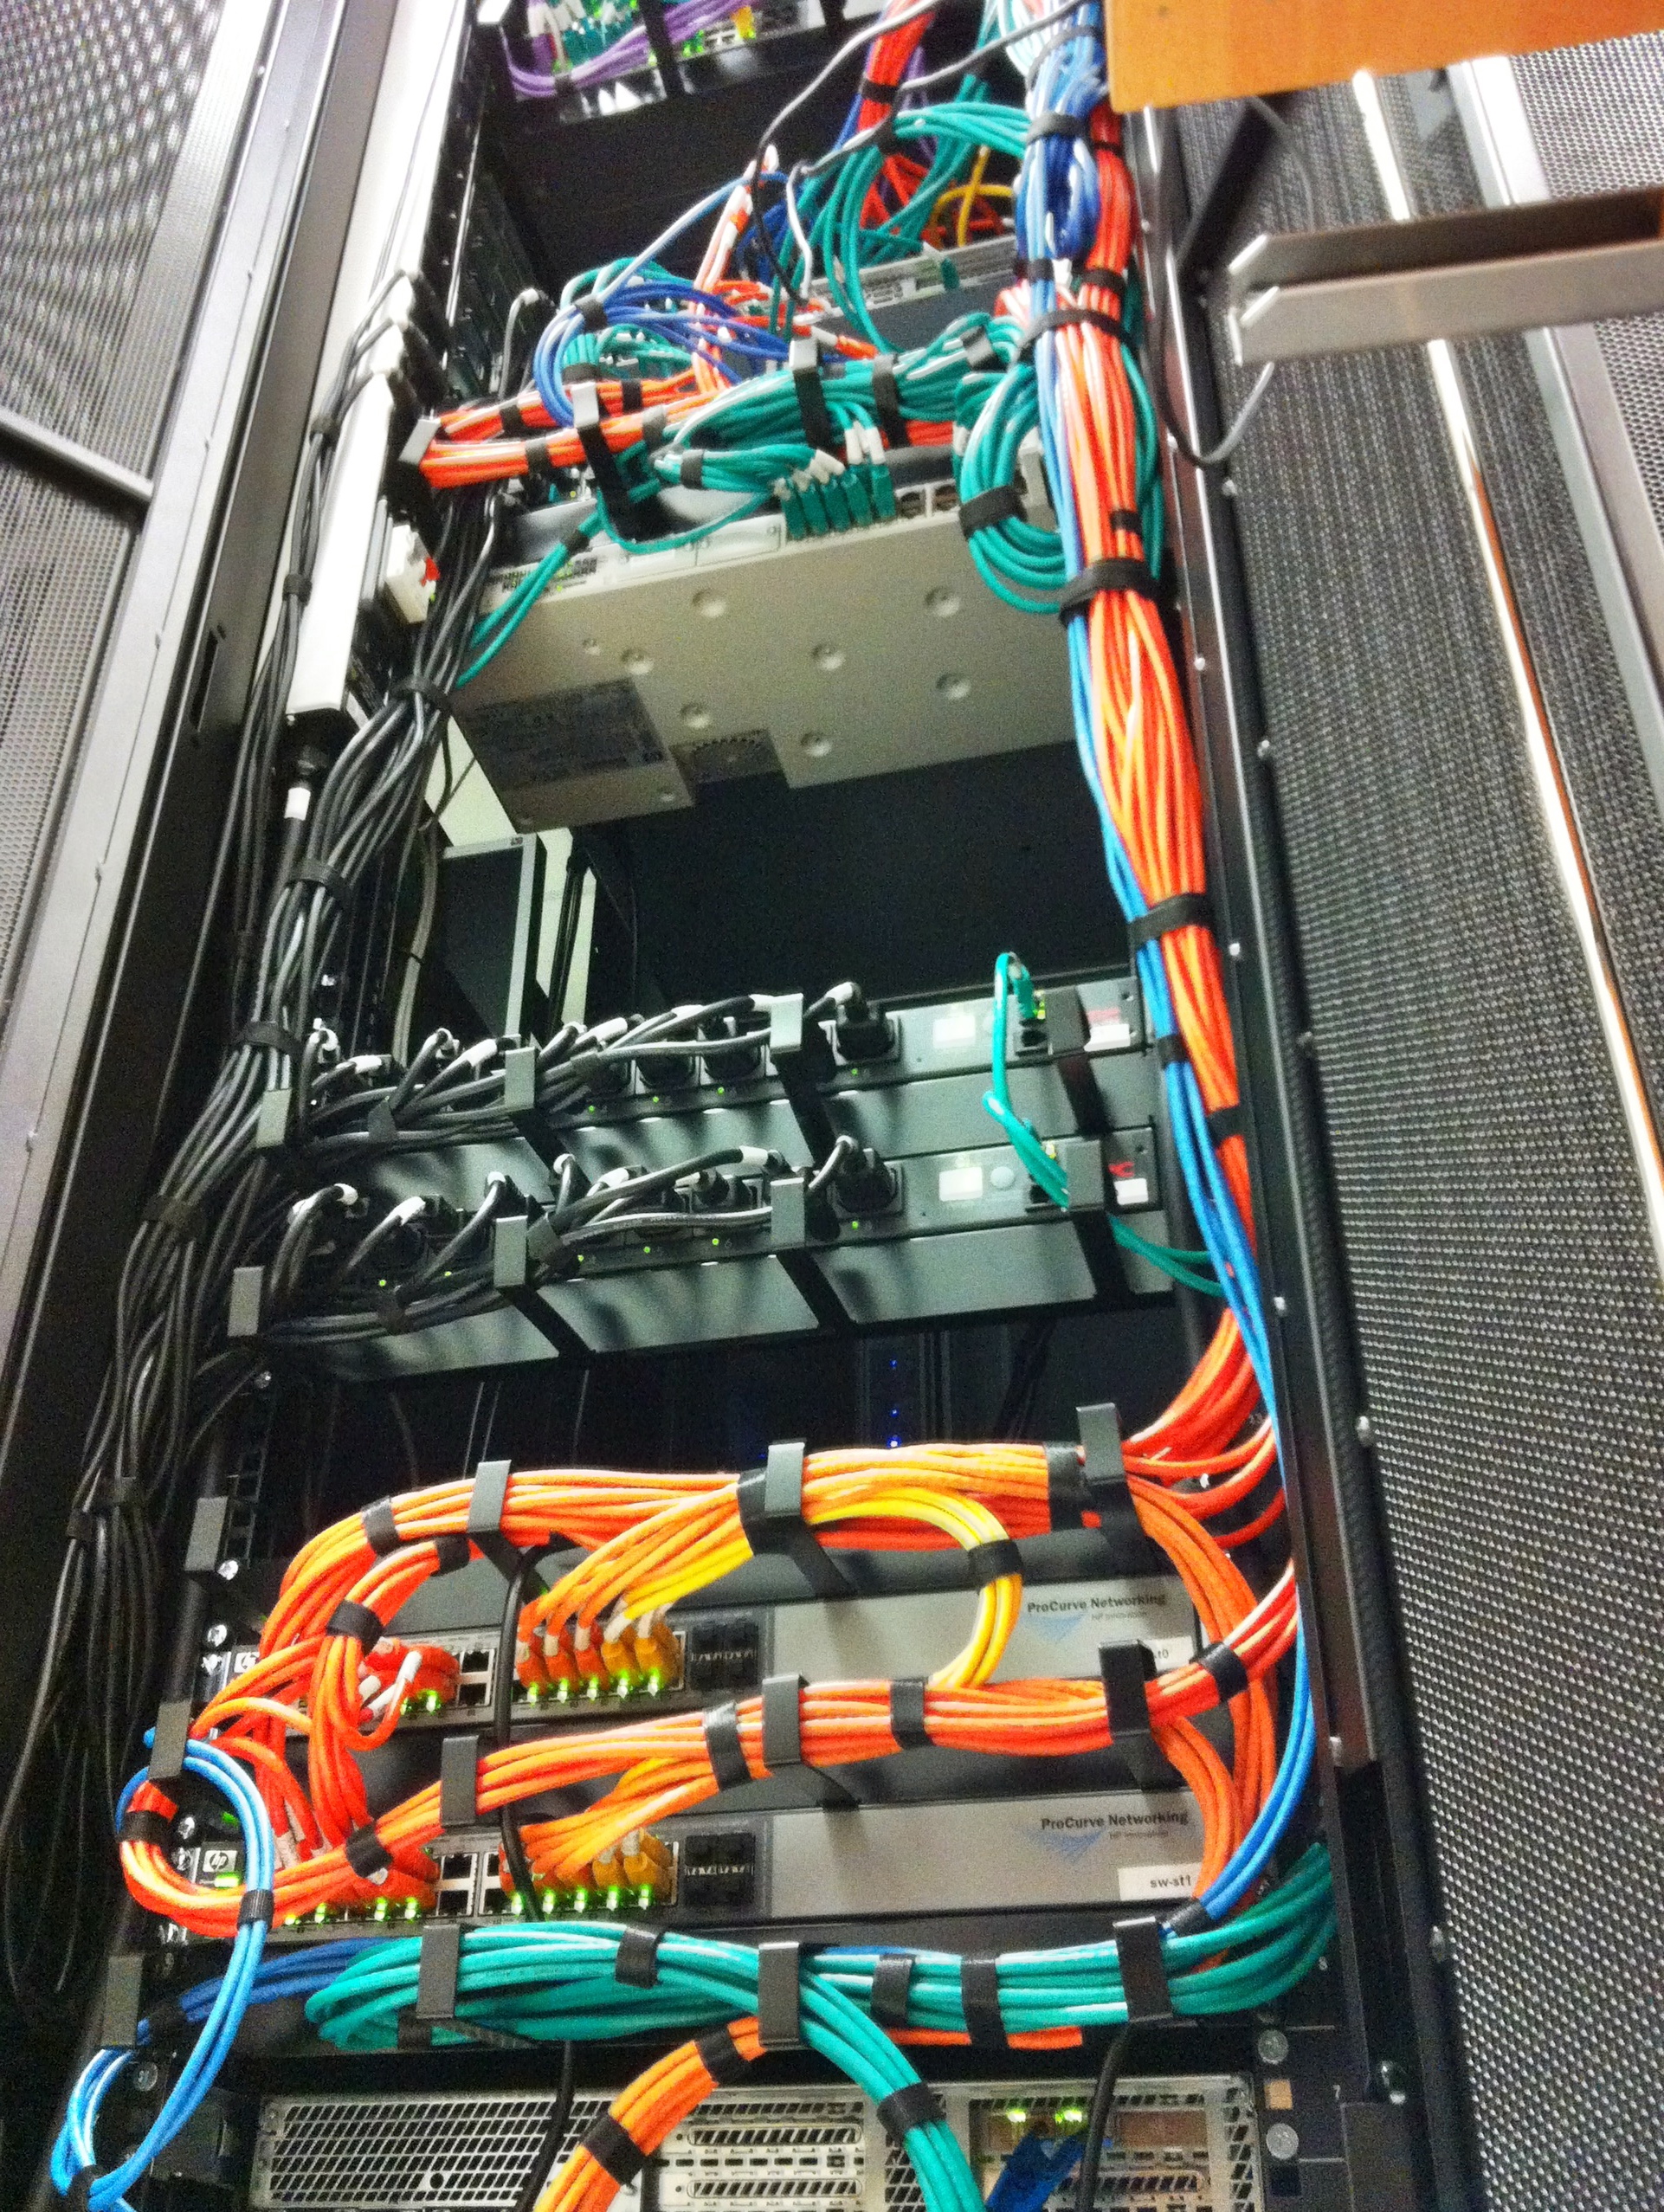
This is the front: 6 compute nodes, 2 management servers and 2 Linux routers that manage all traffic. We also have 2 big storage servers that you cannot see on this image.

This is how the back of the rack in the data center looks like after we’ve built everything in.


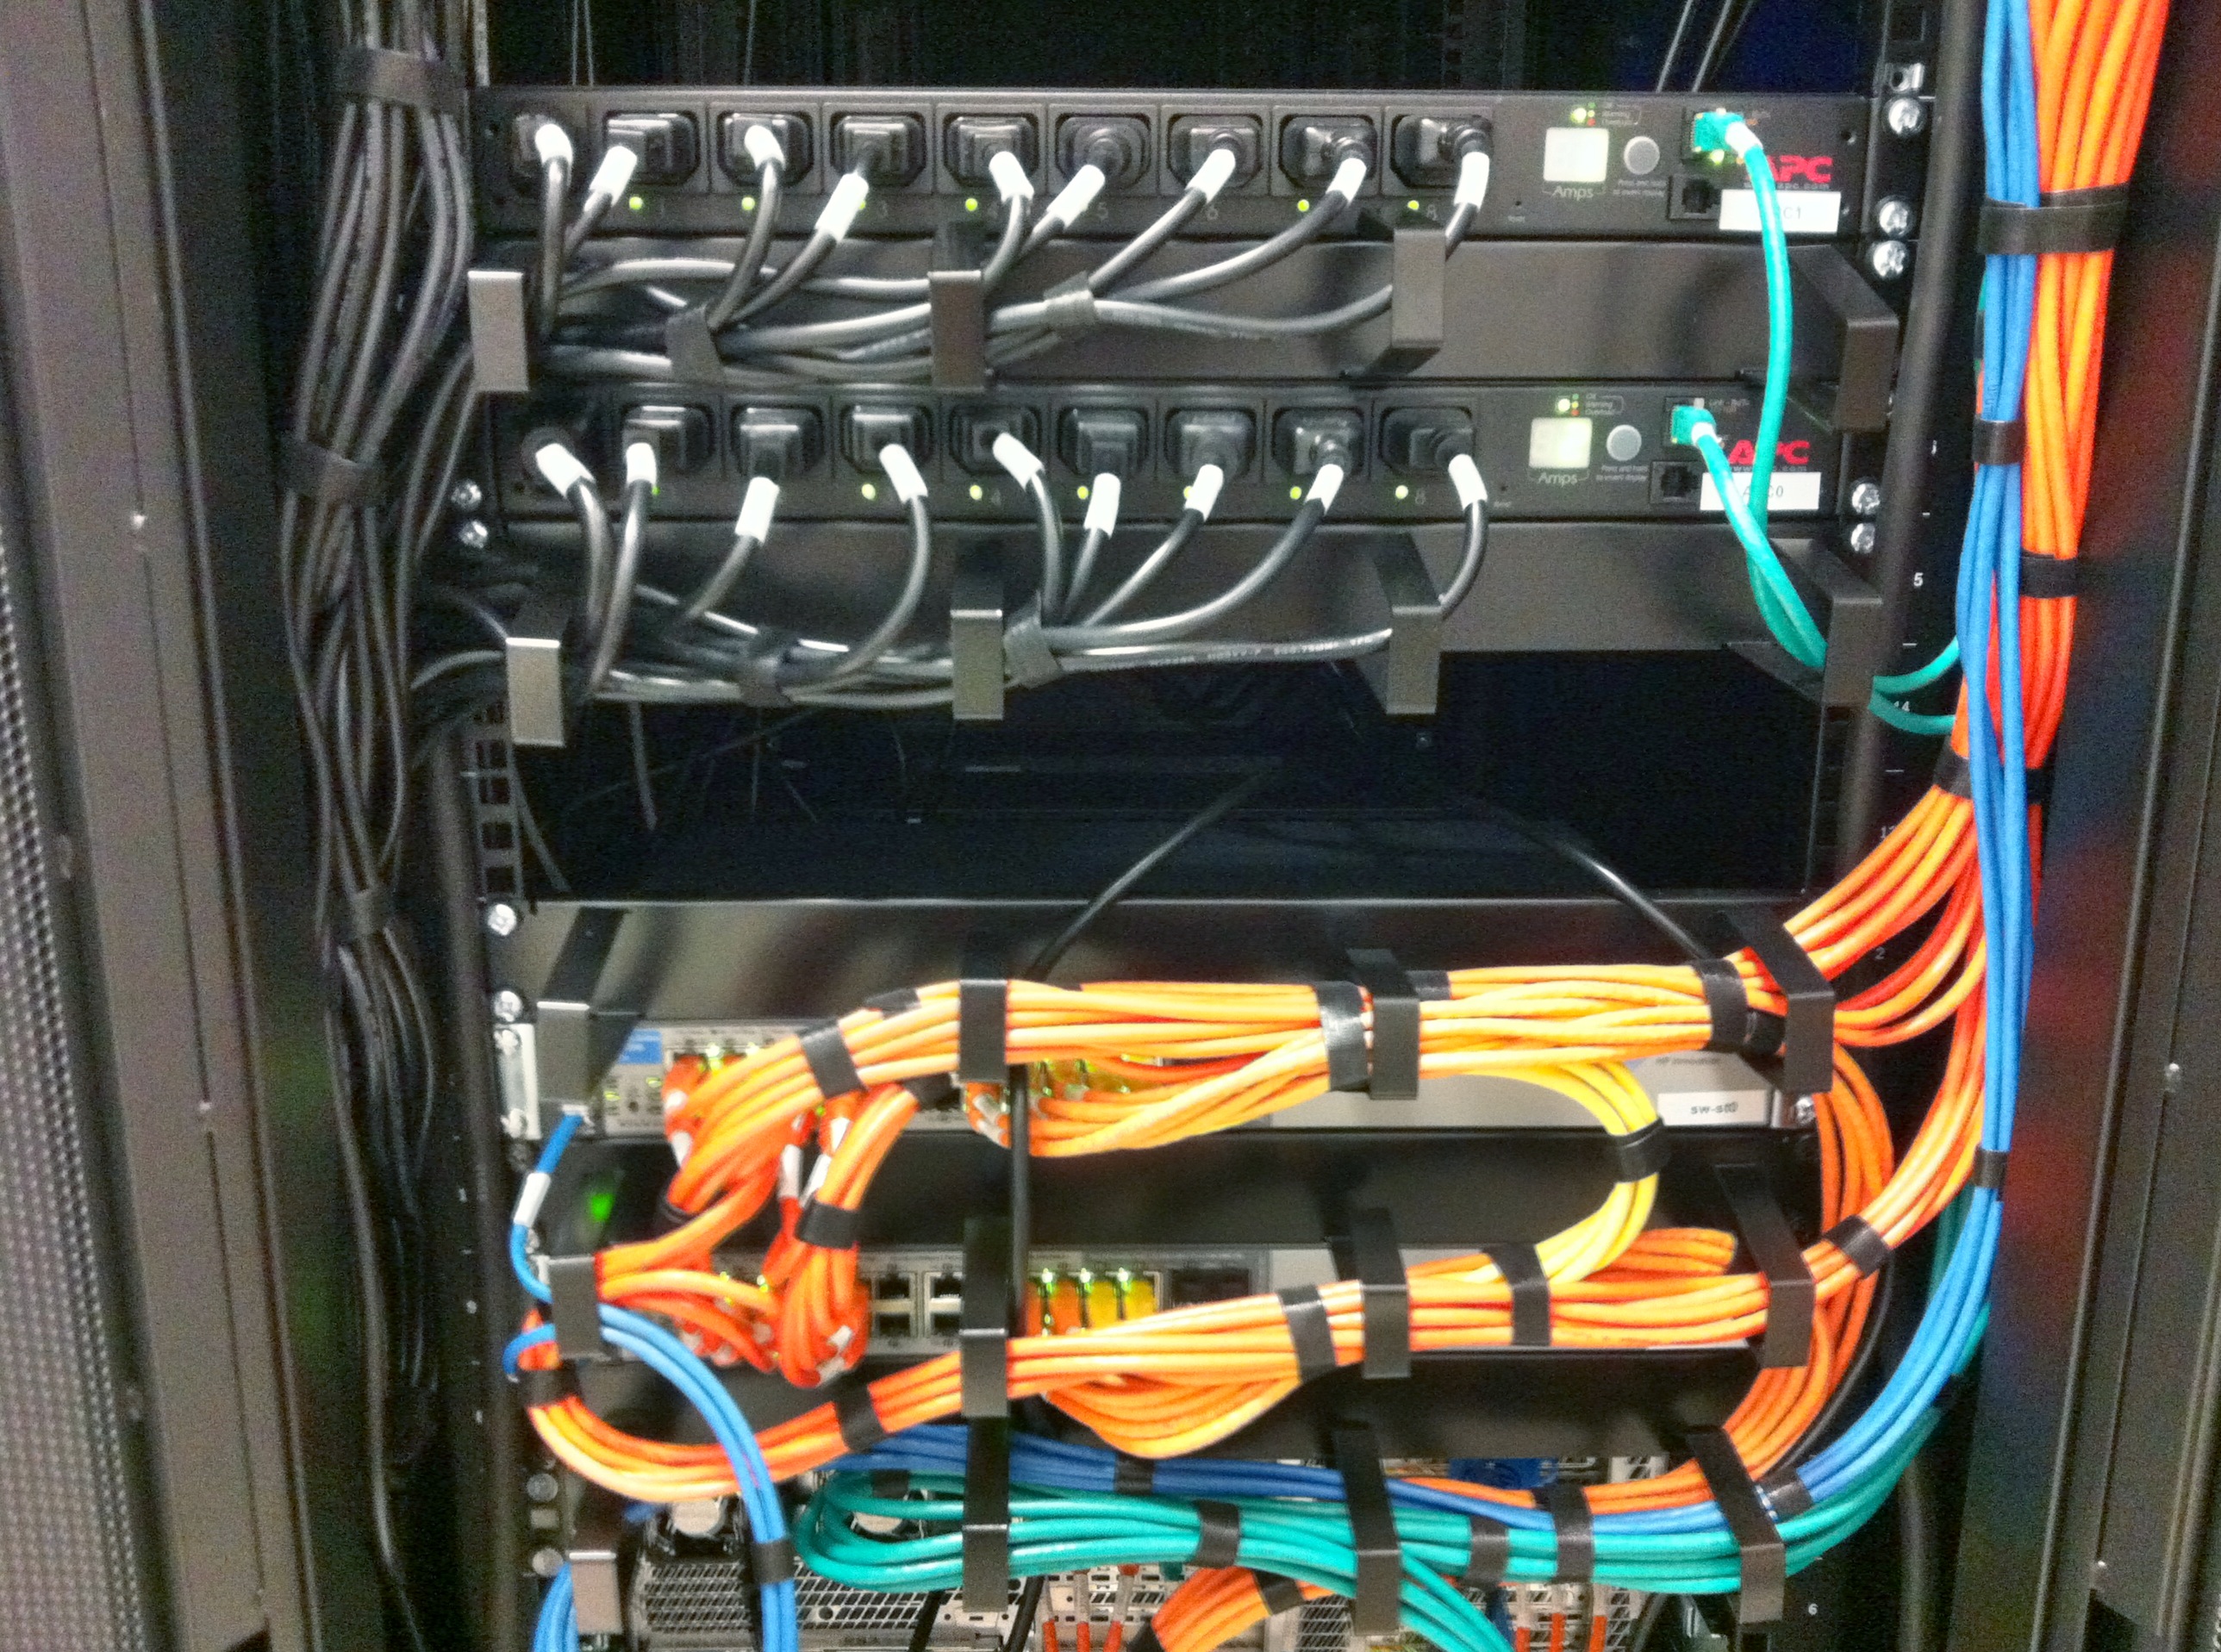
Close up of power management and storage network.


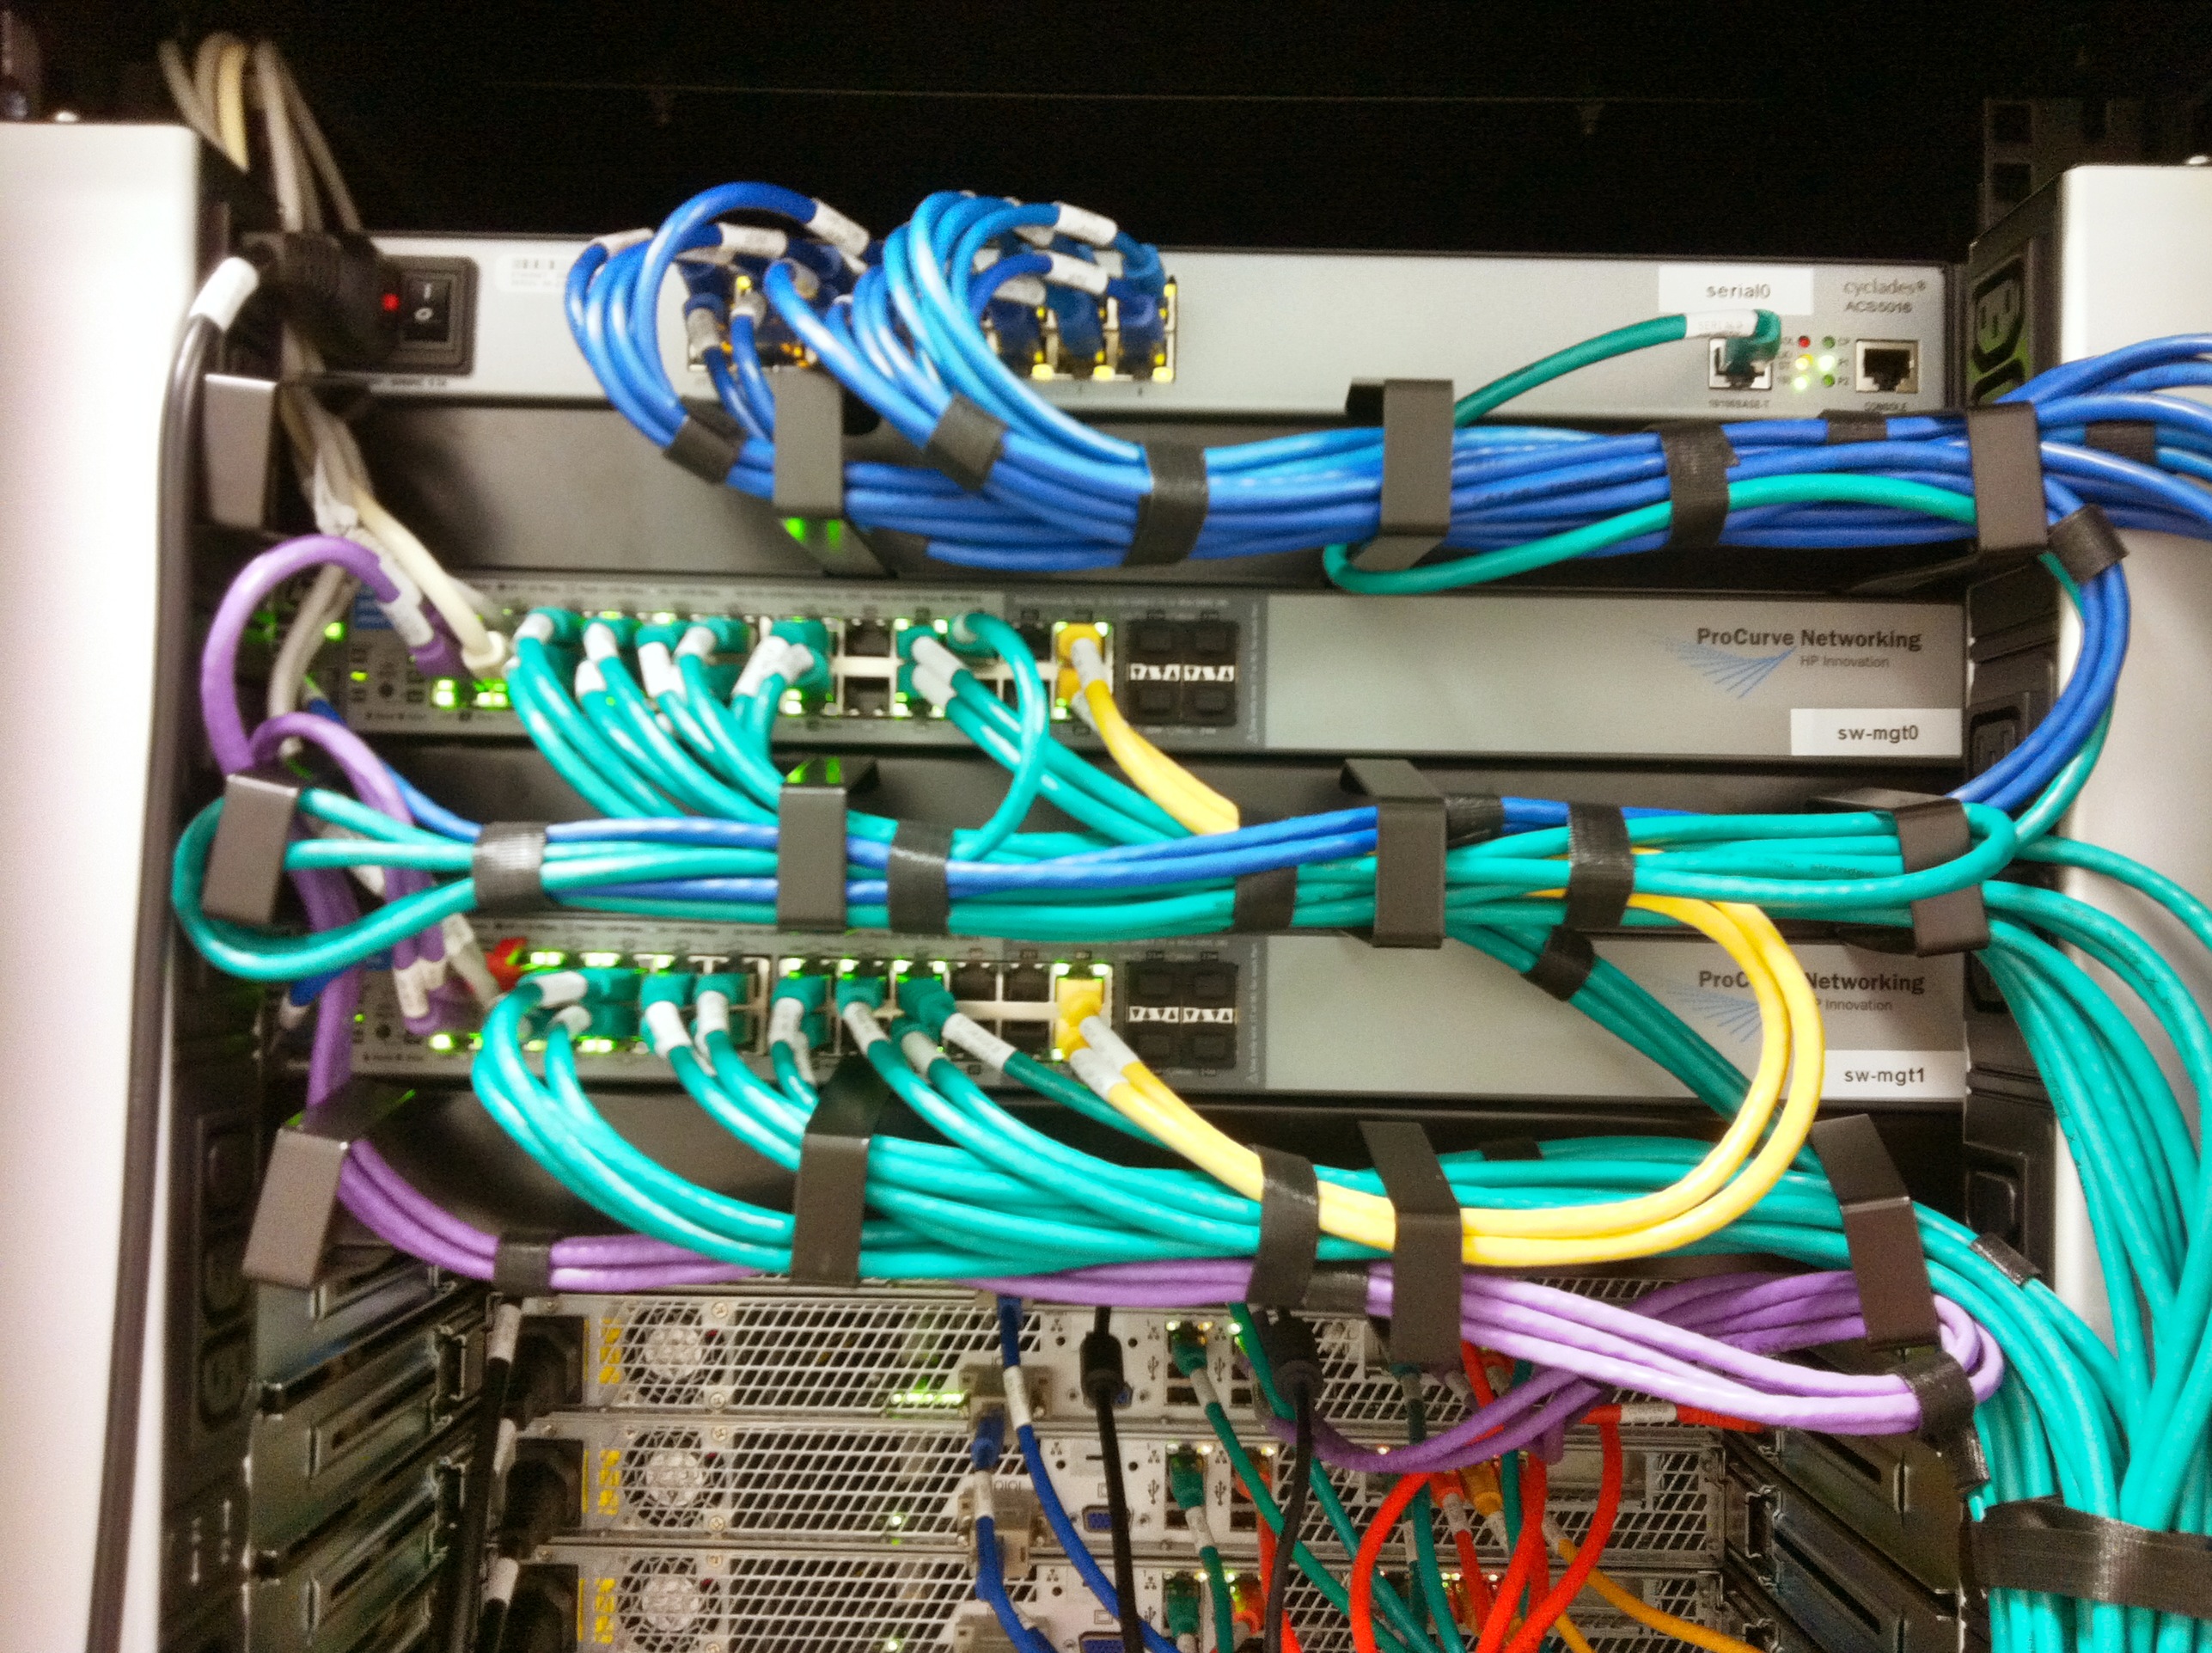
And the final image shows the serial, public, and manage networks.

We’ve labelled and documented every cable and used a separate color for each connection type (i.e. mgt network, storage network, uplinks, cross links, serial connections, etc).

Upgrading Keepalived in Debian Squeeze

— 1,973 views — 9 Comments

I’m running Keepalived on our loadbalancers for many years and I’m really happy with it. Today I run into an issue that took me some time to solve. I thought I’d share it 🙂

In my current setup I have a pair of Debian Squeeze boxes running version 1.1.20. Since I’m rolling out ipv6 at the moment, I need to upgrade to 1.2.2. Fortunately, Debian provides this version in Squeeze-Backports.

So, I decided to upgrade the Backup loadbalancer first (lb-1). It was a simple ‘apt-get’ procedure to get it installed. But soon these errors popped up in my syslog:

Jun 16 21:12:25 lb-1 Keepalived_vrrp: bogus VRRP packet received on bond1 !!!
Jun 16 21:12:25 lb-1 Keepalived_vrrp: VRRP_Instance(CLOUD_MGT_GW) ignoring received advertisment...
Jun 16 21:12:25 lb-1 Keepalived_vrrp: receive an invalid passwd!

No messages were to be found in the primary loadbalancer, lb-0. The two loadbalancers weren’t talking to each other any more. I did’t try a failover, as this apparently wouldn’t work. To be sure, I stopped keepalived on the lb-1.

Using tcpdump I found the problem: version 1.1.20 uses a password in its broadcast advertisement that was truncated to the first 7 characters, while the version 1.2.2 uses the full length password, as configured in /etc/keepalived/keepalived.conf. This of course did not match, and so they refused to talk to each other.

The solution was simple: I changed the password in the version 1.2.2 loadbalancer, to be 7 characters long. Then restarted keepalived, and all was working again. After upgrading both loadbalancers, I changed back the password to the longer version and since the versions are now both 1.2.2 it still worked 🙂

I’m using CloudStack for some months now and our cloud is close to going live. It’s an awesome piece of software that is just rock solid :-). One thing I couldn’t really find is how to create high available management servers with automatic failover. I’ve come up with a solution that I’ll share in this blog post.

From the CloudStack manual:

The CloudStack Management Server should be deployed in a multi-node configuration such that it is not susceptible to individual server failures. (…) MySQL may be configured to use replication to provide for a manual failover in the event of database loss.

Of course, when building a cloud one cannot just have one management server, as that would create a big single-point-of-failure . Even though there is no impact on already running VM’s, you and your customers, for example, won’t be able to stop and start VM’s. The manual suggests looking into “MySQL replication” and when problems occur, “manually failover” to another server.

How does that work? The management server itself is stateless, which means you can have two management servers and if you’d issue a command to either of them, the result would be the same. You can distribute the load, it just doesn’t matter which management server you’ll talk to. So there’s no master nor slave: they’re just all the same. The challenge is where CloudStack stores its data: in a MySQL server. We should have one MySQL master server that handles the requests from the management servers. MySQL supports replication, which means you can add MySQL slave servers that would just stay in sync with the master using the binary logs. You cannot query them directly, that’s what the master is for. When the master dies, you can promote a slave to be the new master. But this is a manual step to take.

Personally, I’d like to automate this. Further more, my experience with MySQL master/slave in the past, is that it isn’t rock solid. Sometimes slaves would get out of sync due to some error. You at least need some monitoring to warn you when this happens. It is almost always possible to fix this, but again this is manual work and I was looking for an automatic solution. So I came up with an alternative..

Since 2005 I’m building Linux clusters at work for our webhosting and e-mail business. Using Open Source techniques, that is. One of the things I’ve been using for years is DRBD. You can think of DRBD as a network based RAID-1 mirror. Using a dedicated high speed network (Gigabit or better), DRBD keeps two disks in sync. Using another Open Source tool, Heartbeat, one can automatically fail-over from one server to another and keep the service online. Heartbeat and DRBD have a sub-second failover and in case of a complete (power) failure of the hardware, the automatic failover takes just 10 seconds. Now that’s cool!

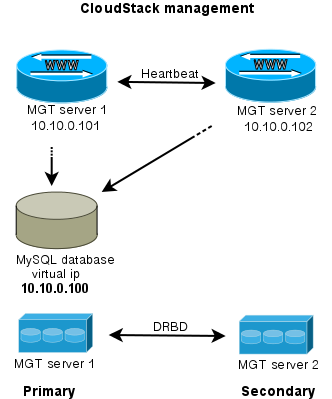
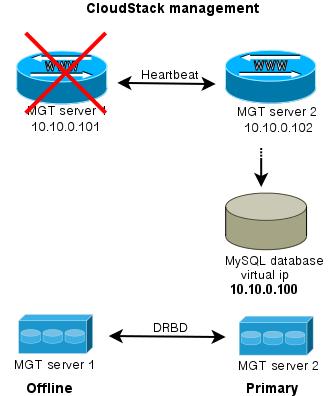
How can this help solve the management server issue? Imagine two management servers, that use DRBD to keep a given disk in sync. This disc is mounted on /var/lib/mysql on the management server that is primary. It is not mounted on the secondary management server. Heartbeat makes sure MySQL is only run on the primary server. To make it all easy to manage, Heartbeat also takes care of an extra ip-addres that is always mounted on the primary server. We call this the “virtual ip-address”. It looks like this:

Wat do we have then? Two management servers, both run the CloudStack management software and can be used to visit the webserver, call the API etc. Both management servers use the MySQL server which is run on the primary server. Tell CloudStack to use the “virtual ip-address” as MySQL host address. DRBD will make sure the stand-in server has an up-to-date version of the MySQL disk.

If the secondary server dies, nothing happens apart from losing redundancy. What if the primary server fails?

When either server goes offline, the MySQL disk and MySQL service is run on the server that is still alive. Of course also the CloudStack management is still available then. This way, you have an automatic failover for the CloudStack management server.

To extend this setup, one could easily setup a loadbalancer that distributes the traffic between the management servers. Both keepalived and haproxy can do that for you.

I hope this brings some inspiration to others working with CloudStack. If you’ve suggestions, questions or improvements let me know!

When you mix architectures (or are moving from 32bit to 64bit like me) and use RRDtool for statistics, you might run into this problem:

ERROR: This RRD was created on another architecture

You can solve this, to dump the RRD file on the server that created it to XML, like this:

rrdtool dump stats.rrd > stats.xml

Then transfer it to the new server, and convert it back to RRD:

rrdtool restore -f stats.xml stats.rrd

The  other server can now read the file. You can test it with the info command:

rrdtool info stats.rrd

Hope this helps someone!

PS: If you want to convert a whole directory to XML, use this little bash oneliner I created for this job:

for f in *.rrd; do rrdtool dump ${f} > ${f}.xml; done

Using GNU Screen to manage terminal sessions

— 1,588 views — 1 Comment

Whether you’re using Mac OSX, Windows or Linux, we’re all using a so-called “window manager”. Most are graphical user interfaces; and that’s a good thing 🙂 But as a sysadmin I need to manage many servers. Servers without a graphical user interface. So, how to handle that?

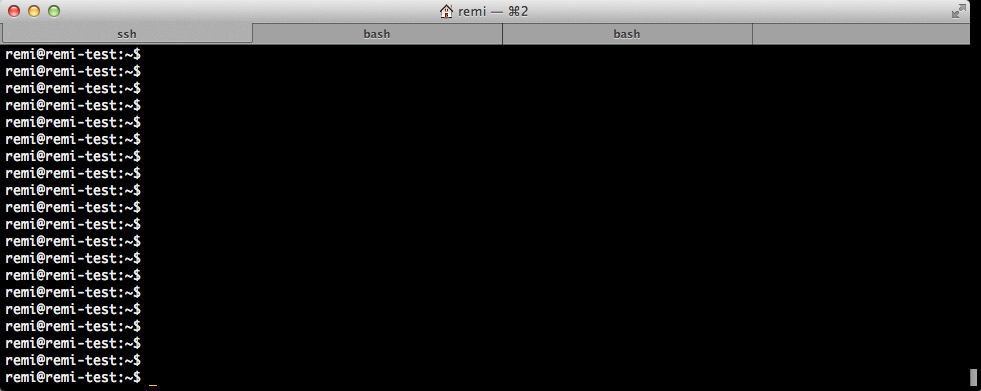
One could just ssh into a server when you need to do work on a given server. Depending on the terminal program you use, you might be able to have multiple sessions at the same time, preferably in tabs. It looks like this when 3 tabs are open:

Although this works well, it has one drawback for me: it only works on one computer. And when you turn off your computer everything is gone and disconnected. Since I’m working on multiple computers (desktop/laptop), multiple OS’es (OSX, Ubuntu) and multiple places (Work, Home), this no longer worked for me and I started looking for a better solution.

GNU Screen to the rescue! GNU Screen is a full-screen window manager, but terminal based. That is, it works in interactive shells such as a ssh session and is able to keep running while disconnected.

Starting a screen is easy:

screen -S screenname

You can attach and detach a session when needed. To detach, press Ctrl+a+d. To reattach enter:

screen -r screenname

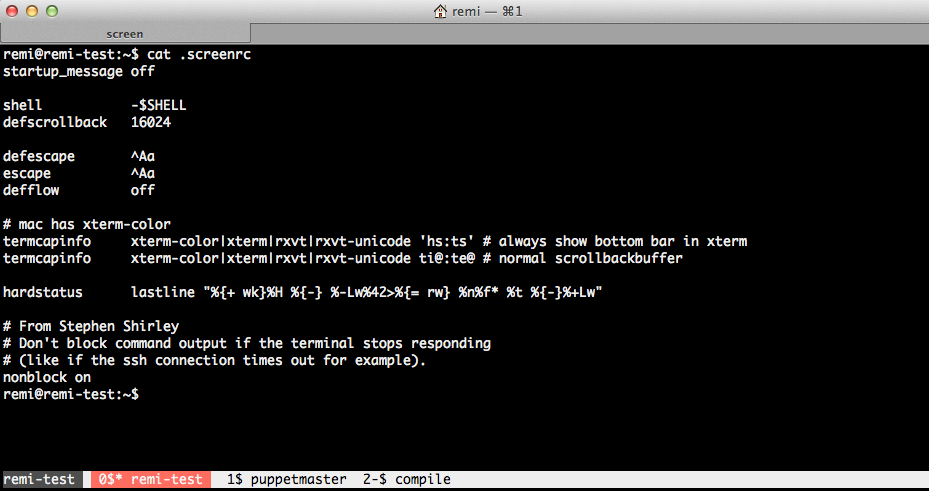
This means that no matter on what computer I login, on any place, I always am able to attach a running screen. It looks like this:

Note the bar at the bottom where the tabs are. You can even give them a name!

GNU Screen can be a bit obscure to configure. After googling a lot and some help from co-workers, I have now configured GNU Screen as you can see on the above image. Configuration is read from the .screenrc file in your homedir. In the image above you can see my .screenrc file.

Commands in GNU Screen are all prefixed by a control command, the default is Ctrl+a. This means that all commands you type will be entered in the terminal you’re connected to, except commands followed directly after you press Ctrl+a. In the manual page you’ll find C-a, which is short for Ctrl+a.

When you want to create a new tab, enter Ctrl+a+c. To change from one tab to the other, you press Ctrl+a+2 to go to tab #2. Ctrl+a+spacebar brings you to the next tab. To name that tab, enter Ctrl+a+A, etc. It takes a bit of time to get used to it, but for me it works very well.

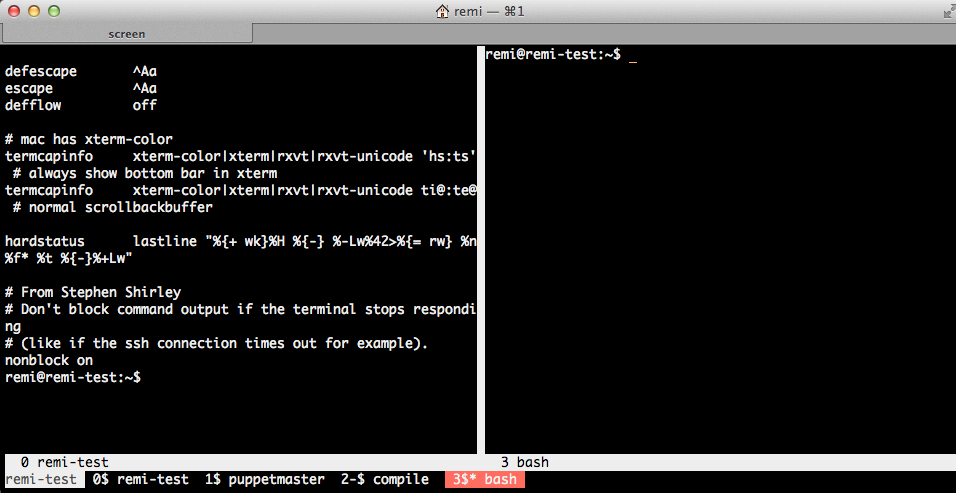
GNU Screen is a window manager, so apart from multiple tabs, you can even split the window to host multiple screens next to each other. To split vertically you enter Ctrl+a+|. Ctrl+a+tab brings you to the newly created space. You then create a new tab there, like Ctrl+a+c. It looks like this:

Like I said, Ctrl+a+tab switches between the left and right screen. In each you can call any tab that is below with Ctrl+a+tabnumner, or toggle between them using the spacebar.

Need to go away and want to protect your screens? Enter Ctrl+a+x and you’re screens will be locked. You need to enter the password of the connected user to unlock.

This is just a quick introduction of what is possible with screen. Have a look at the man page:

man screen

or use Google to get some more configuration examples. Have fun!

HOWTO enable RPMForge repository in CentOS

— 1,006 views — 2 Comments

Since I’m working with CloudStack I’m also working with CentOS. As I’ve been working with Debian for over 10 years, it sometimes takes some extra time to get things done. Like when you want to install a package that is not in the default repo’s.

This is how to enable the RPMForge repository:

Start to import the key:

rpm --import http://apt.sw.be/RPM-GPG-KEY.dag.txt

Then download the RPMForge release file:

wget http://apt.sw.be/redhat/el6/en/x86_64/rpmforge/RPMS/rpmforge-release-0.5.2-2.el6.rf.x86_64.rpm

Then all you need to do is install this rpm:

rpm -i rpmforge-release-0.5.2-2.el6.rf.x86_64.rpm

You only need to do this once. Now the packages from RPMForge can be installed using yum. Have fun!

HOWTO create php5-PECL Debian packages

— 2,332 views — No comments


The PHP Extension Community Library (PECL) has many great extensions for php5. Unfortunately, most are not packaged for Debian. Of course it is pretty easy to install it by hand. For example the ‘pecl_http’ extension:

pecl install pecl_http
echo "extension=http.so" > /etc/php5/conf.d/http.ini

For this to work you need some -dev packages to be installed. php5-dev and build-essential are the minimum required.

I have two problems with this method:
1. Too many -dev packages will be installed on production servers. I want to have as less packages installed as possible;
2. The software is not easily installable and upgradable;

I’ve yet another requirement: I need to distribute my package in a local Debian repository so it can be automatically installed. Therefore I need to have the right metadata with my new package. The method I describe here does create all files you need to upload the package to a Debian Repository.

Start to create an empty directory for our new package:

mkdir php-pecl-http_1.7.4-1

Then go into this new directory and download the PECL package you want to package for Debian.

pecl download pecl_http

Using ‘dh-make-pecl’ you can create a Debian source package like this:

dh-make-pecl --only 5 pecl_http-1.7.4.tgz

The next step is fixing a problem with ‘pecl_http’. The generated .so file is called http.so and not pecl_http.so. You can skip this step when creating other packages.

sed -i 's/PECL_PKG_NAME=pecl-http/PECL_PKG_NAME=http/1' debian/rules
mv debian/pecl-http.ini debian/http.ini
sed -i 's/pecl-http.so/http.so/1' debian/http.ini

If you want, you can edit the changelog. For example when you want to customize the version number.

vim debian/changelog

Now it’s time to build the package. Look closely to the output when you get an error. You might need some dependencies like php5-dev and build-essential.

Don’t run this as root, but add ‘-rfakeroot’ as oridinary user.

dpkg-buildpackage -rfakeroot

You will find your new package one level below:

ls -la ../

drwxr-xr-x 3 remi staff   4096 Apr  5 16:58 . drwxr-xr-x 7 remi staff   4096 Apr  5 18:23 .. -rw-r–r– 1 remi staff   1134 Apr  5 16:08 channel.xml -rw-r–r– 1 remi staff 174503 Apr  5 16:08 pecl_http-1.7.4.tgz -rw-r–r– 1 remi staff 146352 Apr  5 16:38 php5-pecl-http_1.7.4-1_amd64.deb drwxr-xr-x 5 remi staff   4096 Apr  5 16:56 php-pecl-http-1.7.4 -rw-r–r– 1 remi staff   1516 Apr  5 16:38 php-pecl-http_1.7.4-1_amd64.changes -rw-r–r– 1 remi staff   4334 Apr  5 16:58 php-pecl-http_1.7.4-1.diff.gz -rw-r–r– 1 remi staff    769 Apr  5 16:38 php-pecl-http_1.7.4-1.dsc -rw-r–r– 1 remi staff   4332 Apr  5 16:57 php-pecl-http_1.7.4-1.md.0.diff.gz lrwxrwxrwx 1 remi staff     19 Apr  5 16:09 php-pecl-http_1.7.4.orig.tar.gz -> pecl_http-1.7.4.tgz

The *.deb *.changes *.diff.gz *.dsc and *.orig.tar.gz files are needed for uploading to a repository. I’m not covering setting up your own Debian Repository. Don’t worry, you can always install the .deb directly like this:

dpkg -i php5-pecl-http_1.7.4-1_amd64.deb

To install from your Debian Repository:

apt-get update
apt-get install php5-pecl-http

In my configuration management (Puppet) I can now ensure this package is installed at all times at all nodes that run php5. Furthermore, I can compile and package on a dedicated compile vm and have as clean as possible production vm’s!