


Recently I was looking for a way to SSH from a network that blocked my outgoing SSH connection. I’d be nice to have a way around firewalls and be able to access your private Linux terminal. To be able to debug a problem from an remote location, for example.
A collegue suggested a tool called ‘Shell In A Box‘. Shell In A Box implements a web server that can export arbitrary command line tools to a web based terminal emulator using just JavaScript and CSS without any additional browser plugins. This means: connecting your browser via HTTPS to your own hosted Shell In A Box web site, and access a Linux terminal from there.
How cool is that? In this blog I’ll show you how to set it up in a secure way.
Building and installing Shell In A Box
I want to setup Shell In A Box on my Raspberry Pi. It’s a great device running Linux that has a very small energy consumption footprint. Ideal for an always-on device I’d say!
Since there is no package available, we’ve to compile our own. It’s best to get the sources from Github (original here), since the Github repository contains some patches and fixes for issues on Firefox.
These commands install the required dependencies, clone the Git repository and start building:
apt-get install git dpkg-dev debhelper autotools-dev libssl-dev libpam0g-dev zlib1g-dev libssl1.0.0 libpam0g openssl
git clone https://github.com/pythonanywhere/shellinabox_fork
cd shellinabox_fork
dpkg-buildpackage
During my first attempt, I ran into this problem:
dpkg-source -b shellinabox-2.14
dpkg-source: error: can't build with source format '3.0 (quilt)': no upstream tarball found at ../shellinabox_2.14.orig.tar.{bz2,gz,lzma,xz}
dpkg-buildpackage: error: dpkg-source -b shellinabox-2.14 gave error exit status 255
When grepping for ‘quilt’ I found a file called ‘/debian/source/format’. From what I can tell this does not do anything important, so I ended up deleting the file. Guess what, it now works.
rm ./debian/source/format
Build the package again, this should now succeed.
dpkg-buildpackage
This process will take some time (especially on the Raspberry Pi). Afterwards you’ll find the .deb file ready to be installed.
dpkg -i ../shellinabox_2.14-1_armhf.deb
I changed the configuration, to disallow the build-in SSL and to bind to localhost only. I did this because another web server will serve our terminal. I will explain in a minute.
vim /etc/default/shellinabox
And edit this line:
SHELLINABOX_ARGS="--no-beep -s /terminal:LOGIN --disable-ssl --localhost-only"
Finally, restart the deamon:
/etc/init.d/shellinabox restart
And check if all went well:
/etc/init.d/shellinabox status
You should see:
Shell In A Box Daemon is running
Another way to verify is to check the open ports:
netstat -ntl
You should see:
Active Internet connections (only servers)
Proto Recv-Q Send-Q Local Address Foreign Address State
tcp 0 0 127.0.0.1:4200 0.0.0.0:* LISTEN
Setting up Lighttpd as a proxy
Shell In A Box runs on port 4200 by default. Although this can be changed to a more common 80 or even 443, this is not what I want. I decided to integrate it with another webserver, to be able to combine other services and use just one url (and one SSL certificate). Since the Raspberry Pi isn’t that powerful, I choose Lighttpd.
apt-get instal lighttpd
cd /etc/lighttpd/conf-enabled
ln -s ../conf-available/10-proxy.conf
This installs Lighttpd and enables Proxy support. Now add the Proxy config:
vim /etc/lighttpd/lighttpd.conf
And add:
proxy.server = (
 "/terminal" =>
  ( (
    "host" => "127.0.0.1",
    "port" => 4200
  ) )
)
Save and restart Lighttpd:
/etc/init.d/lighttpd restart
Connect to http://pi.example.org/terminal and your Shell In A Box terminal should appear.
Although this is cool already, we’re not quite there. No one will SSH on an unencrypted web page, right? So, we’ll configure an SSL certificate to enable encryption. For double safety, we’ll also set a username/password on the web page. One then needs to know this password to access the login promt, and needs a valid local username/password to really use the terminal.
Adding encryption with SSL
By using a HTTPS-url, our traffic is encrypted. Let’s generate a private key (and remove the passphrase):
openssl genrsa -des3 -out pi.example.org.key 2048
cp -pr pi.example.org.key pi.example.org.key.passwd
openssl rsa -in pi.example.org.key.passwd -out pi.example.org.key
If you do not remove the passphrase, you will need to type it every time you start the web server. To request a SSL-certificate, you need to supply a CSR (Certificate Signing Request) and send that to a SSL provider such as Thawte or Verisign.
openssl req -new -key pi.example.org.key -out pi.example.org.csr
To be able to continue now, let’s self-sign the certificate:
openssl x509 -in pi.example.org.csr -out pi.example.org.pem -req -signkey pi.example.org.key -days 365
cat pi.example.org.key >> pi.example.org.pem
A self-signed certificate will display a warning in our browser, but that’s ok for now. Once the real certificate comes back from our SSL provider, it’s easy to replace it. The warning will then disappear.
Time to tell Lighttpd about our certificate:
vim /etc/lighttpd/lighttpd.conf
Add these lines:
$SERVER["socket"] == "10.0.0.10:443" {
  ssl.engine = "enable"
  ssl.pemfile = "/etc/lighttpd/ssl/pi.example.org/pi.example.org.pem"
  server.name = "pi.example.org"
  server.document-root = "/home/lighttpd/pi.example.org/https"
  server.errorlog = "/var/log/lighttpd/pi.example.org_serror.log"
  accesslog.filename = "/var/log/lighttpd/pi.example.org_saccess.log"
}
And restart Lighttpd:
/etc/init.d/lighttpd restart
Now Shell In A Box should be available on: https://pi.example.org/terminal
Enhancing security by adding HTTP-auth
Since the /terminal page now makes an actual terminal available to web users, I added an extra password for security. You can use the ‘HTTP Auth’ method for this. It will pop up a message box that requires an valid username/password before the /terminal page is shown.
First enable the module:
cd /etc/lighttpd/conf-enabled
ln -s ../conf-available/05-auth.conf
Then extend the config of the virtual host config you created above. The final result should be:
$SERVER["socket"] == "10.0.0.10:443" {
  ssl.engine = "enable"
  ssl.pemfile = "/etc/lighttpd/ssl/pi.example.org/pi.example.org.pem"

  server.name = "pi.example.org"
  server.document-root = "/home/lighttpd/pi.example.org/https"
  server.errorlog = "/var/log/lighttpd/pi.example.org_serror.log"
  accesslog.filename = "/var/log/lighttpd/pi.example.org_saccess.log"

  auth.debug = 2
  auth.backend = "htpasswd"
  auth.backend.htpasswd.userfile = "/etc/lighttpd/shellinabox-htpasswd"

  auth.require = ( "/terminal/" =>
    (
      "method" => "basic",
      "realm" => "Password protected area",
      "require" => "user=remibergsma"
    )
  )
}
Reload Lighttpd to make the changes active:
/etc/init.d/lighttpd reload
To set a password:
apt-get install apache2-utils
htpasswd -c -m /etc/lighttpd/shellinabox-htpasswd remibergsma
You can enter multiple users, just remember to remove the ‘-c’ flag when adding more users, as this overwrites the current file.
When you visit https://pi.example.org/terminal you will need to enter a valid username and password, before the page loads.
The final result: SSH in a browser window!
You should now be able to use a terminal via your own protected webpage. It’s mostly like a real terminal/SSH session but from a browser. Wow 🙂
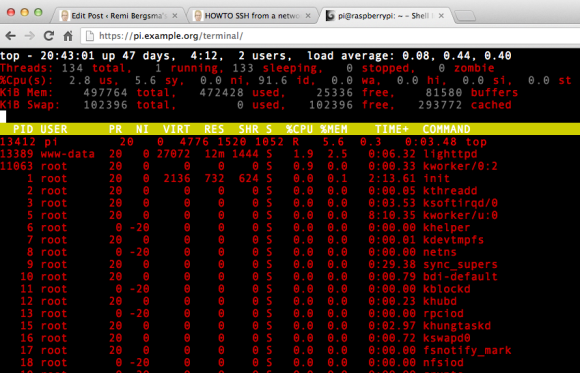
Shell In A Box in action
I always use GNU Screen, so I know for sure my commands keep running whatever happens.
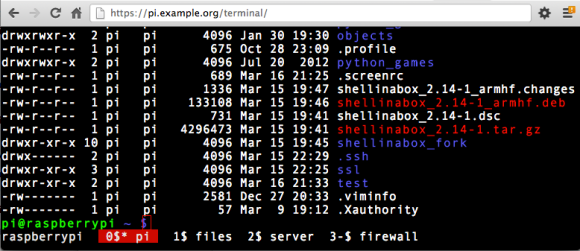
Using GNU Screen in a browser


Wonderful!
I must try it.
To be honest, after discovering GateOne (http://liftoffsoftware.com/Products/GateOne) (source: https://github.com/liftoff/GateOne/) both shell-in-a-box and ajaxterm just don’t cut it anymore for me. But maybe I’m spoiled. For the purpose you listed they both work fine.
Thanks for sharing! I did try this at work, but unfortunately our firewall did not let me pass. Not sure why though, will look into it later on.
I tried installing shellinabox via the git method above, but find that the FF15 patches applied to vt100.js before the installation are overwritten during/after the installation. Does anyone else have this problem?
After the install, i cannot see the updated lines in the shellinabox/vt100.js file:
user@host shellinabox $ pwd
/home/user/shellinabox_fork/shellinabox
user@host shellinabox $ cat -n vt100.js | grep -i FF15
user@host shellinabox $
HI Remi,
I followed your instructions and all went fine. Accept of the access from my workplace. Just as in your case. Do you found a solution for your (and my) problem meanwhile?
Cheers,
AlMudy
Hi there, I’m not sure to what problem you refer. Could you explain? I couldn’t SSH from the office, but this works fine.
Note that shellinabox is now available in the repositories — sudo apt-get install shellinabox
This is a very helpfull article, thank you! I can install the shellinabox on my rpi with it.
I have only one question:
How can I set up the lighttpd.conf correctly for all web https folders on server, not only pi.example.org/terminal subfolder?
Thank you for the tutorial! Some comments to make it even better:
– That would be nice to give the basics to use vim (apt-get install vim; use i for insertion mode, 😡 to save and exit).
– There is an error: apt-get instal lighttpd. InstalL (with two L)
Reblogged this on Alex Stuff and commented:
Allow you to use command lines as in SSH mode right from any internet browser.
Quick note from the post: to use vim, first install this text editor (apt-get install vim), and use i to enter interactive mode (modify the file), and use “: x” to save and exit the file.
hai remi bergsma , i did the steps upto Setting up Lighttpd as a proxy this step , then i got web based ssh shell ,but it is execpting weaved login , what it is exactly , i tried with lot of login ,but it is not accepting
Awesome tutorial. I read the comments and skipped the part about installing shellinabox from source, and just did “apt-get install shellinabox”. The rest of the configuration (lighttpd serving SSL and doing reverse-proxy to localhost) was very useful and saved me a ton of time. Thank you.
Re: the quilt error, I suspect that if you install the quilt package (“apt-get install quilt”) that the error while building with source will go away.
Really great tutorial! Thank you for sharing!
I adapted it for the Pidora (Fedora 20 remix) here:
https://github.com/ksylvan/RaspberryPiSetup
Since I had set up ssh into the RPi with google-authenticator, I found that the SSH-style login in the shellinabox window also used the two-step verification, and thus I saw no need to add another layer of security via apache-style htaccess files.
Best regards.
Have used shellinabox for a while. did its job, but suddenly it wouldnt accept my logon anymore. user and password still the same and let me log on via webmin or direct, but shellinabox just refuses
Hi there! I have tried this tutorial and found that the link “https://github.com/pythonanywhere/shellinabox_fork” doesnt exist. Is there another way to git clone what we need?
Hi there!
I attempted this tutorial and found that the git clone link no longer exists. Is there a way around this that will lead to it working? When installing all the dependencies, libssl1.0.0 isn’t found as well.